

AIoT Face Recognition with Raspberry Pi
Overview
This workshop runs a chain of AIoT architecture: AI – IoT, which was inspired by the project https://github.com/fxgsell/GG-Edge-Inference.
In this demo, a raspberry pi will be used as an IoT device to get local data by constructing a face recognition architecture. Part 1 will be an IoT device setup, then Part 2 will be face recognition setup.
Architecture
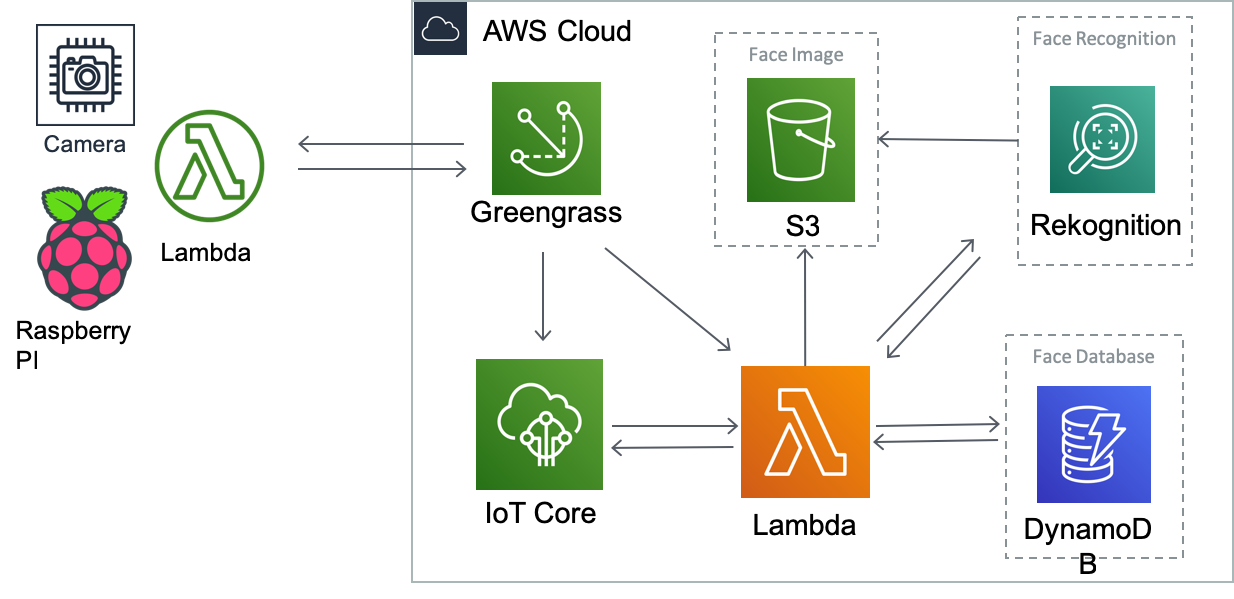
Step by step
- In this part, we ‘ll use a raspberry pi as the IoT Device. In order to provide face image data, some packages such as
Greengrass SDK,OpenCVanddlibneed to be installed. FortunatelyOpenCVis already installed in the below image, butdlibneeds to be manually installed which may take lots of time due to the slow compile speed of raspberry pi.
Setup OS for your raspberry pi
- Download Raspbian Image
- Flash the OS image to the SD card on raspberry pi
- Wait about 5~10 minutes
- You have completed the OS installation for your raspberry pi.
Raspberry Pi Wifi Setup
- Connect your raspberry pi to the monitor
- Insert the SD card onto the raspberry pi, and boot it up. > Default Password is
turtlebot - Connect to the wifi
- Get the IP address
ifconfig
- Note the IP address down
- If you don’t have a monitor, follow this paragraph
Raspberry Pi Packages Installation
- Install packages (3 minutes)
sudo pip install awscli boto3 imutils
-
Install dlib (1 hour) Follow this paragraph
-
Face_Recognition (5 minutes)
sudo pip2 --no-cache-dir install face_recognition
Setup AWS Credential On Your Raspberry Pi
- Find out your AWS Credential (Access key)
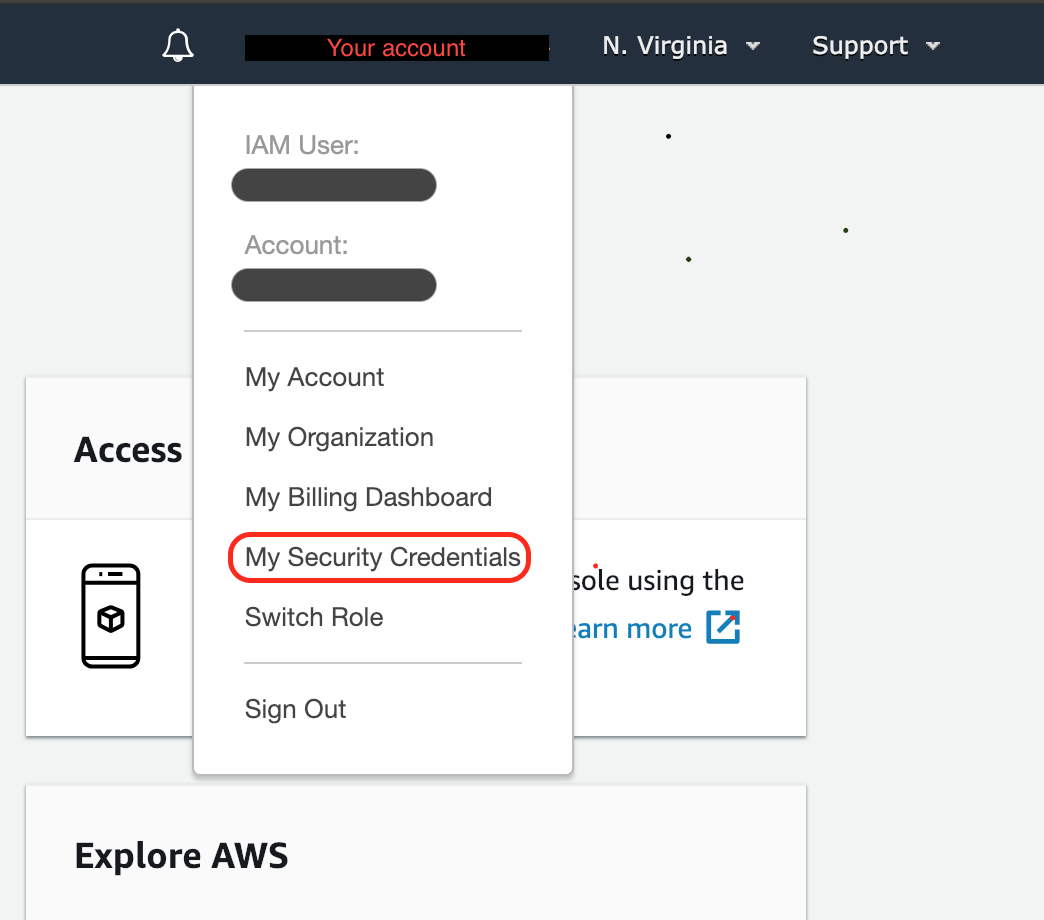
- Setup you AWS Credential in terminal
aws configure
- AWS Access Key ID [None]: Type Your Access Key ID
- AWS Secret Access Key [None]: Type Your Secret Access Key
- Default region name [None]: us-east-1
- Default output format [None]: json
IoT Device Greengrass Installation
- You are now ready to set up Raspberry Pi for AWS IoT Greengrass. First, run the following commands in raspberry pi terminal:
#### Run these commands in your raspberry pi####
sudo adduser --system ggc_user
sudo addgroup --system ggc_group
sudo apt-get install rpi-update
sudo rpi-update b81a11258fc911170b40a0b09bbd63c84bc5ad59
- Reboot
sudo reboot
- Check the kernel version
### connect to pi###
ssh pi@ip_address
uname -a
It should be like this:

- To improve security on the Pi device, enable hard link and soft link protection on the operating system at startup.
cd /etc/sysctl.d
ls
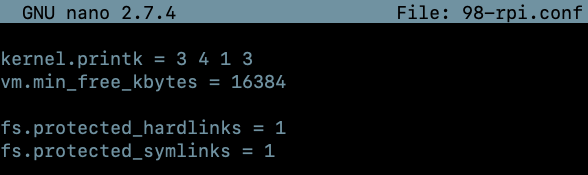
sudo nano 98-rpi.conf
- Add following two lines to
98-rpi.conf
fs.protected_hardlinks = 1
fs.protected_symlinks = 1
- Press
Ctrl+x, and thenY,Enterto save & exit. - Reboot Again
sudo reboot
- Confirm the Check
### connect to pi###
ssh pi@ip_address
sudo sysctl -a 2> /dev/null | grep fs.protected

- Edit your command line boot file to enable and mount memory groups. This allows AWS IoT Greengrass to set the memory limit for Lambda functions. Without this, the Greengrass daemon is unable to run.
cd /boot/
cgroup_enable=memory cgroup_memory=1
### Final Reboot ###
sudo reboot
- Your Raspberry Pi should now be ready for AWS IoT Greengrass. Next, install the green grass SDK.
cd ~
wget https://d1onfpft10uf5o.cloudfront.net/greengrass-core/downloads/1.7.0/greengrass-linux-armv7l-1.7.0.tar.gz
sudo tar -xzvf greengrass-linux-armv7l-1.7.0.tar.gz -C /
Take a break
Now, basic installation on the raspberry pi has been completed, and we’ll move on to the next part.
Step by step
In this part, a face recognition architecture will be built.
This section will guide the user through: – Setup AWS S3, Lambda manually. – Setup Greengrass group by a script. – Setup Greengrass Lambda for face detection by a script. – Setup another Lambda for face recognition architecture by a script.
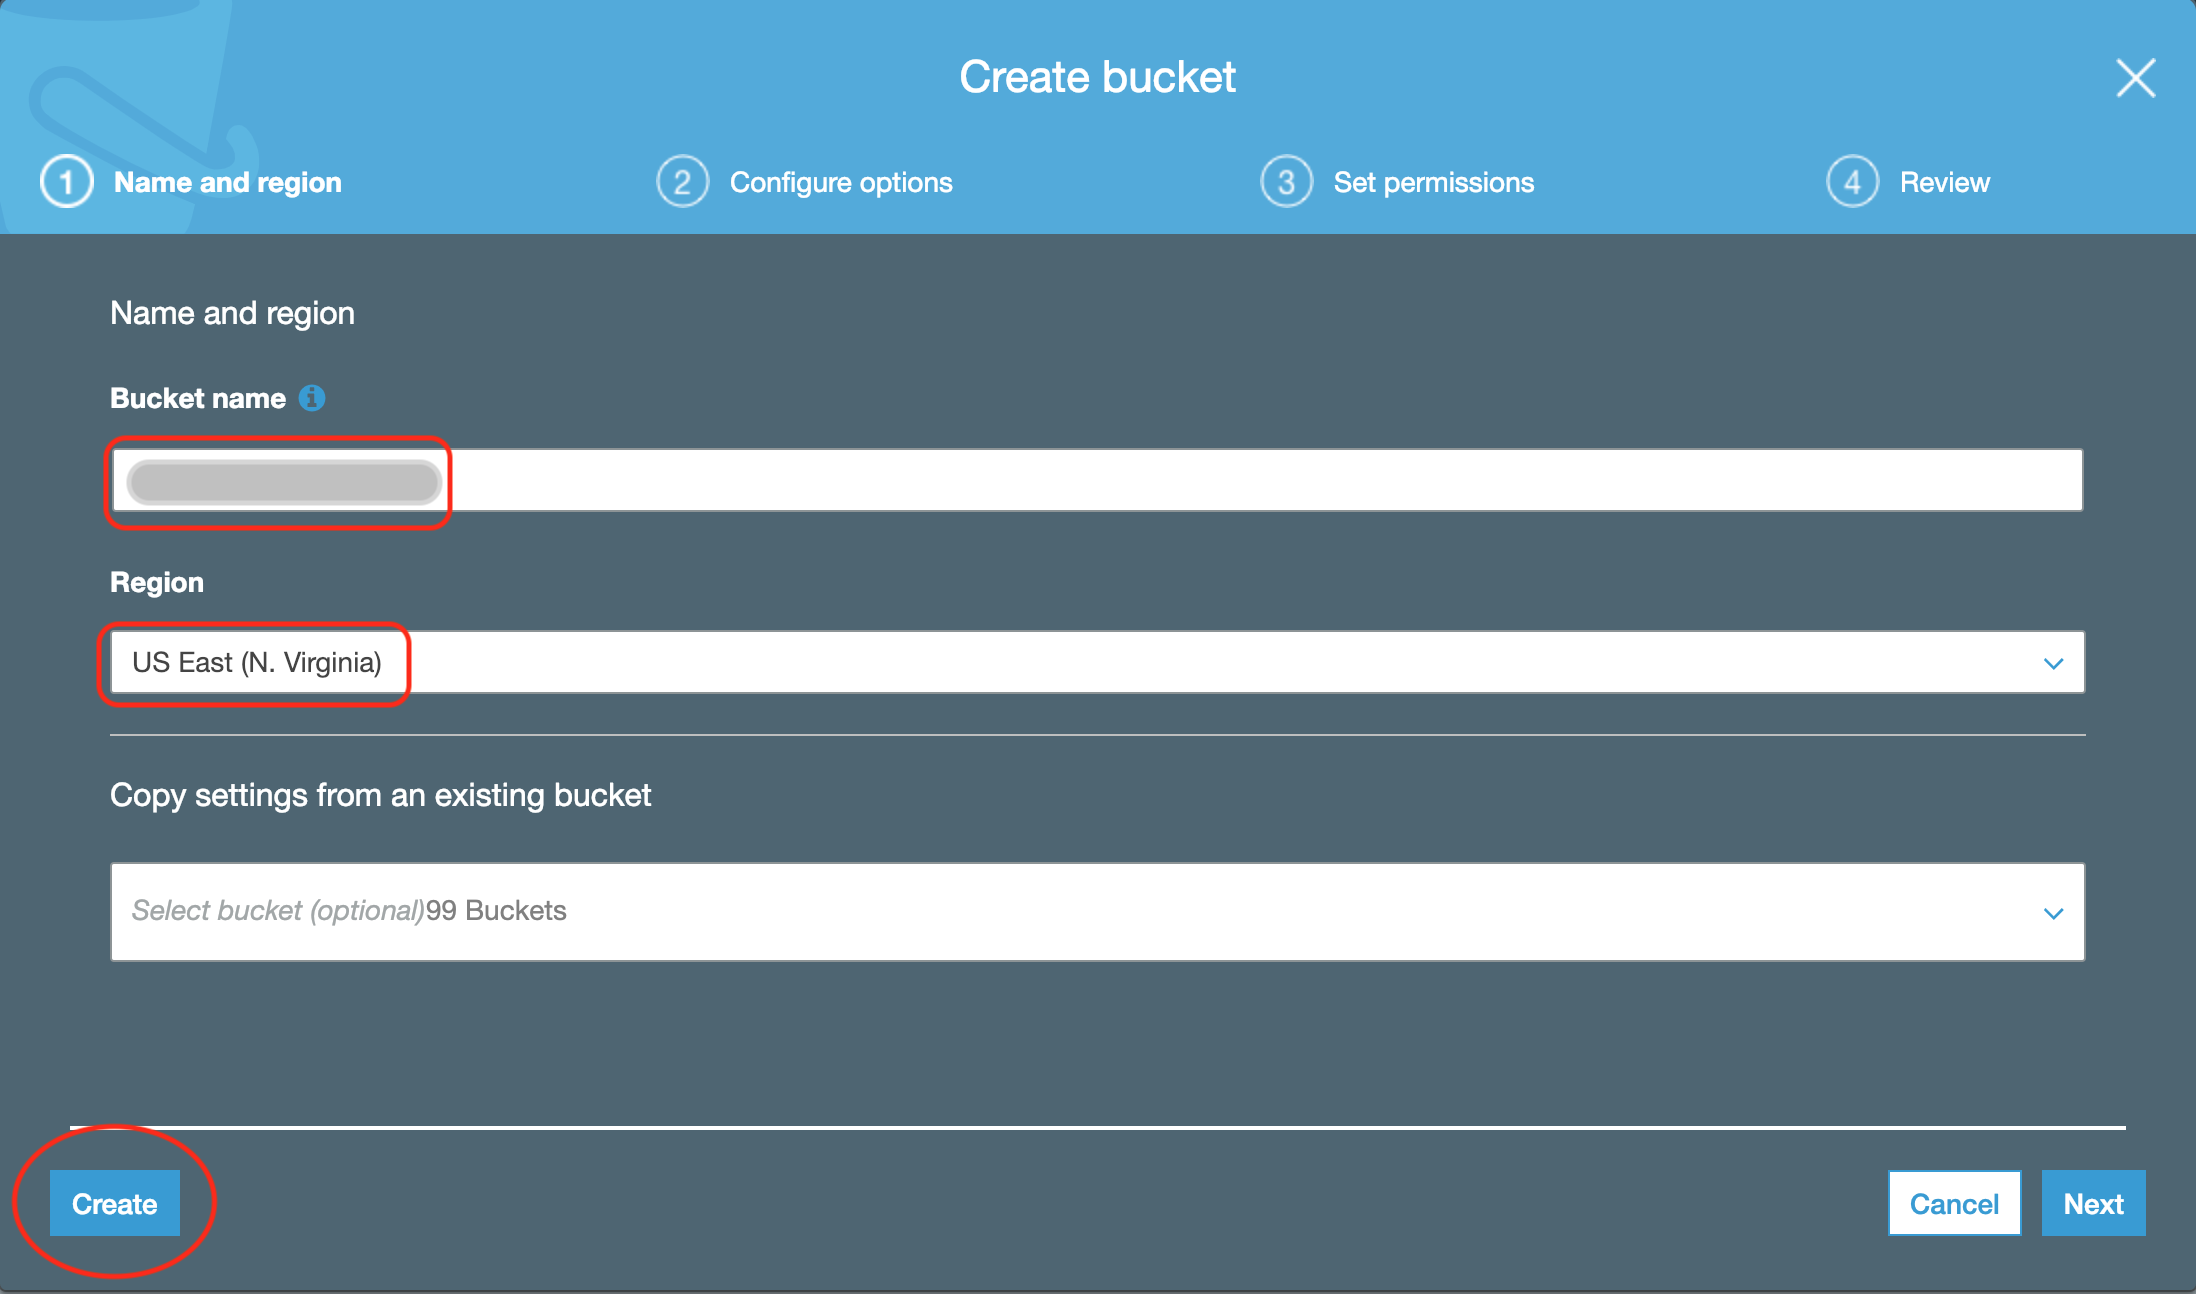
Setup your Amazon S3 bucket
- Select S3 service from the AWS console.
- Create a new S3 bucket, entering a UNIQUE name.
Setup your AWS Lambda Function
-
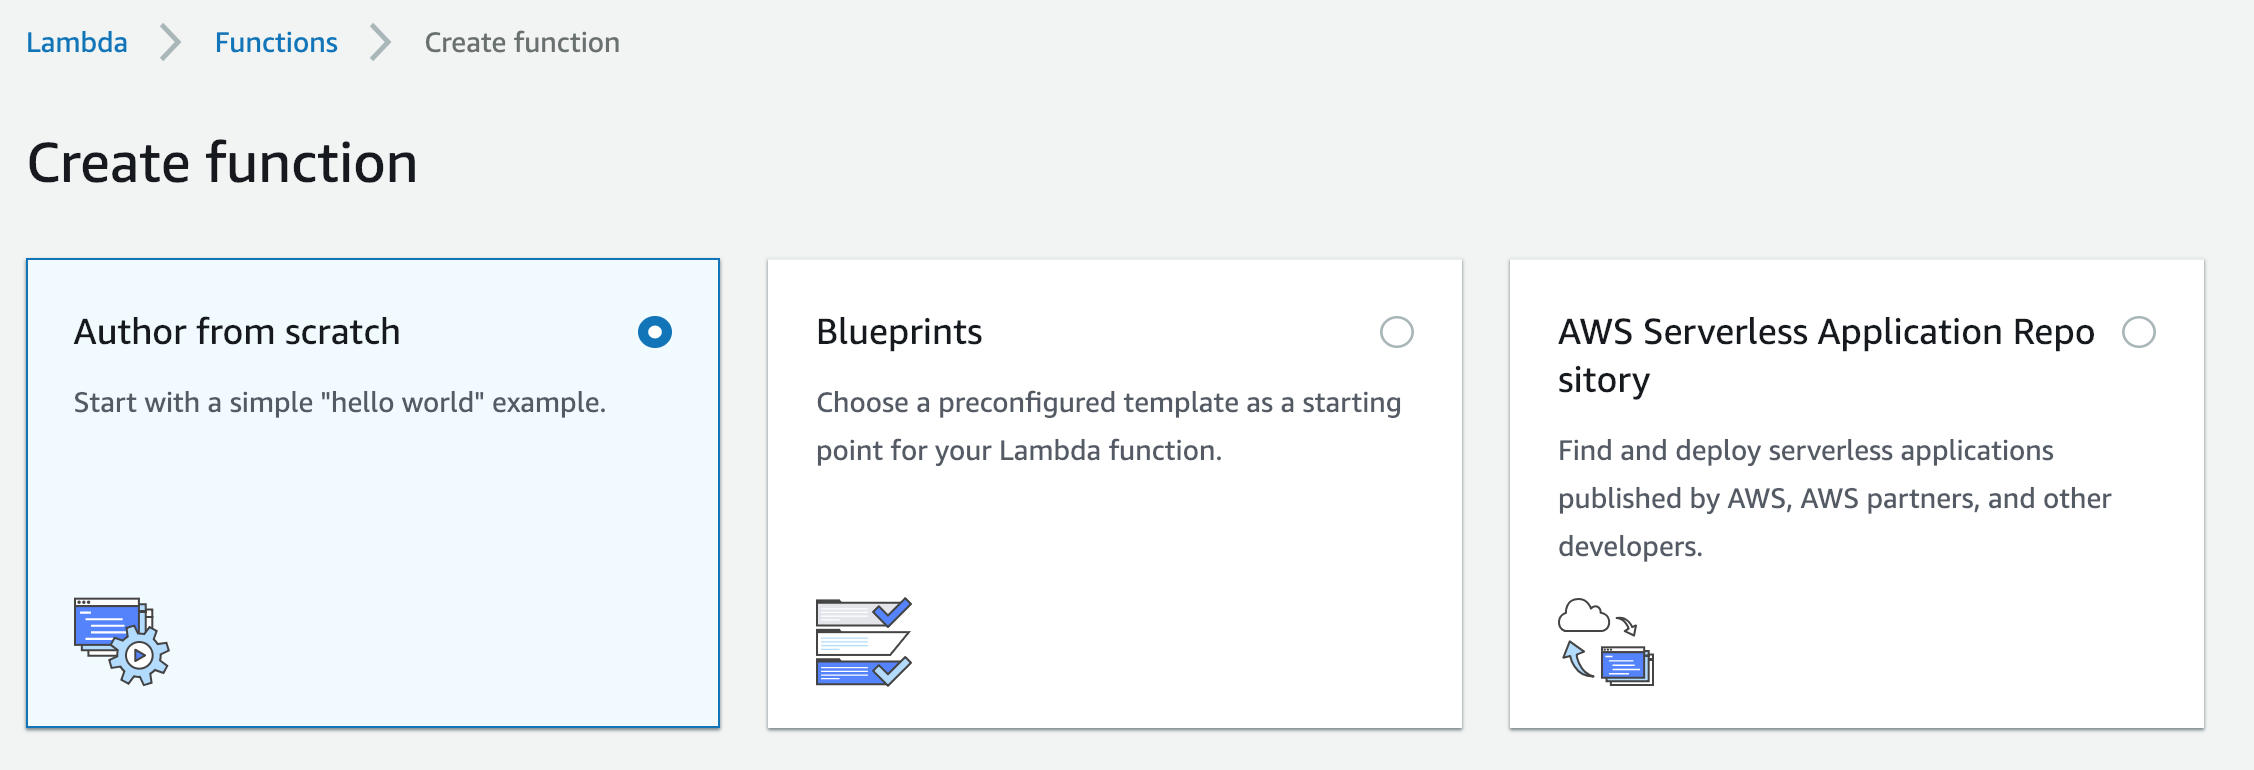
Create a new AWS Lambda
- Choose
Autor from scratch
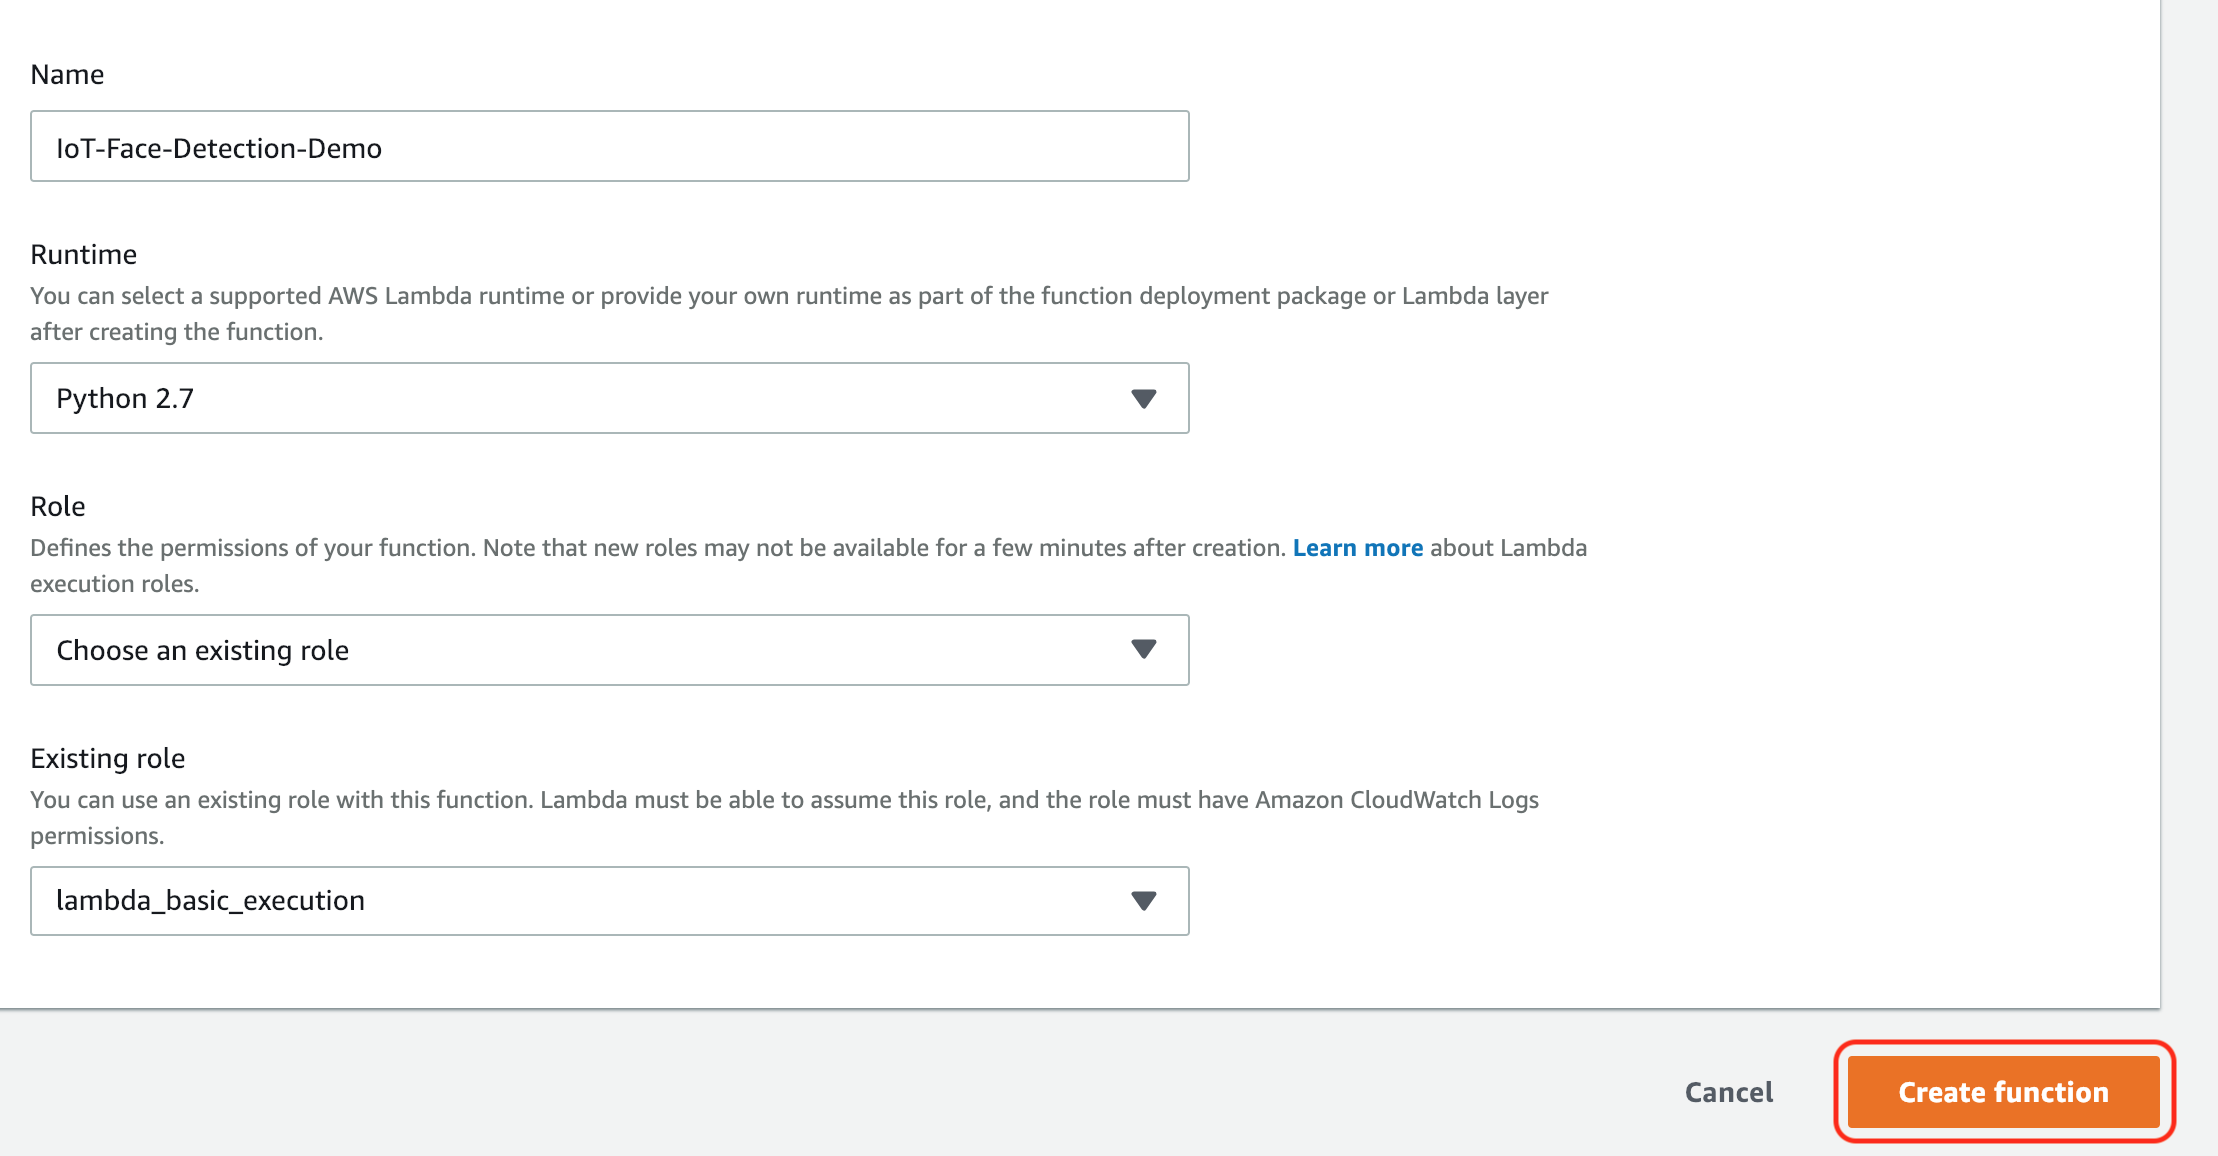
- Make a function name (For example:
IoT-Face-Detection-Demo) - Choose
Python 2.7as the runtime - Choose
Choosing an existing role - Choose
lambda_basic_execution
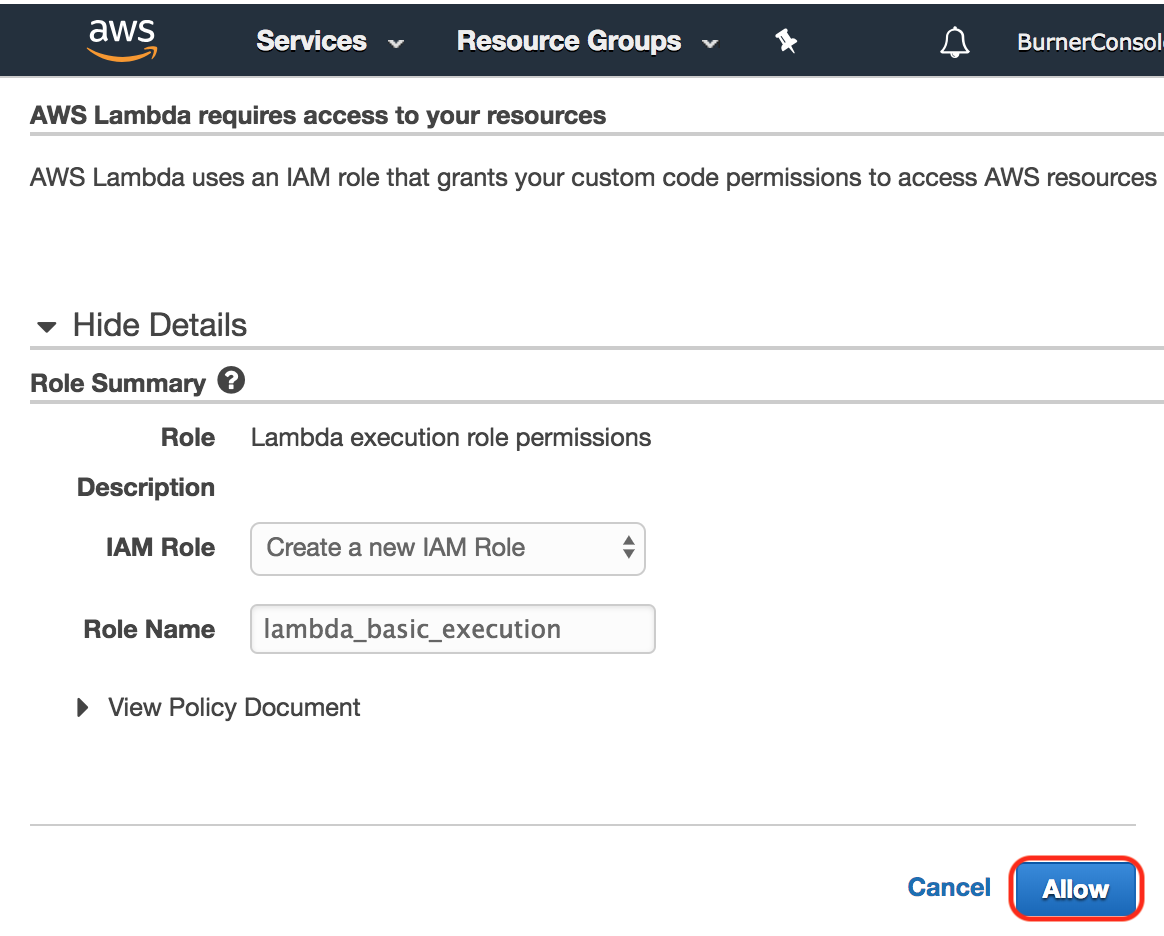
- If you cannot find
lambda_basic_execution- choose
Create a custom rolefrom the role drop-down - Create a new role
lambda_basic_execution
- choose
- Choose
-
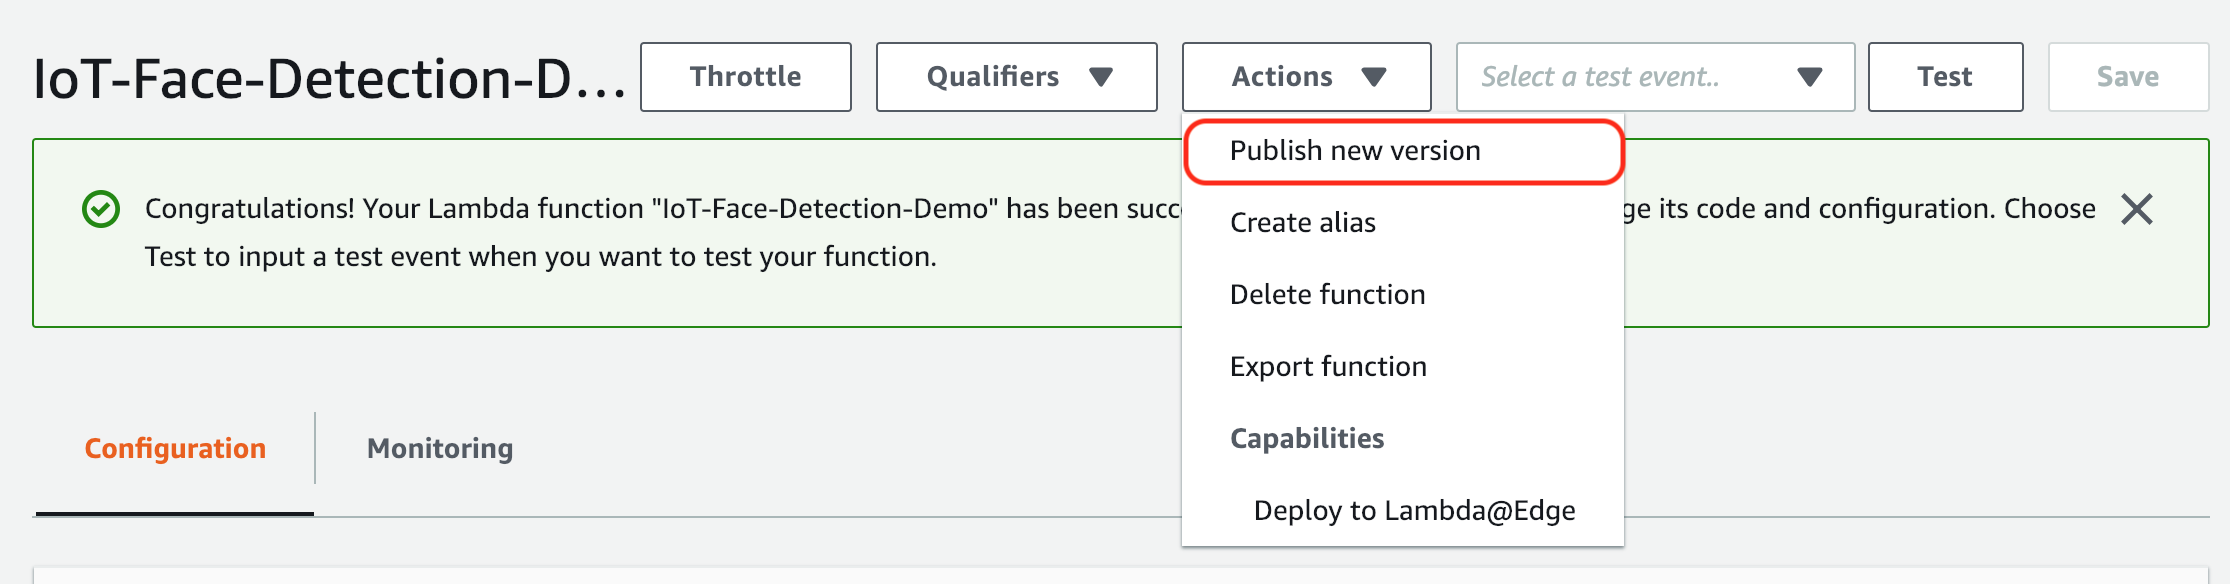
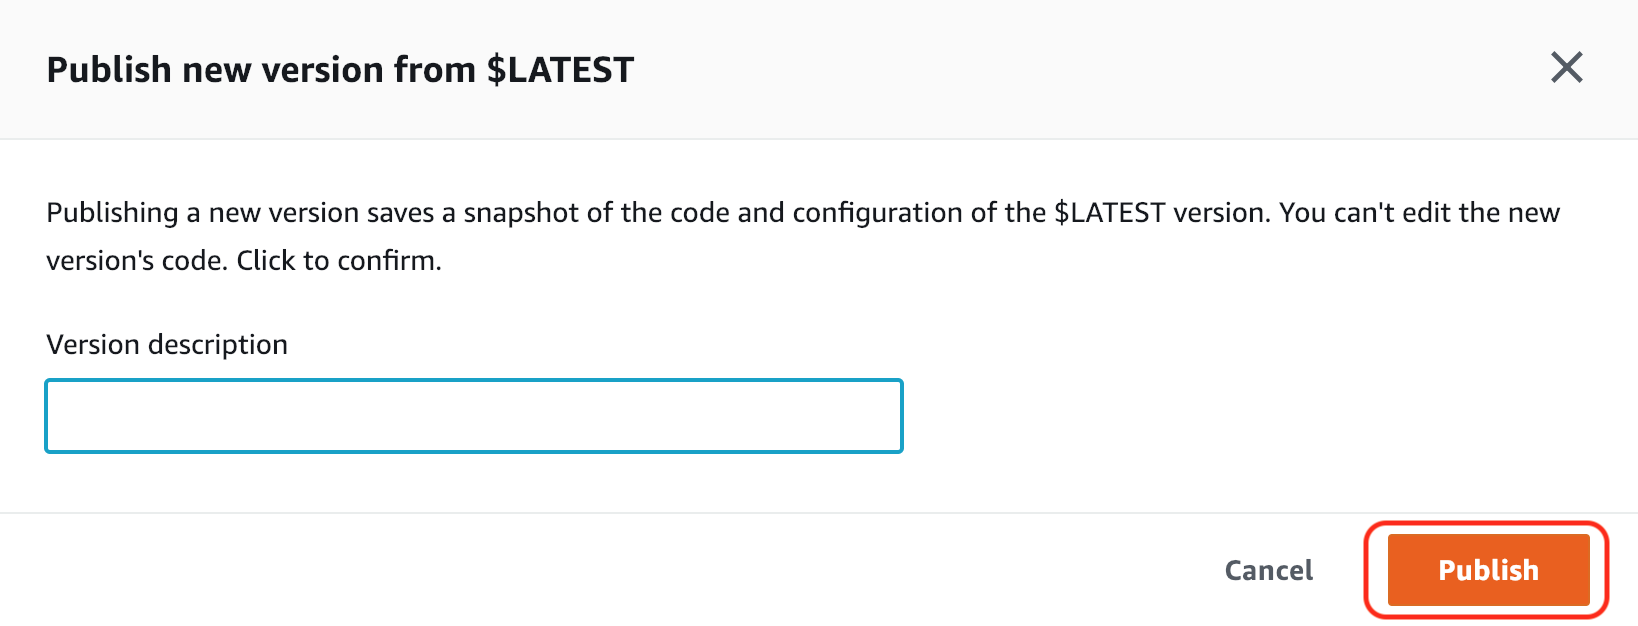
After creating your new Lambda function, we need to publish a new version then assign an alias pointing to that version
- First, select your new Lambda function and click the
Actionbutton, and selectPublish new versionfrom the drop-down menu as shown:
- Next, click
Publish
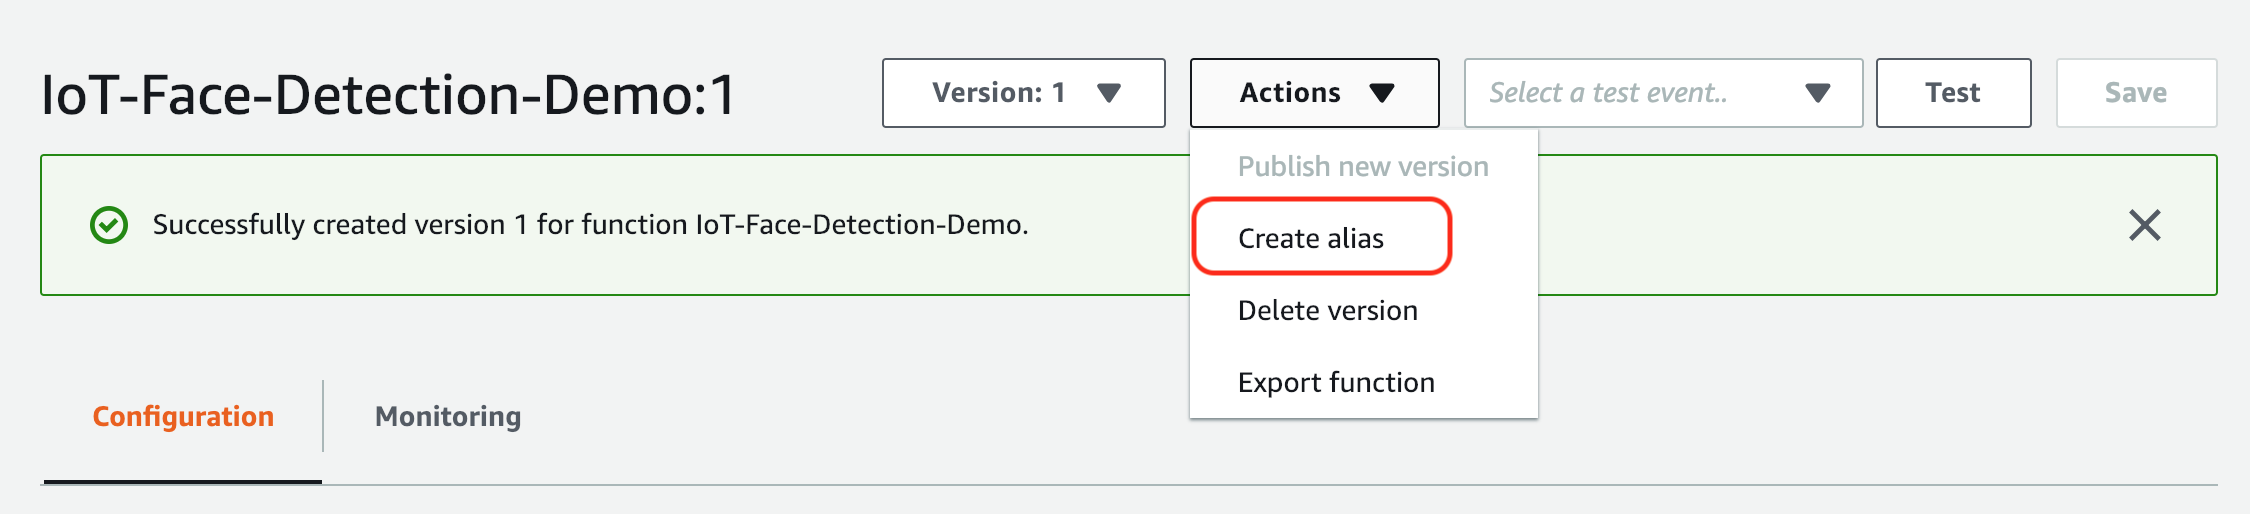
- Now, click the
Actionbutton again, and selectCreate Aliasfrom the drop-down menu as shown:
- Next, fill in the Name field with the word
latestand select the latest Version which would be1as shown here, then click theCreatebutton
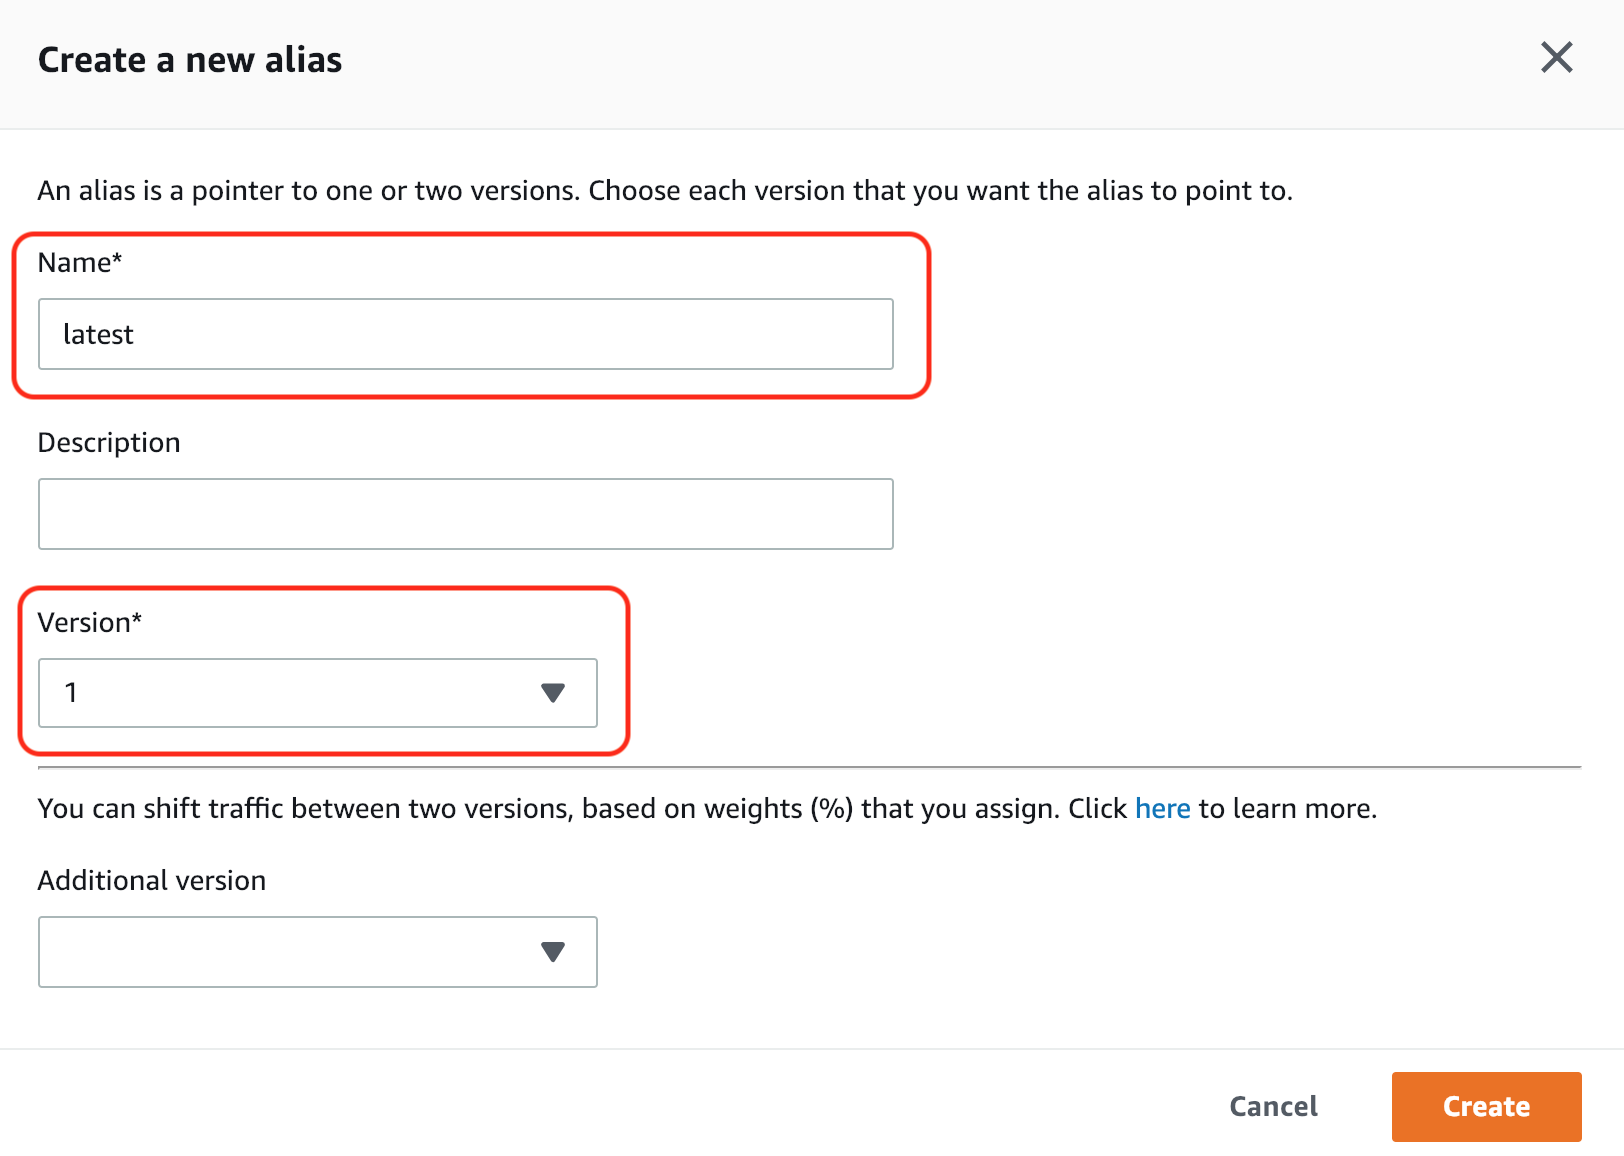
- If successful, you should see the following:

- First, select your new Lambda function and click the
Setup AWS Credential On Your Computer/Laptop
- This time, set up your credential on your computer/laptop in order to run the following steps. Actually, you can run all scripts on your raspberry pi, but sometimes it’s laggy, so it depends on you.
- Setup you AWS Credential in terminal (Same as Lab1 did)
bash

aws configure
Create Greengrass Group
- Now we are going to create a Greengrass group by running a script.
- Get the project from AWS-IoT-Face-Recognition-Analysis
bash

git clone https://gitlab.com/ecloudture/aws-iot-face-recognition-analysis.git

cd AWS-IoT-Face-Recognition-Analysis/script/1-greengrass-configuration/ -
Within this directory, we will use the
create-greengrass-config.pyscript to generate the necessary groups for publishing our Greengrass function:python3 create-greengrass-config.py --create-group NAME_YOU_WANT --bucket NAME_U_CREATED --function NAME_U_CREATEDThe above command is executed with the following parameters:
- –create-group \
: the group_name that will appear in your AWS IoT console referring to this device - –bucket \
: the bucket_name of the Amazon S3 bucket you created earlier - –function
: the function_name of the AWS Lambda function you created earlier
- –create-group \
-
If successful, you should see similar output to the following:

Install Certificate Into Your Pi
- The certificate is the key to the connection between your IoT Device and AWS IoT. So you need to install the certificate into your raspberry pi. You can use either
scporFilezillato transport the file.
- Installation through
scp
scp certificates.tar.gz pi@ip_address:~
- SDK Installation
ssh pi@ip_address
ls
sudo tar -xzvf certificates.tar.gz -C /greengrass
- Get the root.ca.pem. Here we use VeriSign Endpoints instead of Amazon Trust Services Endpoints.
cd /greengrass/certs/
sudo wget -O root.ca.pem https://www.symantec.com/content/en/us/enterprise/verisign/roots/VeriSign-Class%203-Public-Primary-Certification-Authority-G5.pem
cat root.ca.pem  #check the content
- Start the Greengrass daemon
cd /greengrass/ggc/core
sudo ./greengrassd start
exit #back to your computer/laptop
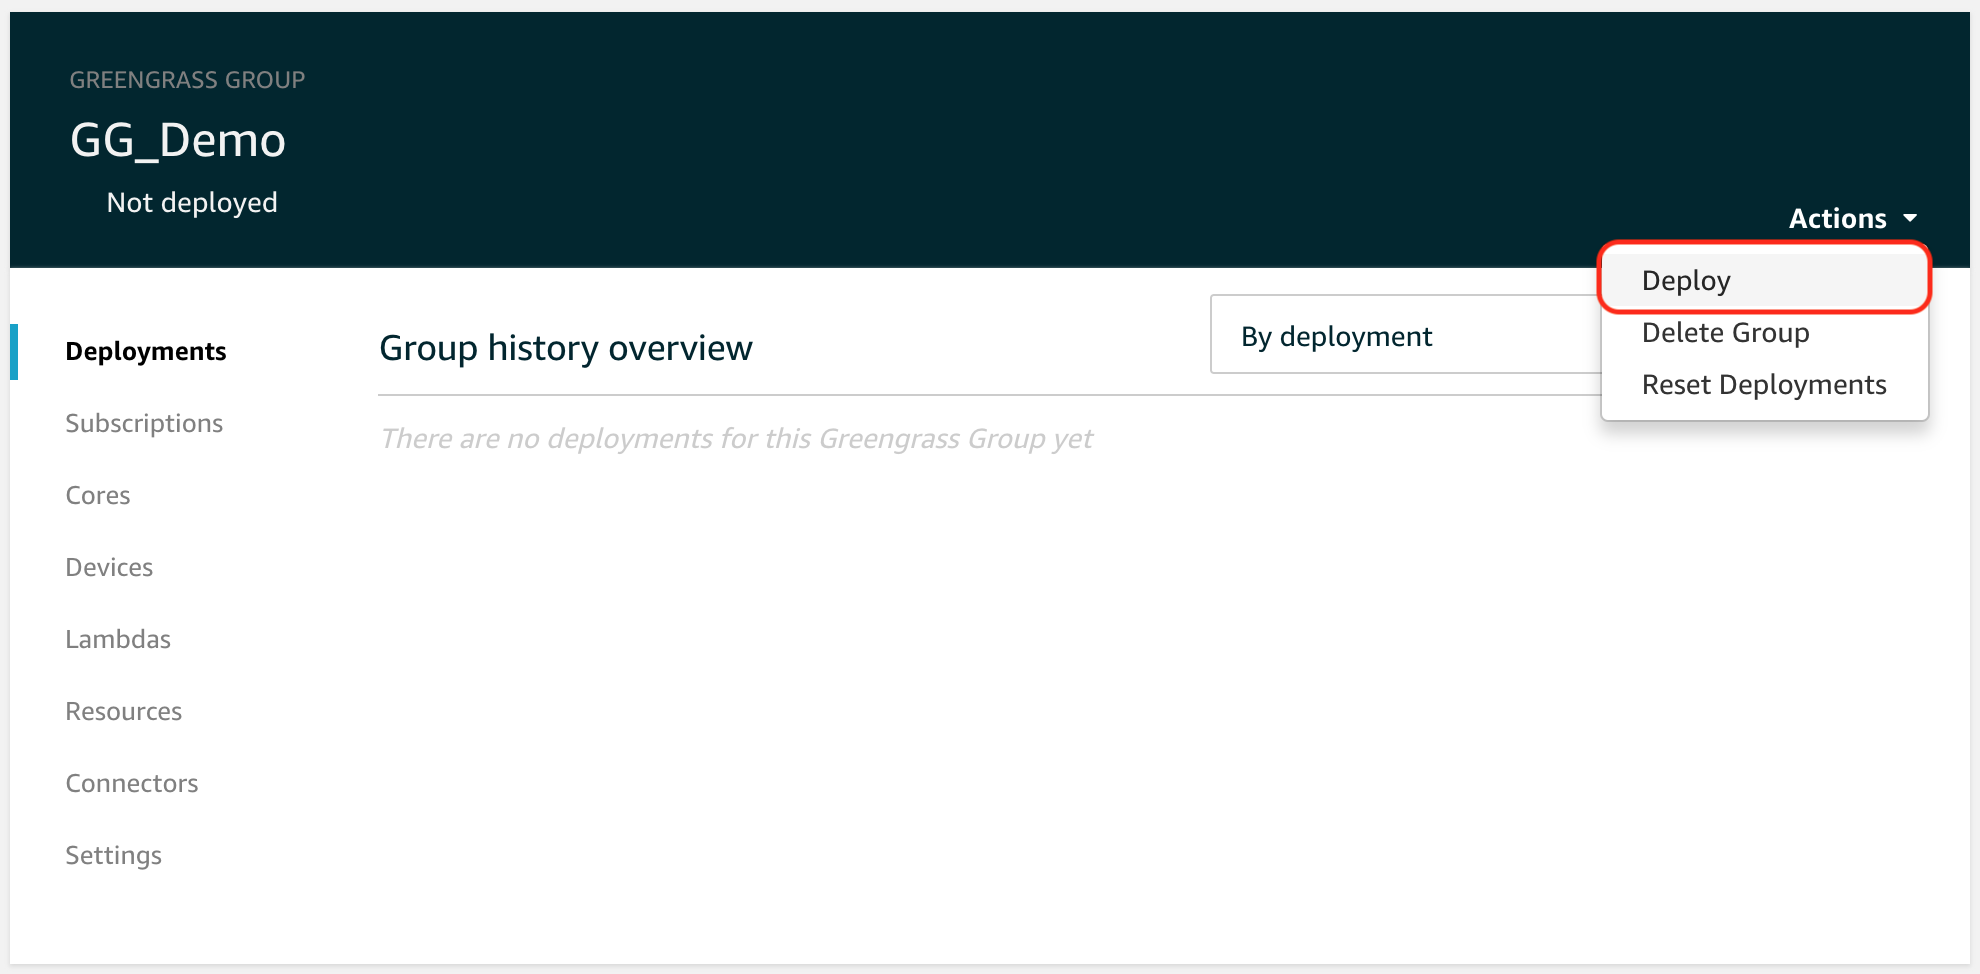
Deploy the Greengrass group to the Device
- Go to AWS IoT Console , Click
Greengrass,then clickGroups - Click the
Actionsbutton, and selectDeployas shown below:
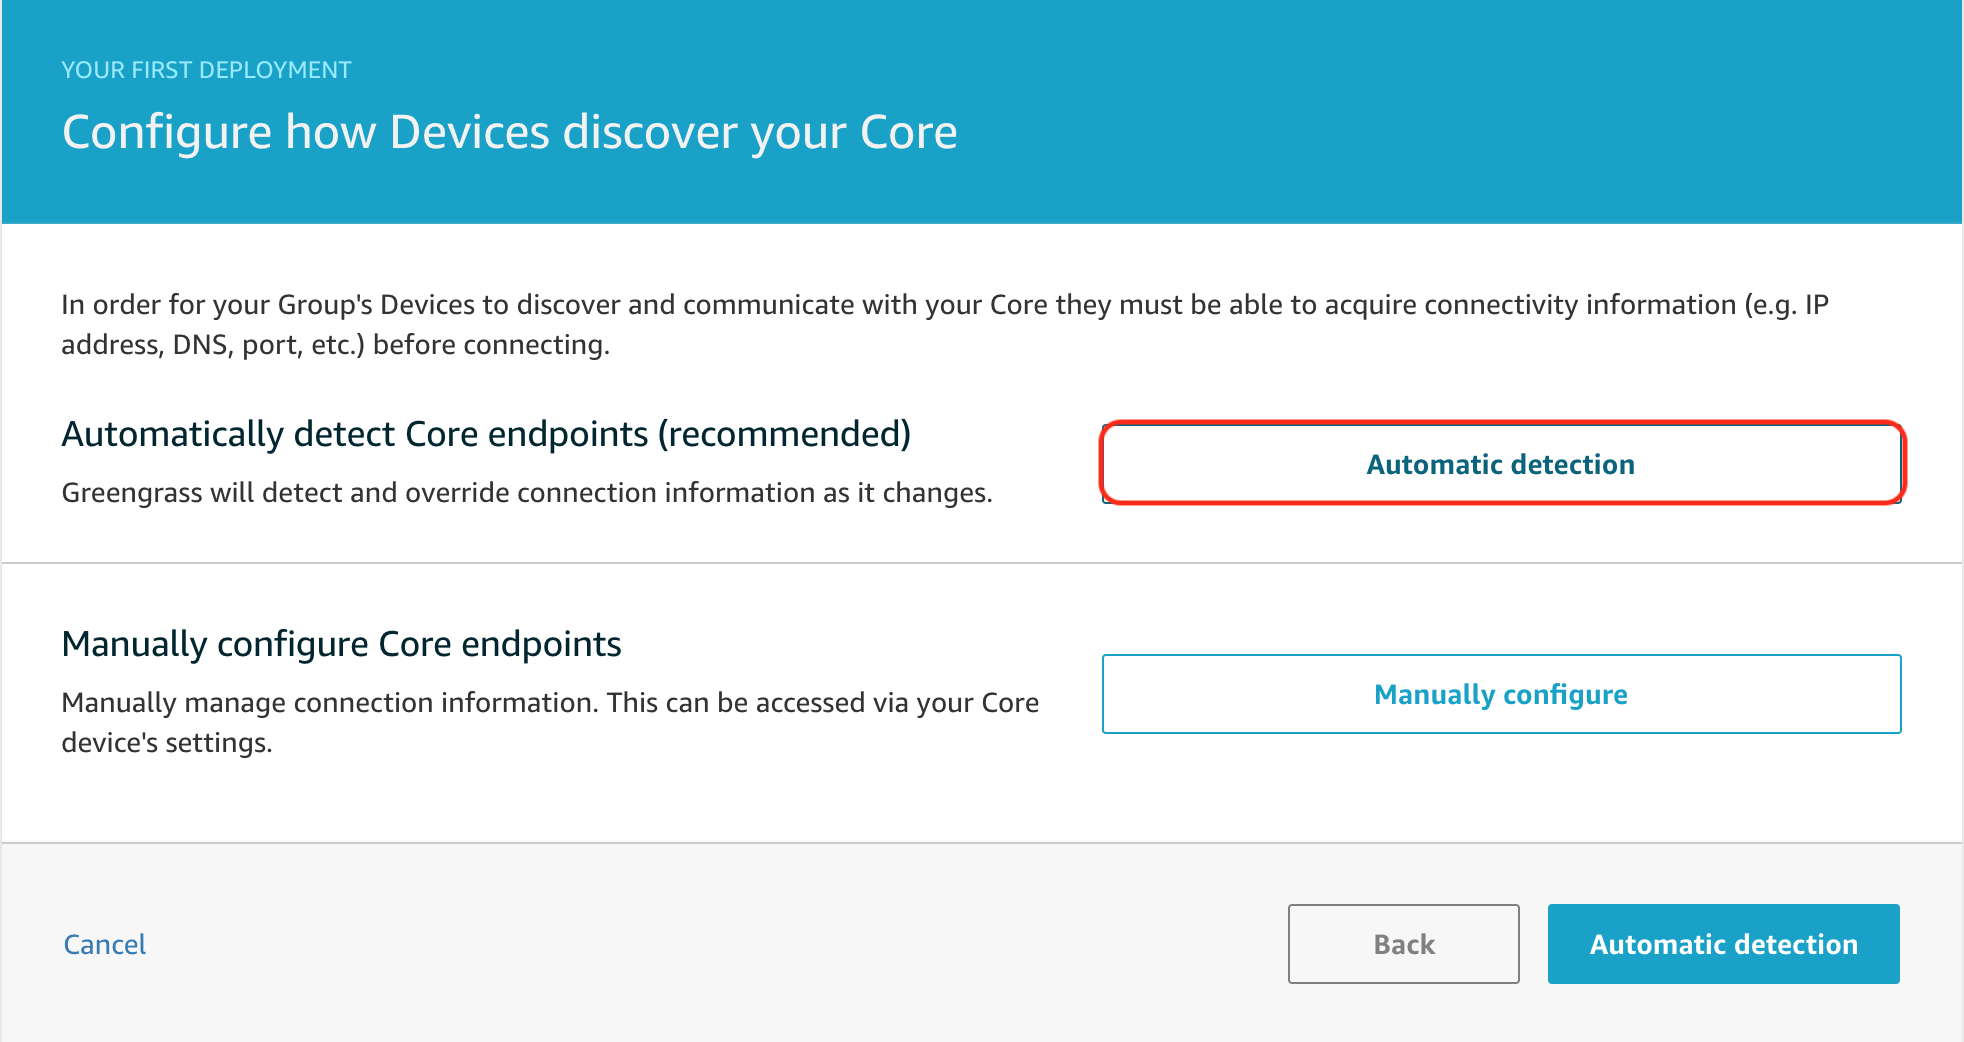
- Next, click
Automatic detection.
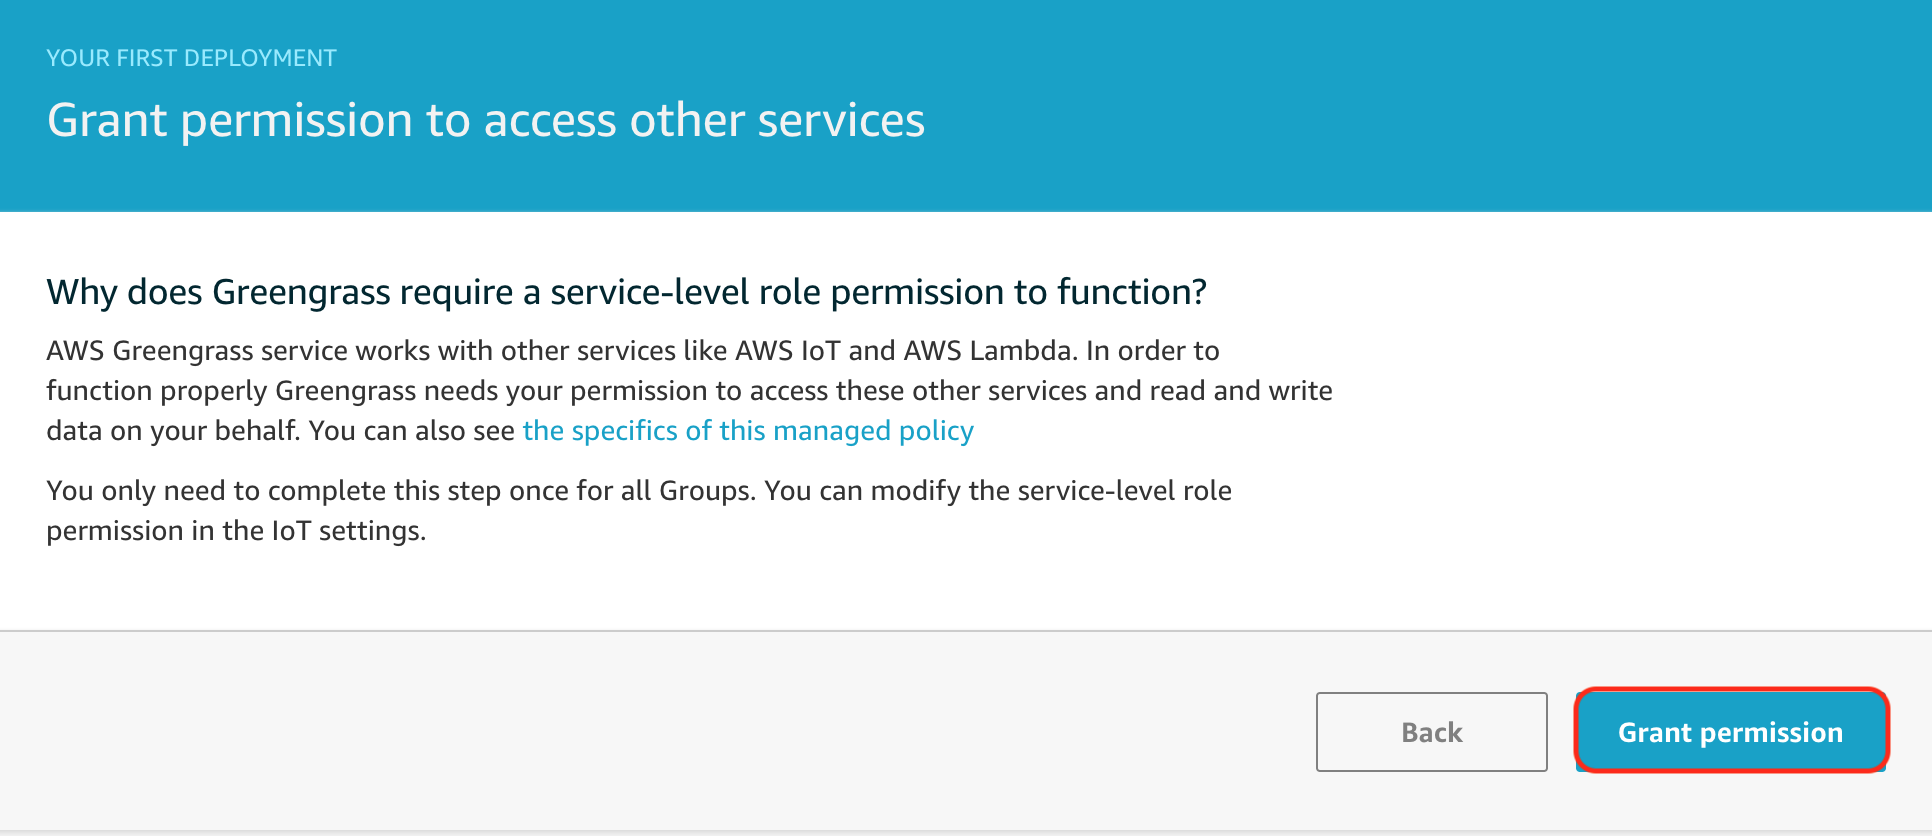
- Next, we will choose to grant permissions to Greengrass by clicking
Grant permission(shown below):
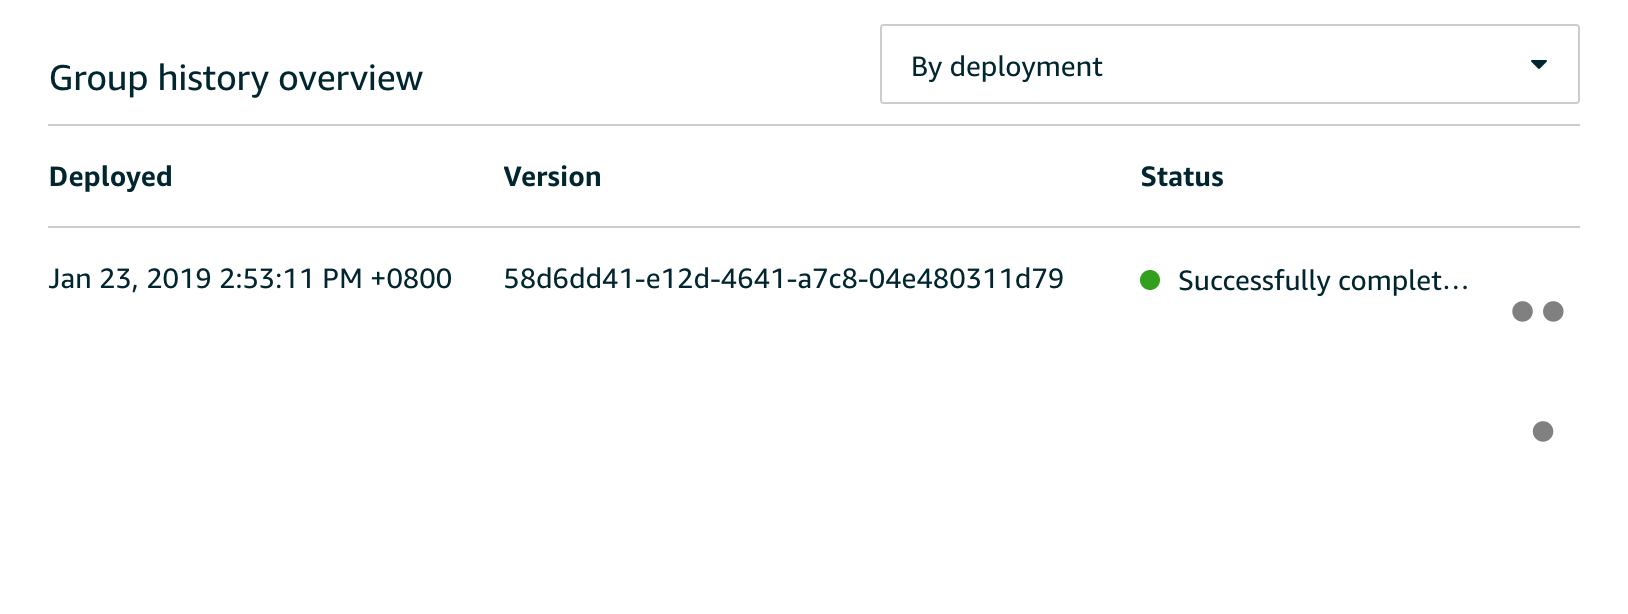
- We will need to wait a bit for the deployment to be successful.
- Next, we go to
Resourceson the left panel.
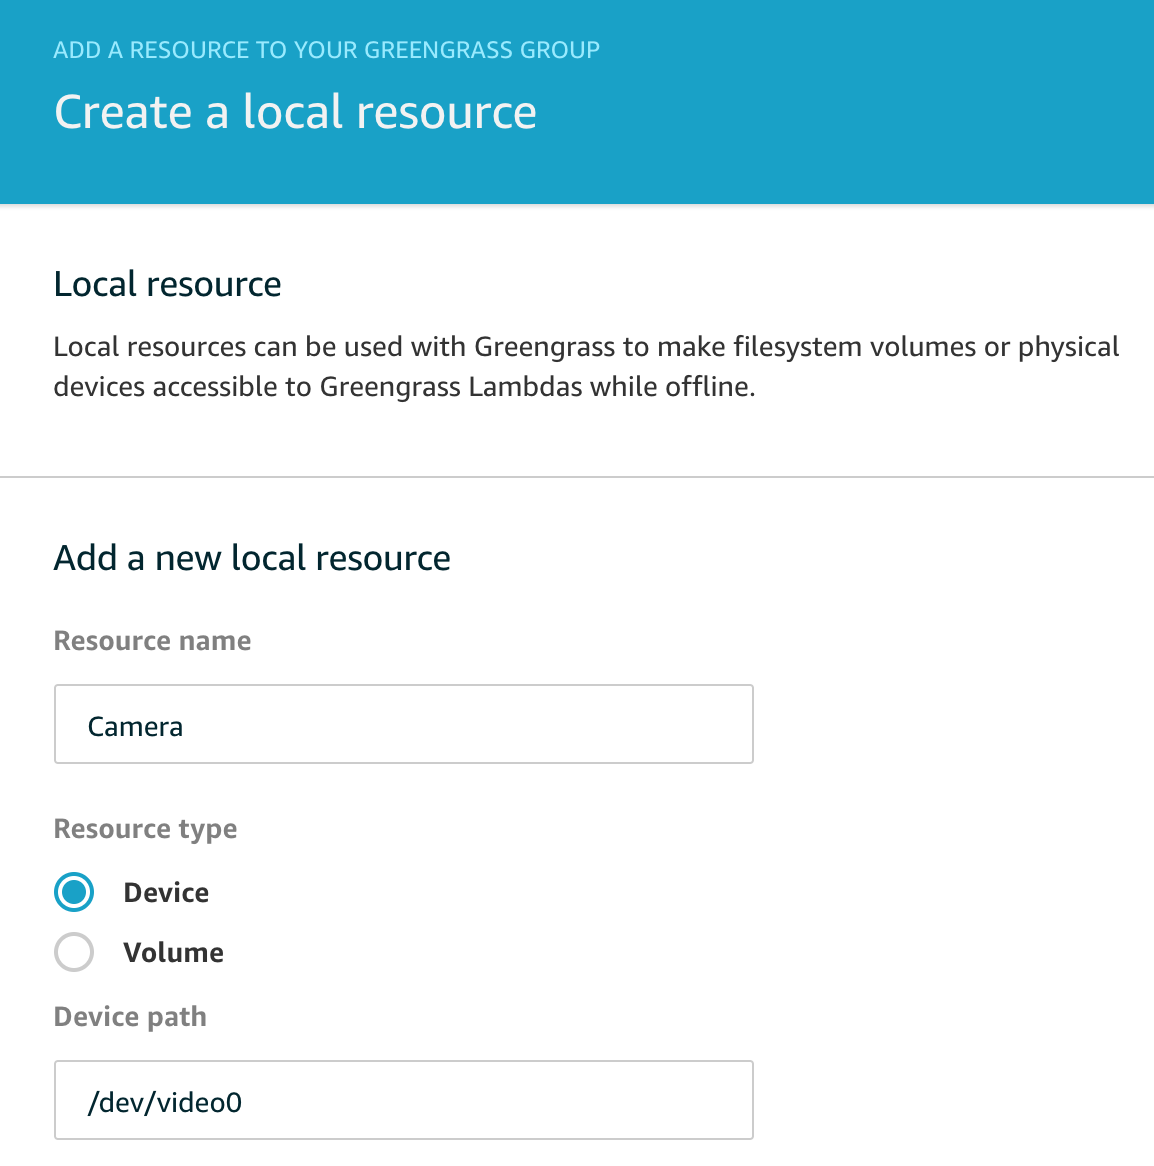
In order to get access to the camera, a new resource needs to be added. ClickAdd local resources
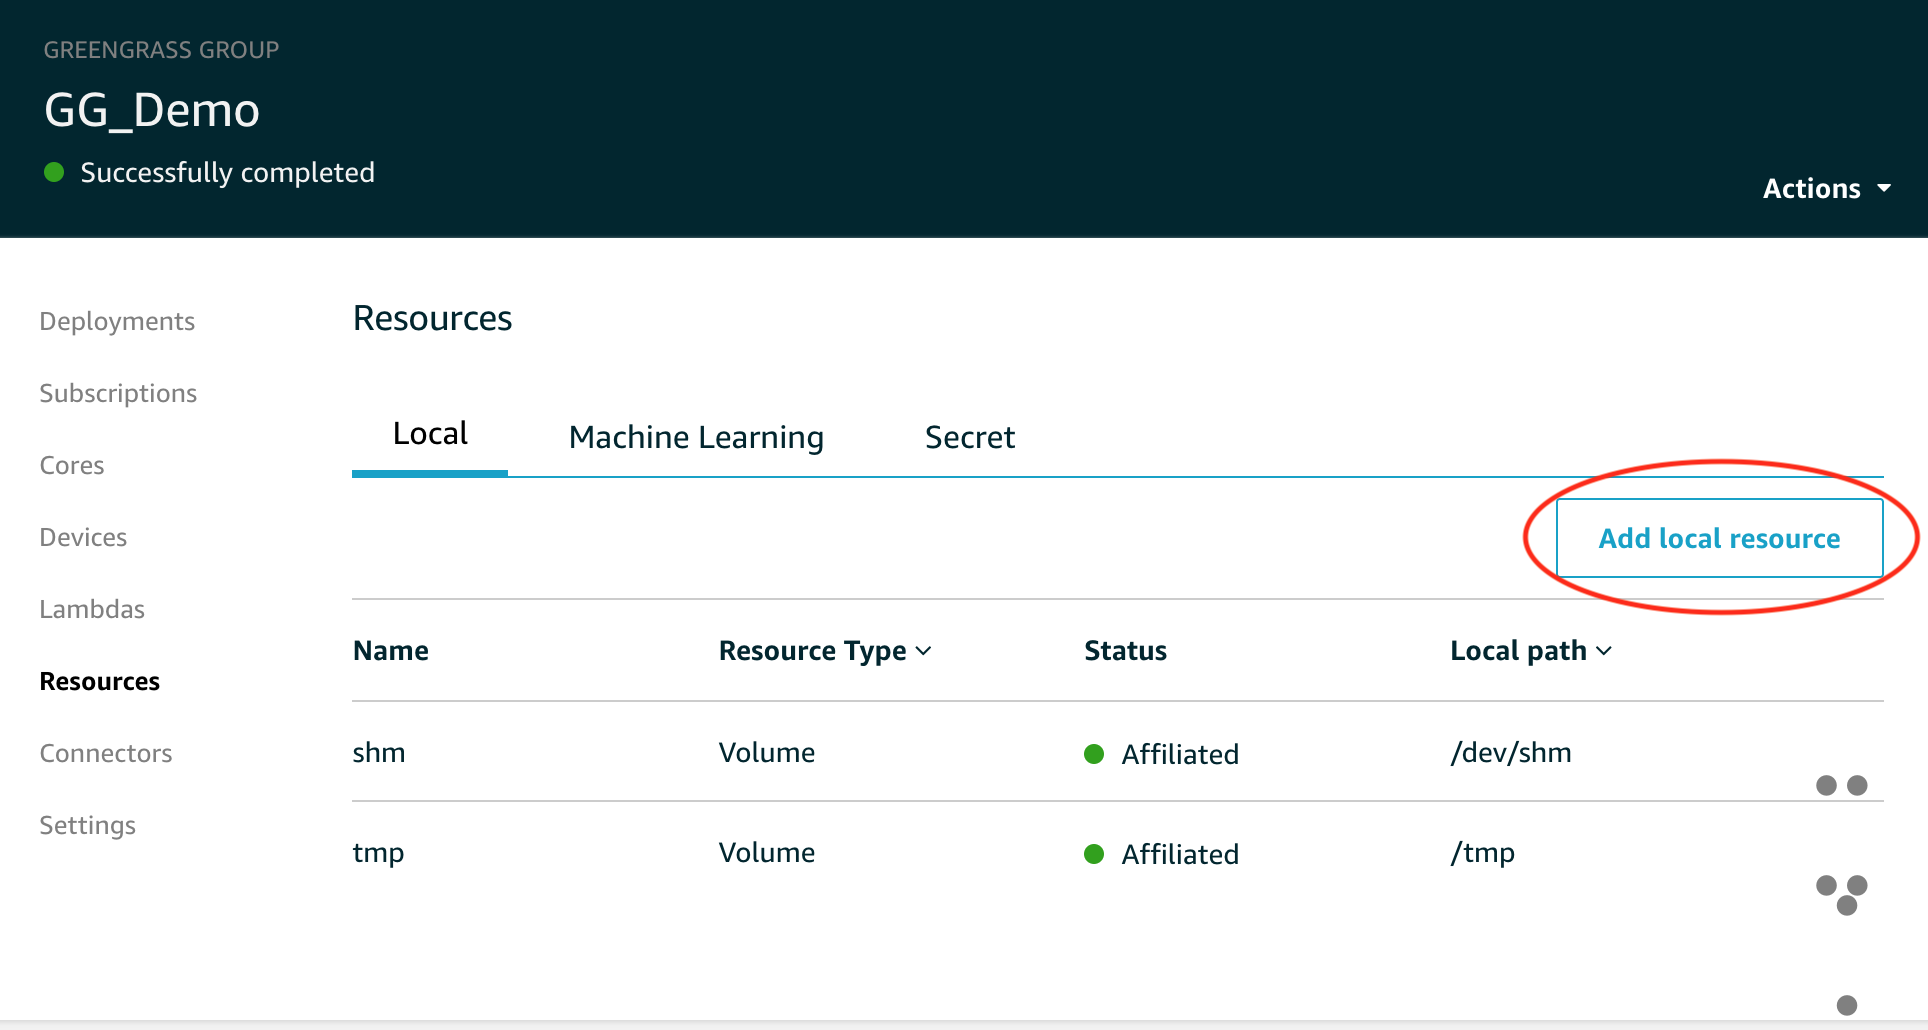
- For resource name, enter
Camera.
ChooseDevicefor Resource Type.
In Device Path, enter/dev/video0.
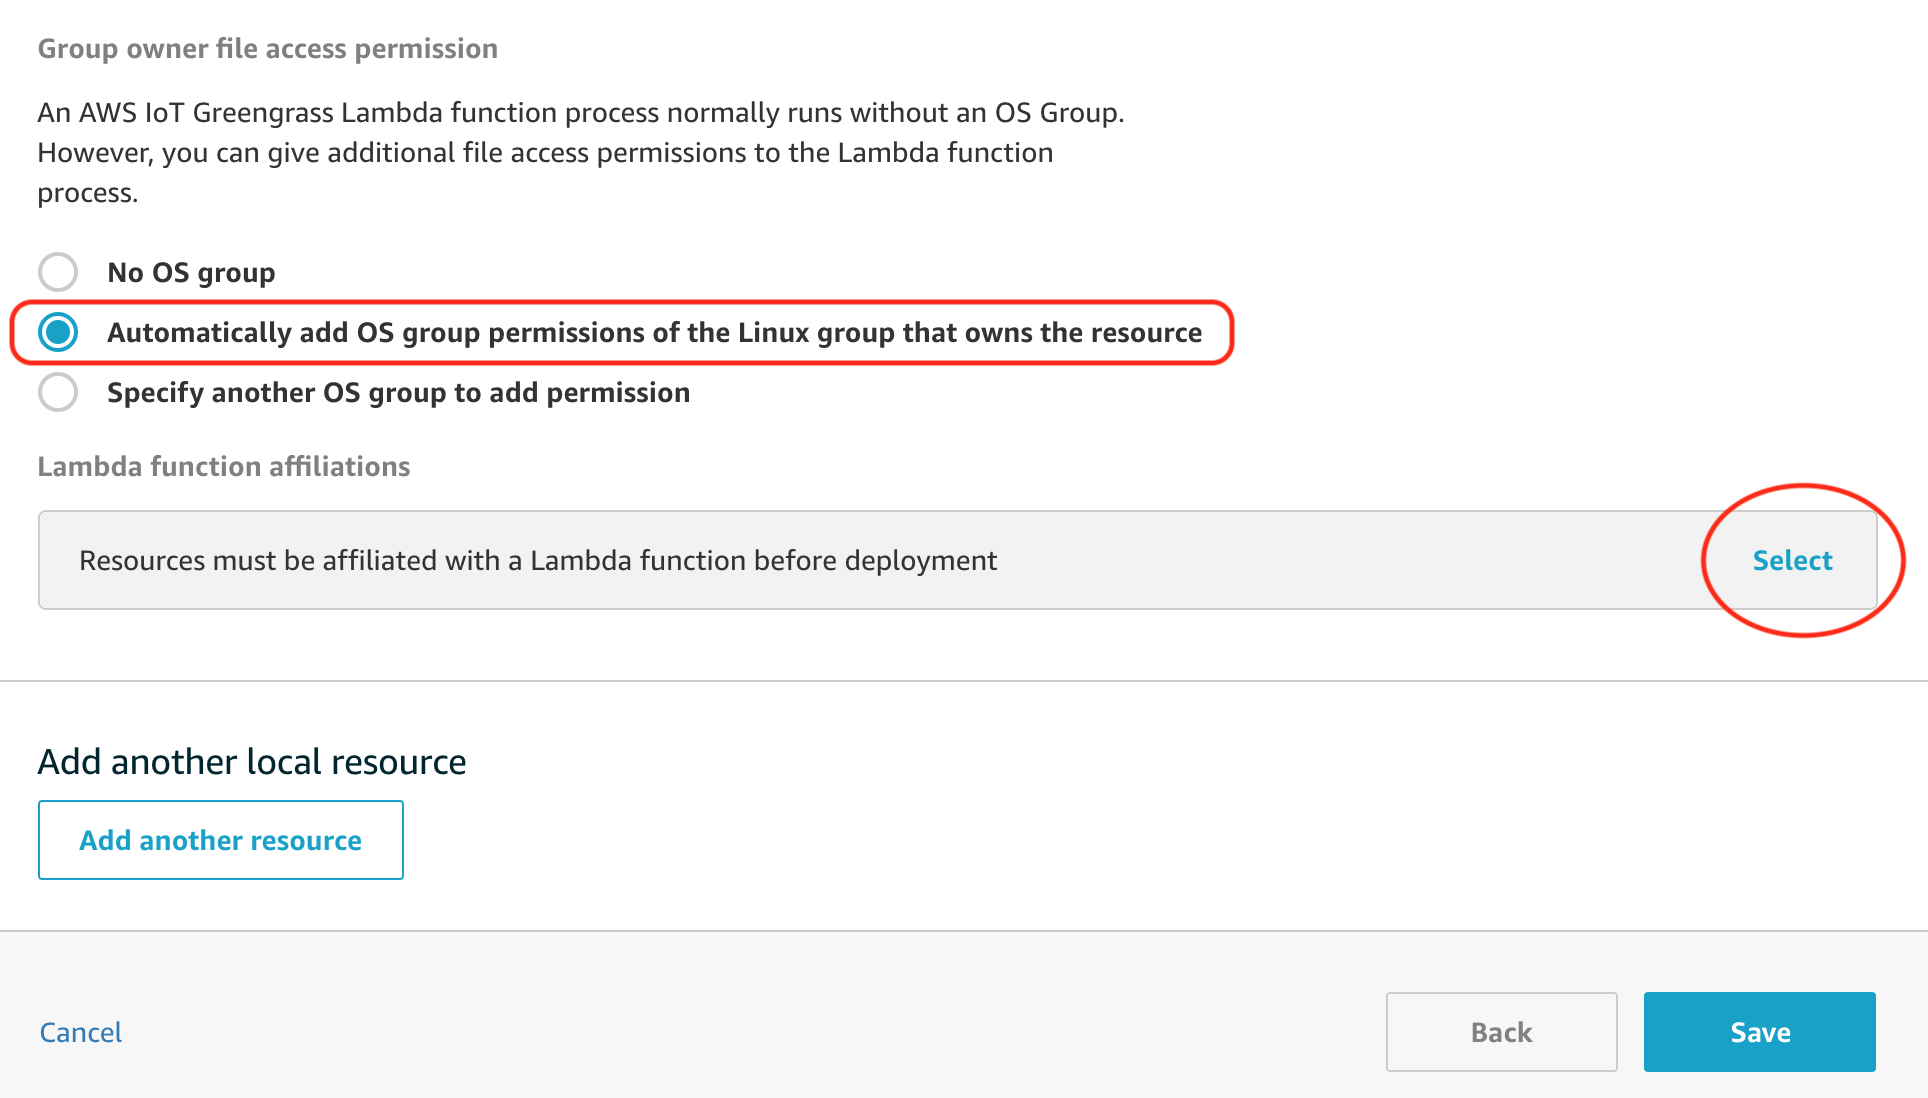
- In Group owner file access permission select
Automatically add OS group permission of the Linux group that owns the resourcesThen clickselectin Lambda function affiliations
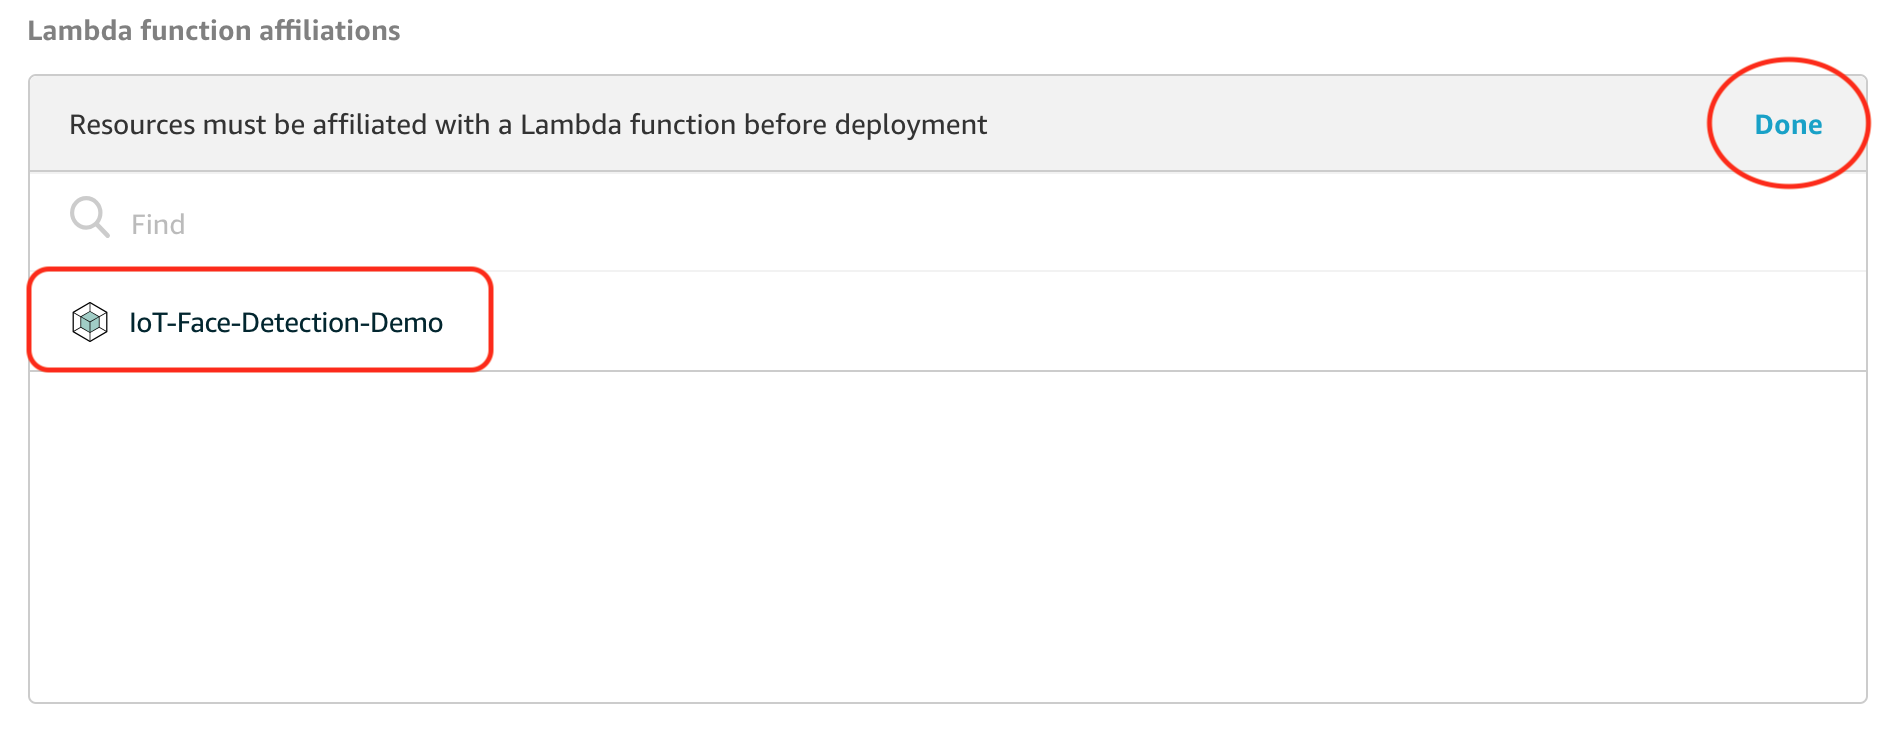
- Choose the lambda you created earlier , For example:
IoT-Face-Detection-Demo.
Then selectRead And Write Access, then clickDone.
- Make sure you have linked the right lambda. Then click
save. - Click
Actionagain. Then clickdeploy - Wait until it is successfully connected.
- Once success, a lambda would be deployed on your IoT device.
- If you did not a success, try to restart Greengrass daemon and redeploy Greengrass.
##connect to your pi##
ssh pi@ip_address
cd /greengrass/ggc/core
sudo ./greengrassd restart
AWS IoT Connection
- From the AWS console, select IoT Core. We should see the AWS IoT Monitoring console as shown below, with a dot on the graph indicating a successful connection to our device.

Setup Up Face Detection
- Here we are going to deploy the first lambda function working with face detection. Once the lambda detect faces, it would upload the snapshot to your S3 bucket. You can monitor the log of your lambda in cloudwatch log.
Setup properties
cp ../properties{.sample,}.mk
nano ../properties.mk
Run the script
- This script will automatically upload python files to the lambda you created before. Once completed, the lambda would be deployed on your raspberry pi through IoT Greengrass.
cd ~/GG-Edge-Inference
cd 2-face-detection
make
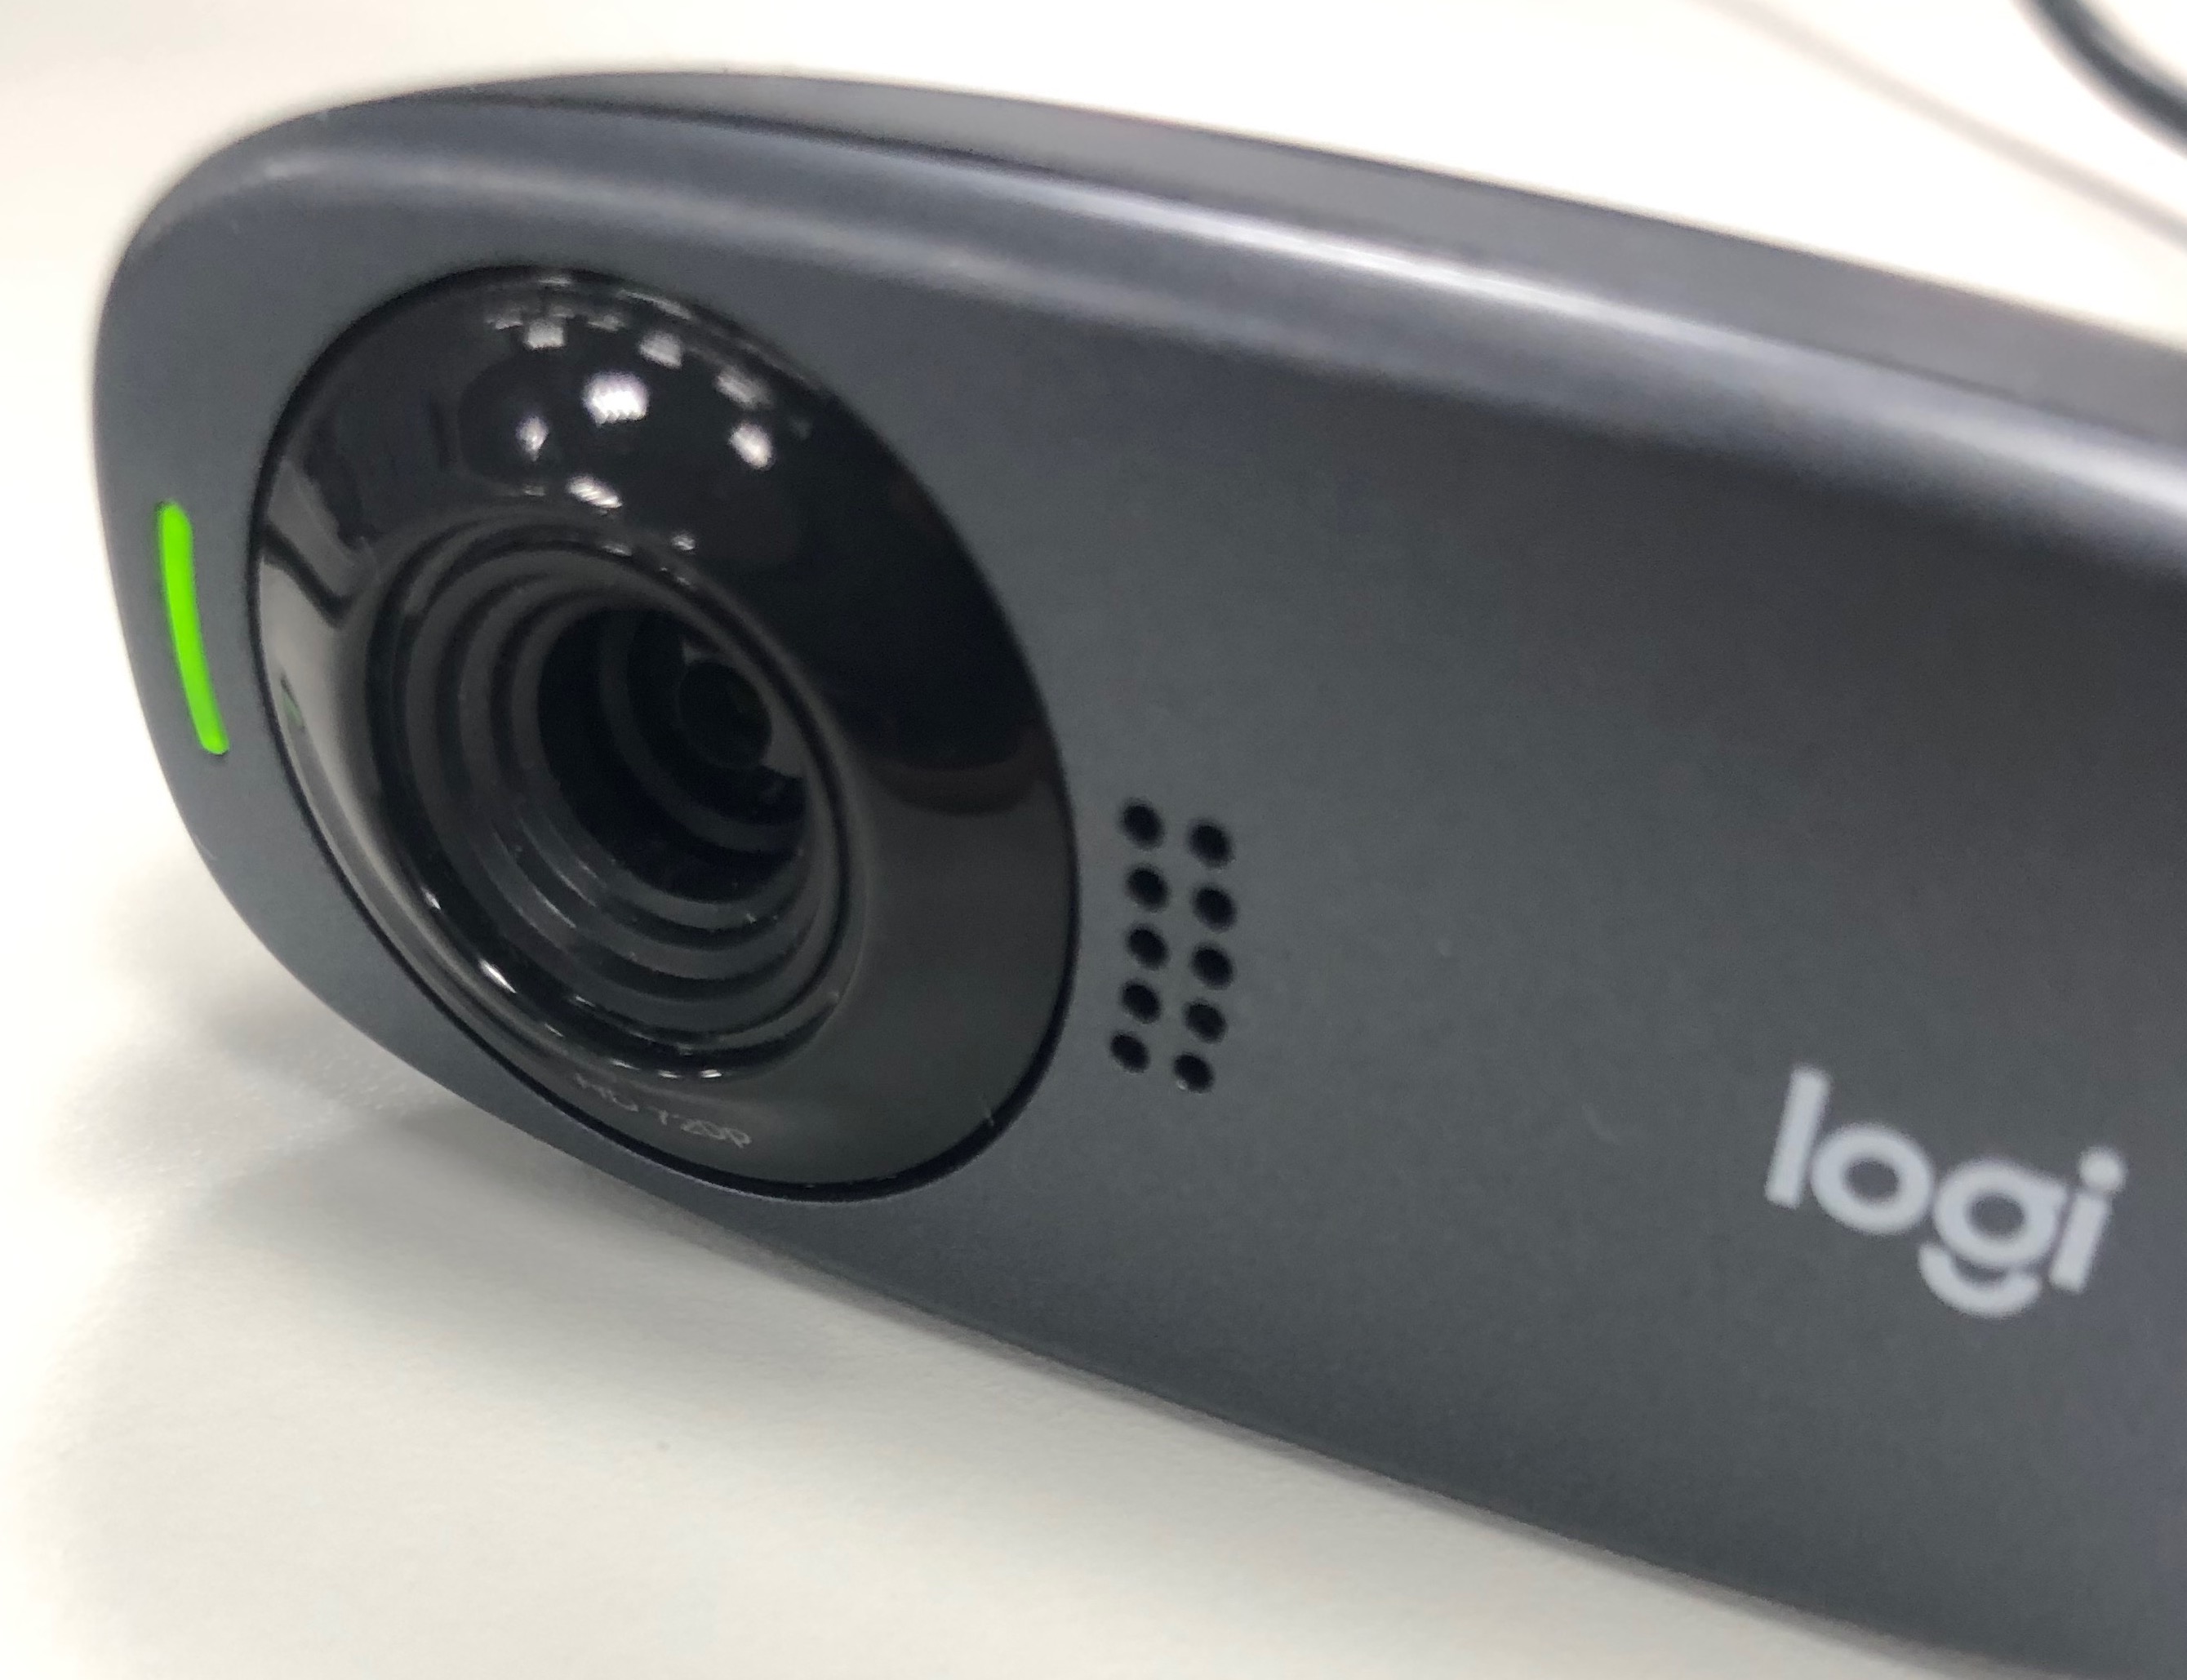
- If you are on the right track, then your camera on the device should be triggered on very soon like this:
Debug Tool: Cloudwatch log
If you encounter some problems: 1. Go to AWS console, then choose cloudwatch 2. choose log on the left panel
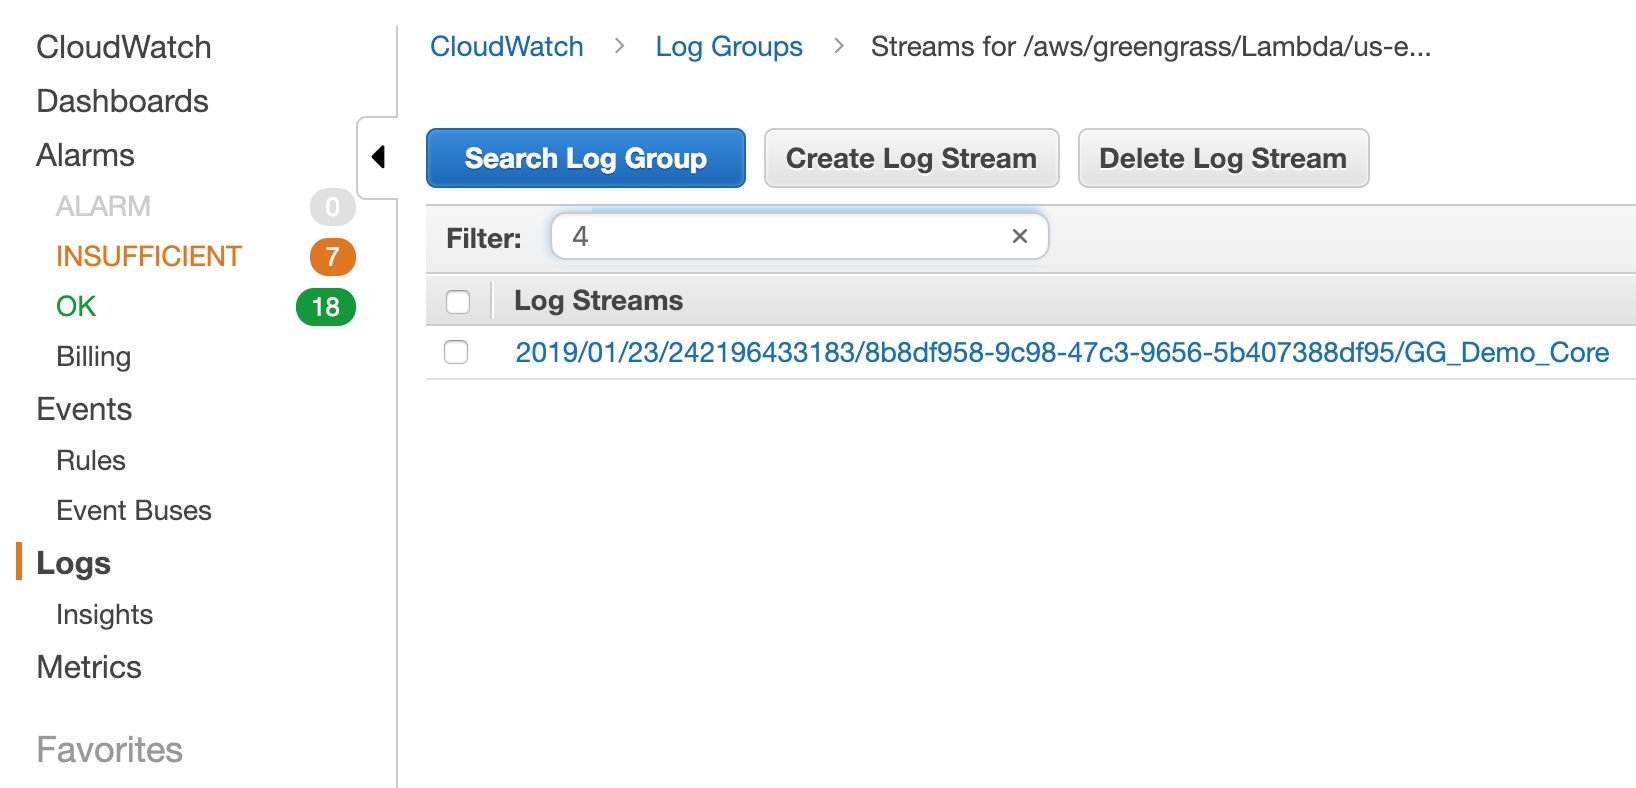
- find the lambda function you created earlier
- get your bugs, usually are packaged issue, ex.
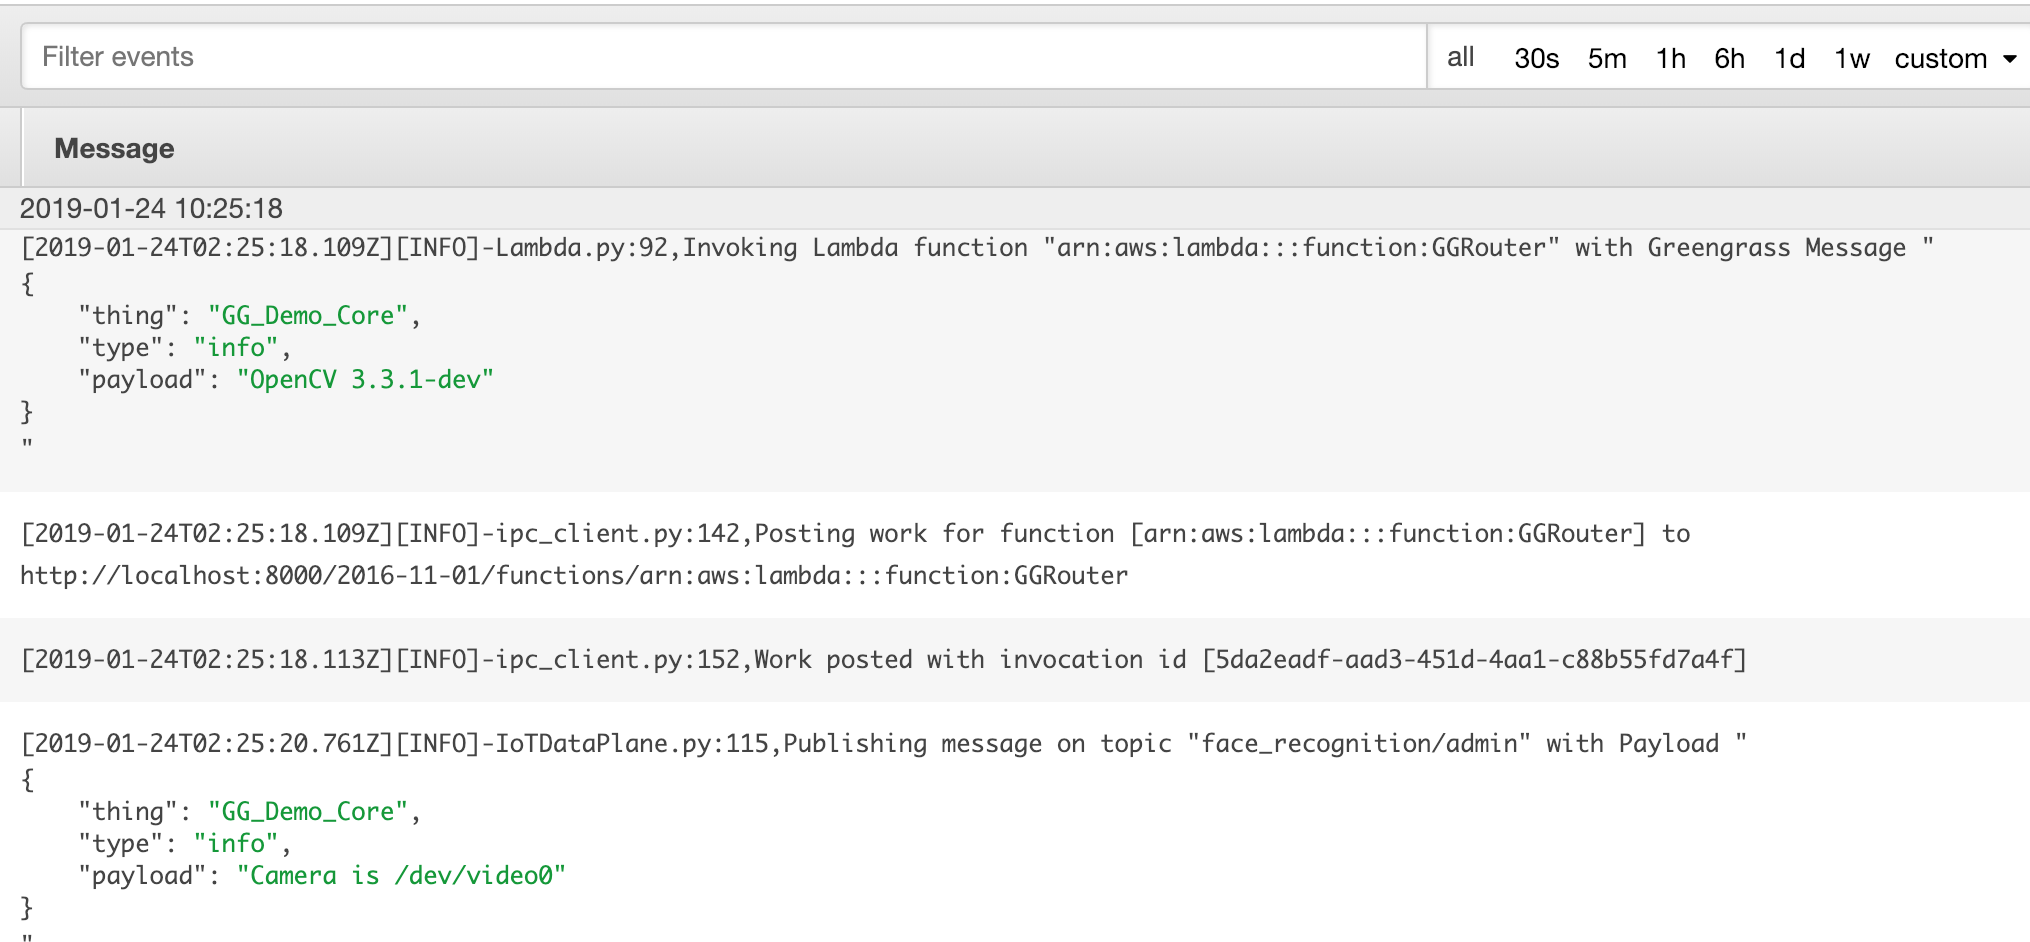
cannot find module: cv2 - If your lambda runs properly, the log should be like this.
Setup Face recognition
- Here we are going to run a script for creating another lambda function. This time the lambda function manages face recognition part and connect to DynamoDB & Rekognition.
cd ~/GG-Edge-Inference
cd 3-hybrid-face-recognition
make
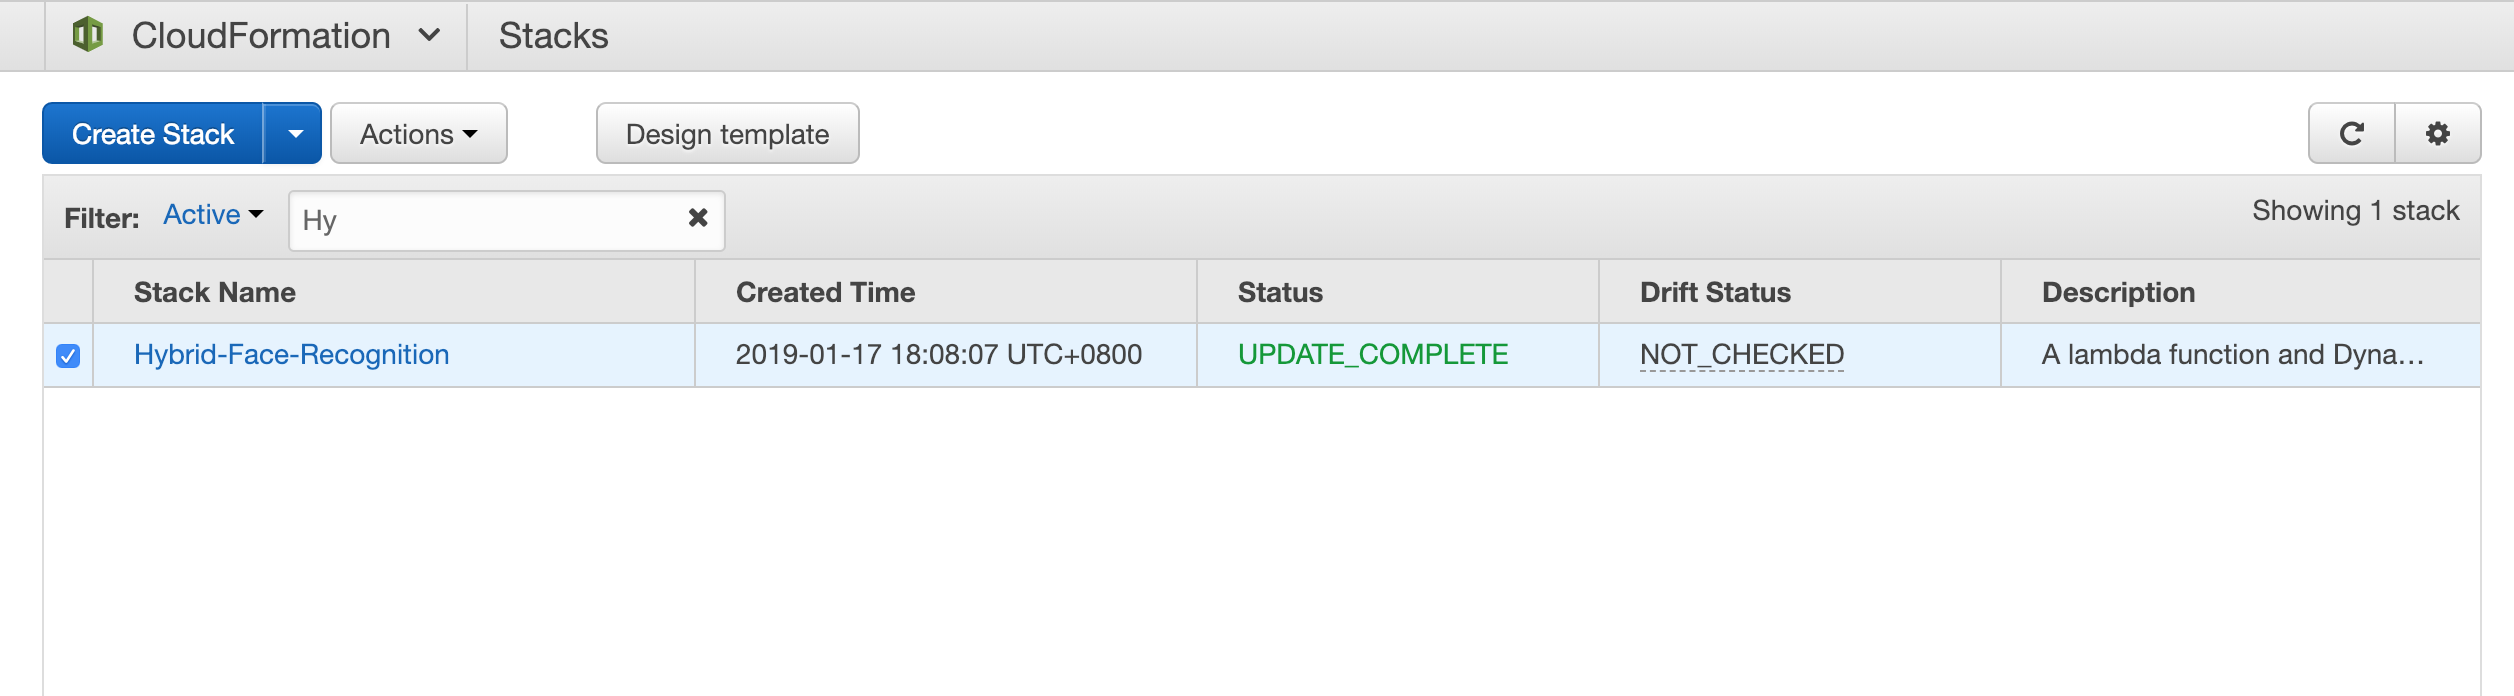
- This will trigger cloudFormation to start.
Go to cloudFormation in the aws console, then findHybrid-Face-Recognition. Wait until its success, it should be like this:
See the result within the device
- In order to view the video from the device:
- You need a monitor connected to raspberry pi and run below command
cat /tmp/results.mjpeg | mplayer - -demuxer lavf -lavfdopts format=mjpeg:probesize=32 - If /tmp/results.mjpeg does not exist, it means your local lambda did not work successfully at all. Find the bug in the cloudwatch log, or try to restart your raspberry pi & Greengrass daemon.
- You need a monitor connected to raspberry pi and run below command
Check the result on AWS IoT Core
- In the IoT console, got to the Test section.
-
Subscribe to the topic
face_recognition/inference, it will show you who the device sees. There are more topics available:face_recognition/inference: the faces it seesface_recognition/admin: some info messages or errors if there is.face_recognition/new: where the device posts face it doesn’t know (Base64 encoded jpeg).face_recognition/match/"Thing_Name": used to update the name of a face in a device.
-
To rename a user: post a message to the
face_recognition/match/Thing_Namewith content{"OLD_NAME": "NEW_NAME"}
Conclusion
Congratulations! now you have learned: – Learn basic Linux skill to operate raspberry pi – Create IoT connection with Raspberry Pi – Construct a face recognition architecture by using AWS cloud services
Gitlab Project Link
https://gitlab.com/ecloudture/aws-iot-face-recognition-analysis
You may also like

AWS re:Invent 2021 – Werner Vogels Keynote

AWS re:Invent 2021 – Adam Selipsky Keynote
