Amazon Personalize
Overview
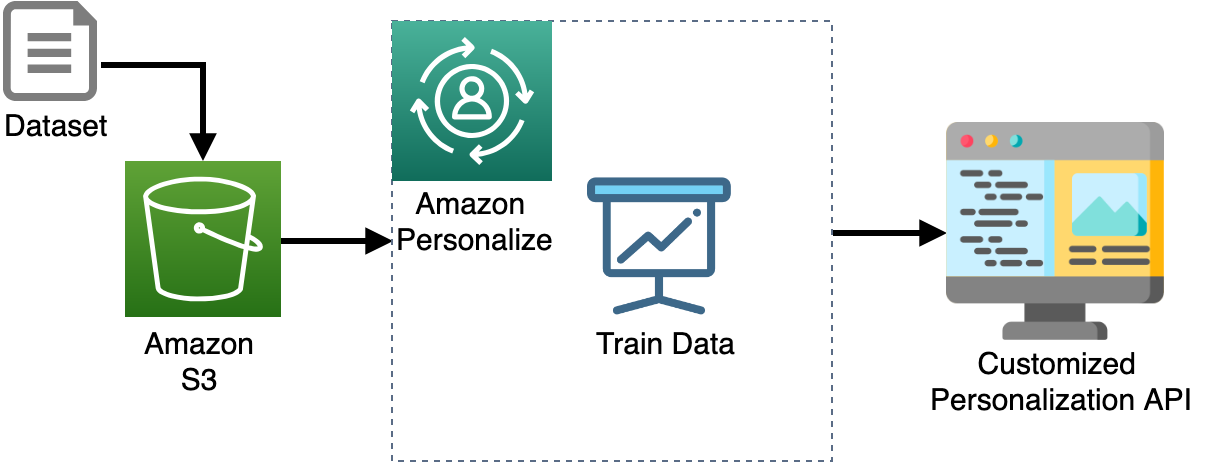
Amazon Personalize is a machine learning service that makes it easy for developers to create individualized recommendations for customers using their applications.
With Amazon Personalize, you provide an activity stream from your application – page views, signups, purchases, and so forth – as well as an inventory of the items you want to recommend, such as articles, products, videos, or music. You can also choose to provide Amazon Personalize with additional demographic information from your users such as age, or geographic location. Amazon Personalize will process and examine the data, identify what is meaningful, select the right algorithms, and train and optimize a personalization model that is customized for your data.
In this lab, we are going to import an user-item interaction dataset from S3 bucket, if you don’t have an user-item interaction data you can install the SDK provided by Amazon. On the next step, we use the data to create a solution, after creating the solution we create a campaign. These steps can also call it train data. In the last part, we can finally generate a recommendation system.
Prerequisites
- Download <ratings.csv> to local, this dataset is a list of movie rating rate by over 1,000 people, the columns include
user_id,ratings, andmovie_name.
Step by step
Create S3 bucket
-
On the Service menu, select S3.
-
Select Create bucket.
-
Type an unique name for your S3 bucket.
-
Select Create on the down-left of the create console.
-
Search for your bucket name and click it on the name to enter the bucket.
-
Select Permissions tab, select Public access settings, click Edit. We will modify the public access settings to make your objects Public which can be used to import datasets to the Amazon Personalize.
-
Uncheck all the ☑ select Save.
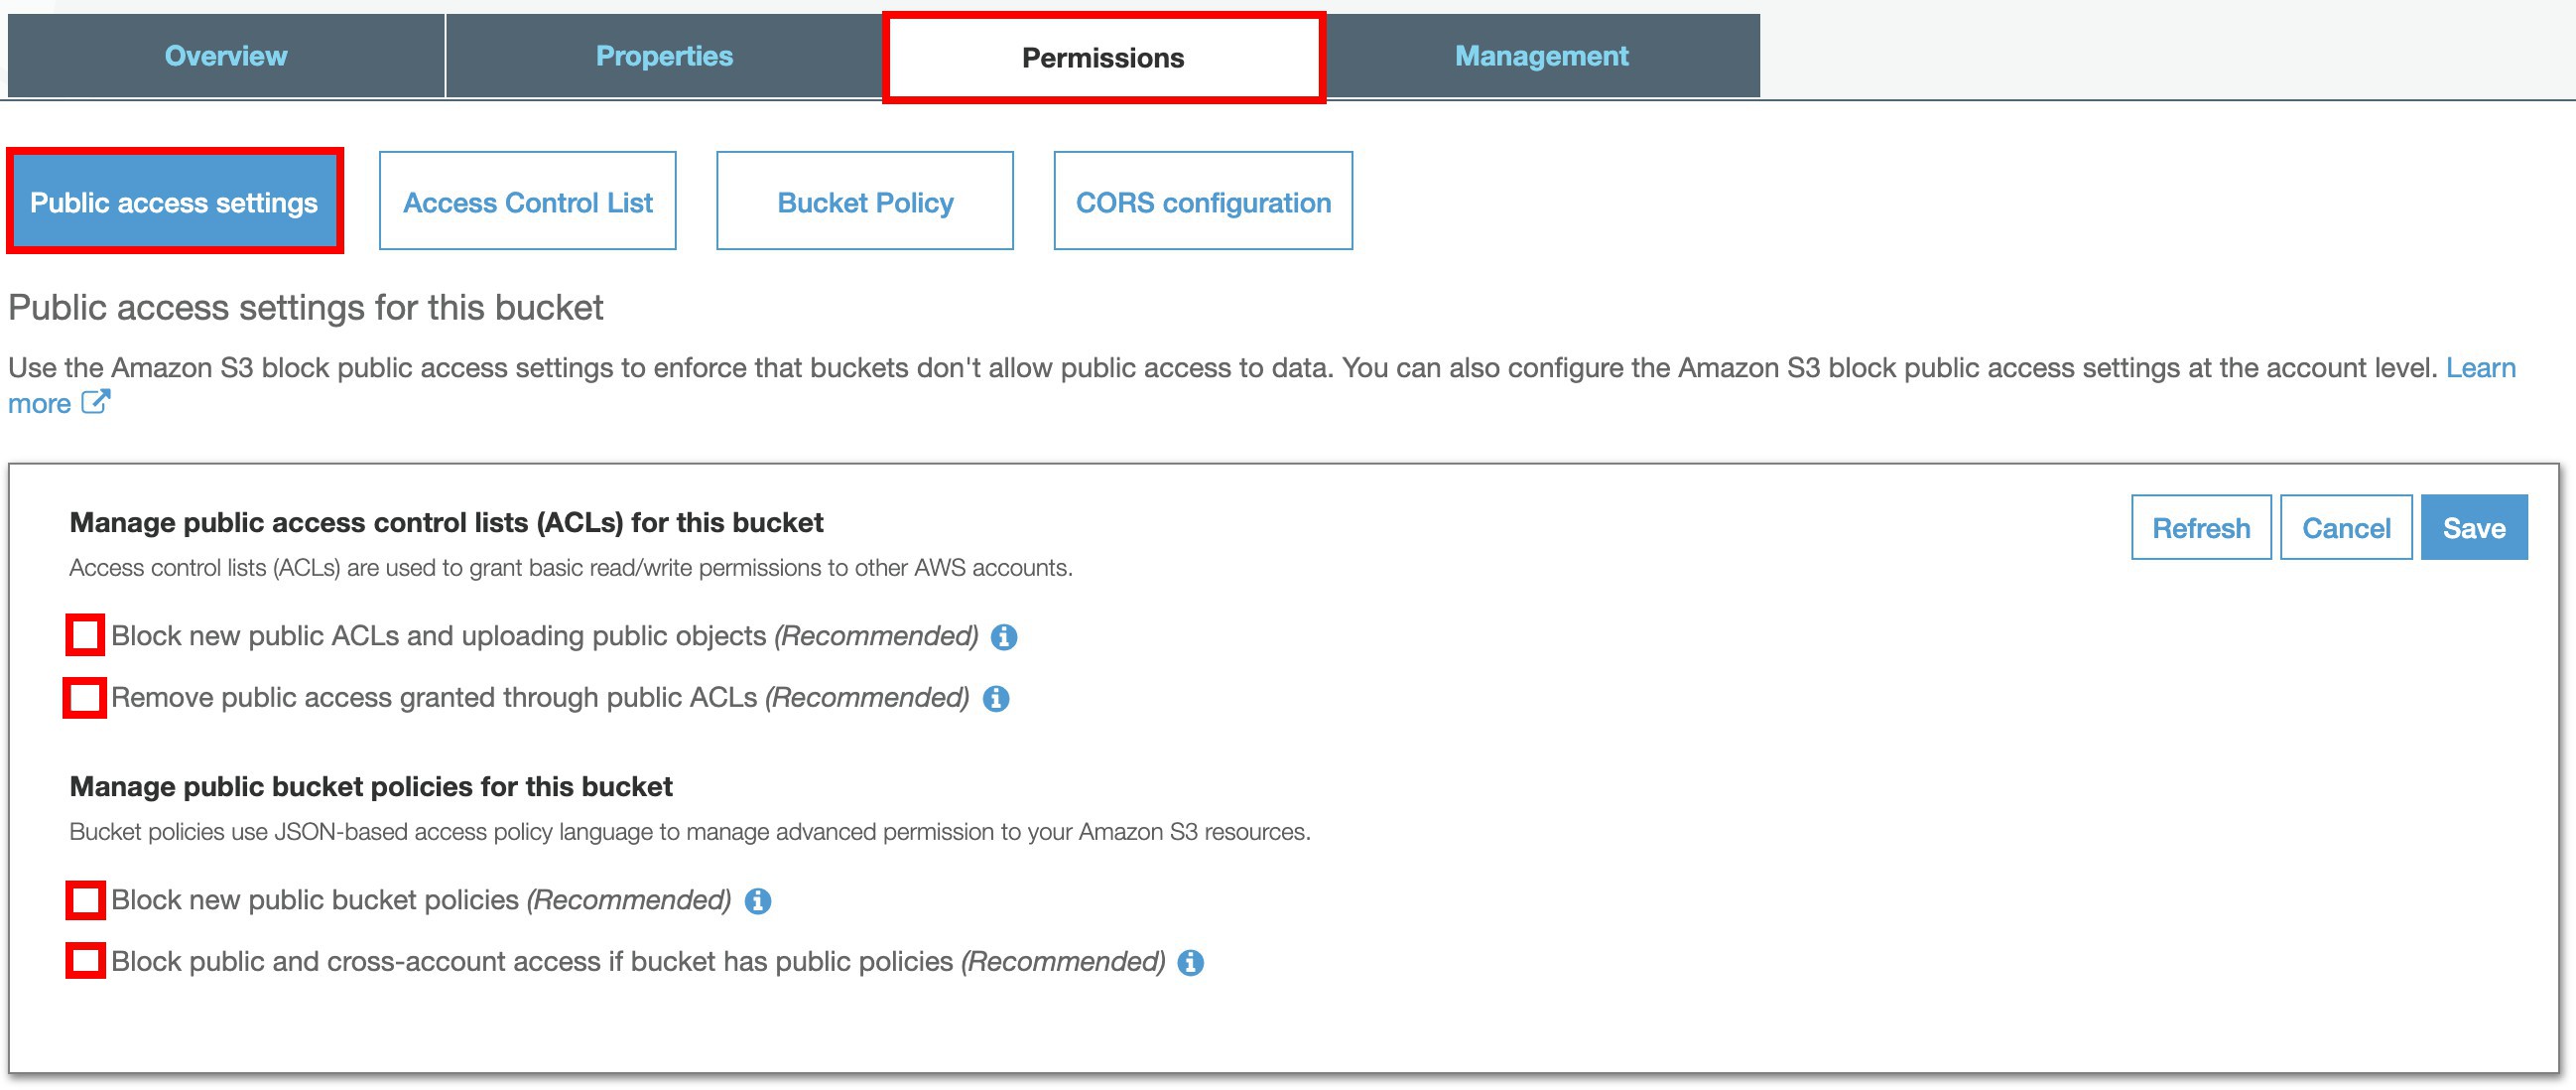
- Select Bucket policy, copy and paste the json code below, remember to change
to your own bucket name, and select Save.
- This Bucket policy is for Amazon Personalize to get data and list data in S3 bucket.
{
    "Version": "2012-10-17",
    "Id": "PersonalizeS3Bucket AccessPolicy",
    "Statement": [
        {
            "Sid": "PersonalizeS3BucketAccessPolicy",
            "Effect": "Allow",
            "Principal": {
                "Service": "personalize.amazonaws.com"
            },
            "Action": [
                "s3:GetObject",
                "s3:ListBucket"
            ],
            "Resource": [
                "arn:aws:s3:::<your-bucket-name>",
                "arn:aws:s3:::<your-bucket-name>/*"
            ]
        }
    ]
}
-
Select Create folder, type movie rating for the folder name.
-
Click on the folder name to enter the folder.
-
Select Upload, select Add files, choose the <ratings.csv> we downloaded in the Prerequisites, select Upload on the down-left of the upload console.
-
Select the file name to enter.
-
Click Make Public make the file accessible.

Create IAM Role
In this section, we create an IAM Role for Amazon Personalize to read data from S3 bucket, and also push logs to CloudWatch which enables users to easily debug.
-
On the Service menu, select IAM.
-
Select Roles on the left navigation pane, select Create role.
-
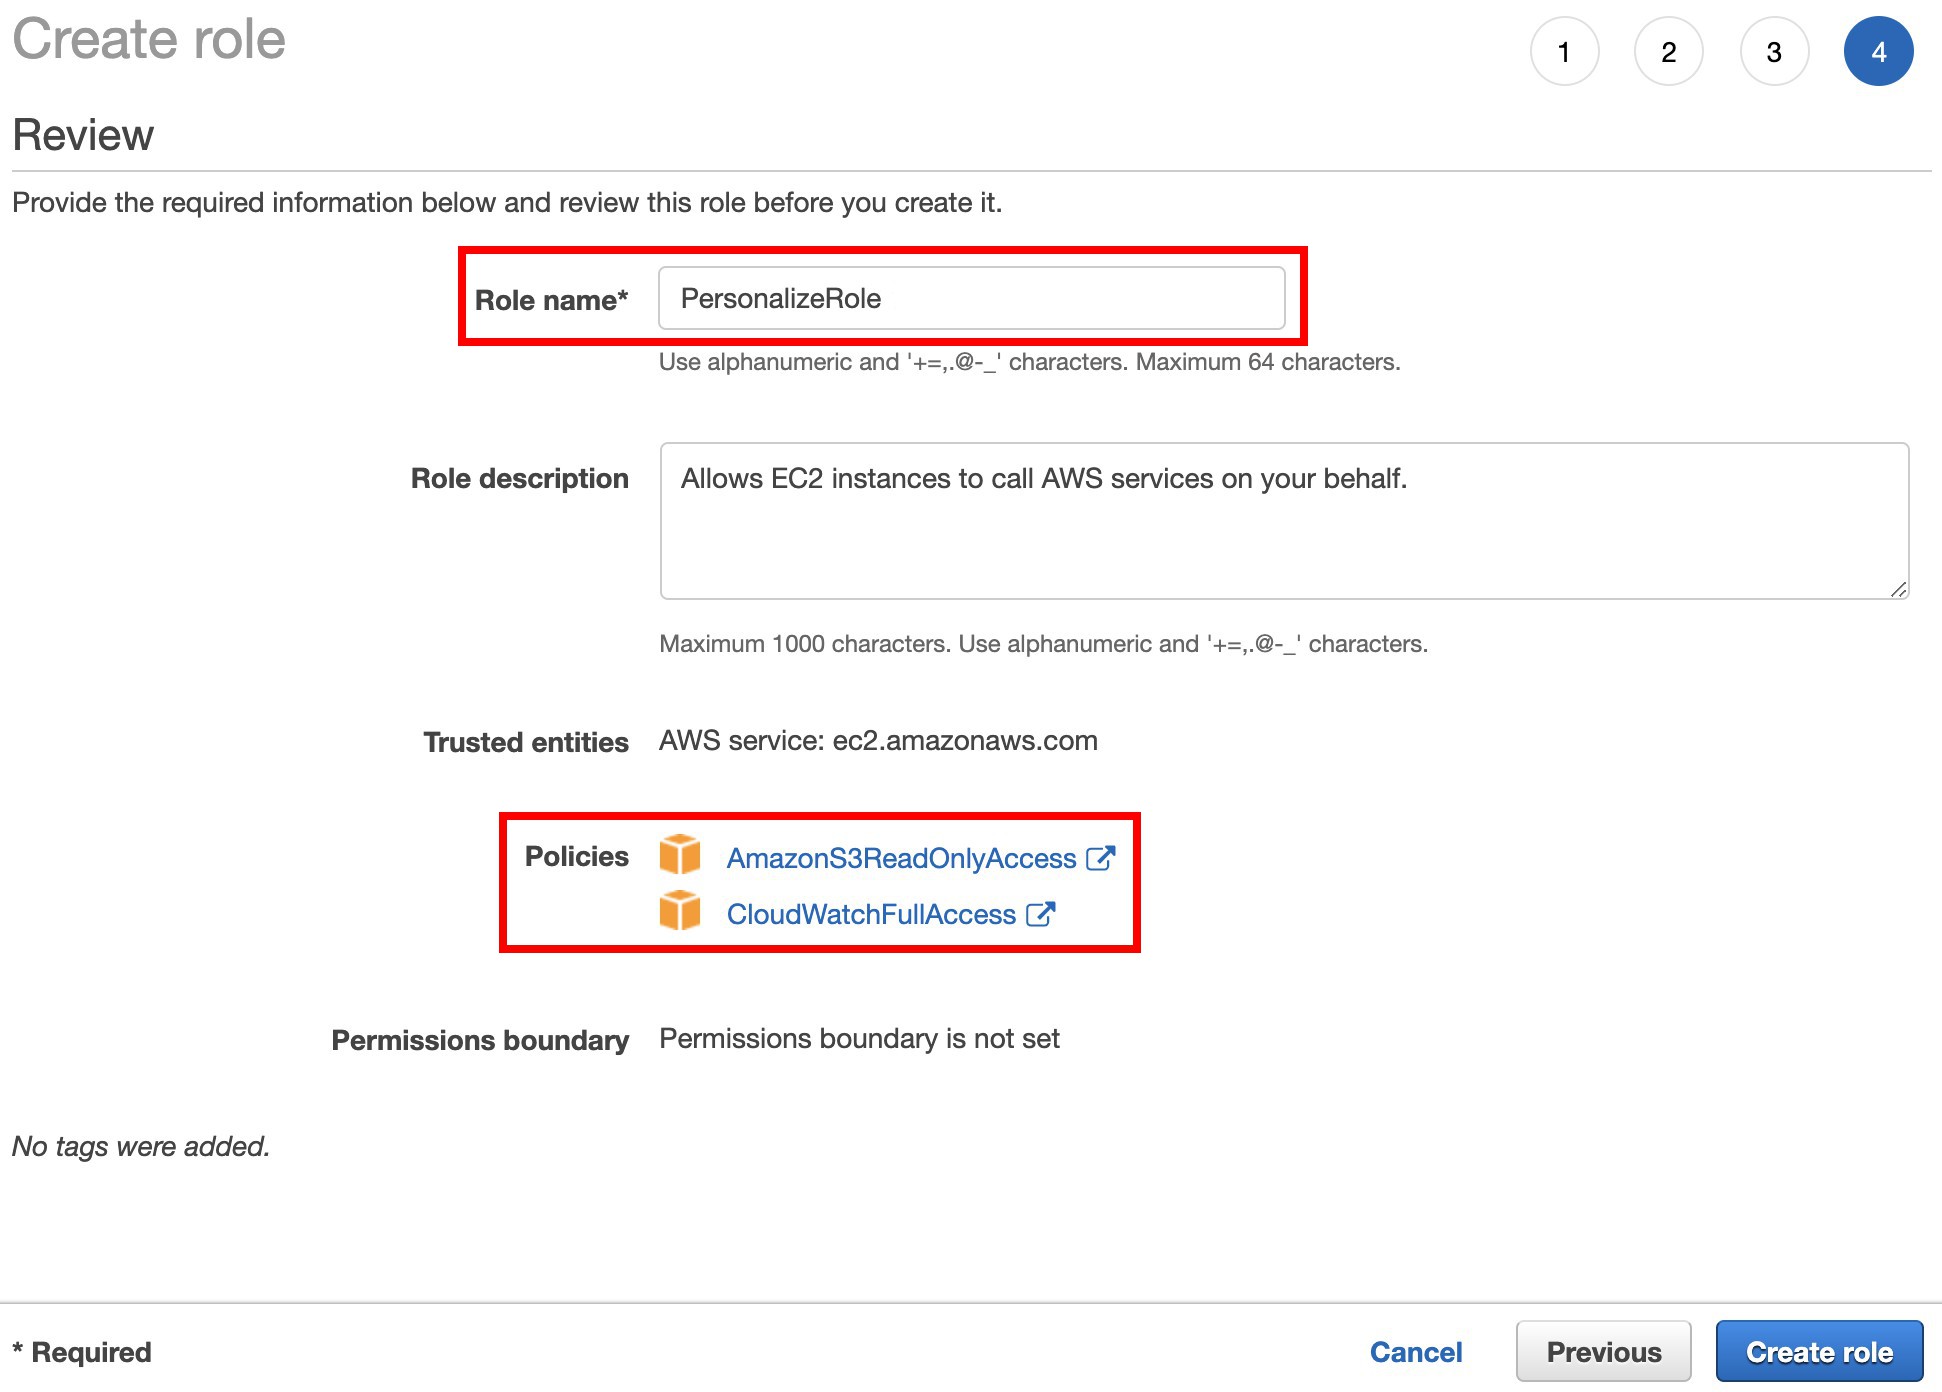
Select AWS service under Select type of trusted entity, as for Choose the service that will use this role select Personalize, if you can’t find it just select EC2, select Next:Permissions.
-
Search and ☑:
- AmazonS3ReadOnlyAccess
- CloudWatchFullAccess
-
Select Next:Tags add tags if you want, otherwise select Next:Review.
-
Type
PersonalizeRolefor Role name, and make sure you have attached the two policies, select Create role.
-
Search for the Role name:
PersonalizeRoleyou just created. -
Copy the Role ARN into your notepad, we will use it later.
-
Select Trust relationships, select Edit trust relationship.
-
Copy and paste the json code below to change the Policy Document:
- Because we couldn’t find Amazon Personalize at the Select type of trusted entity section, so we modify the Trust relationships service to
personalize.amazonaws.com.
{
  "Version": "2012-10-17",
  "Statement": [
    {
      "Effect": "Allow",
      "Principal": {
        "Service": "personalize.amazonaws.com"
      },
      "Action": "sts:AssumeRole"
    }
  ]
}
- Select Update trust policy.
Create dataset group
In this part, we create a dataset group with the data we uploaded to S3 bucket, we have to give Amazon Personalize a static format as a json format to let it recognize the dataset.
-
On the Service menu, select Amazon Personalize.
-
If you are using Personalize for the first time, select Get Started, otherwise select Create dataset group, select Next.
-
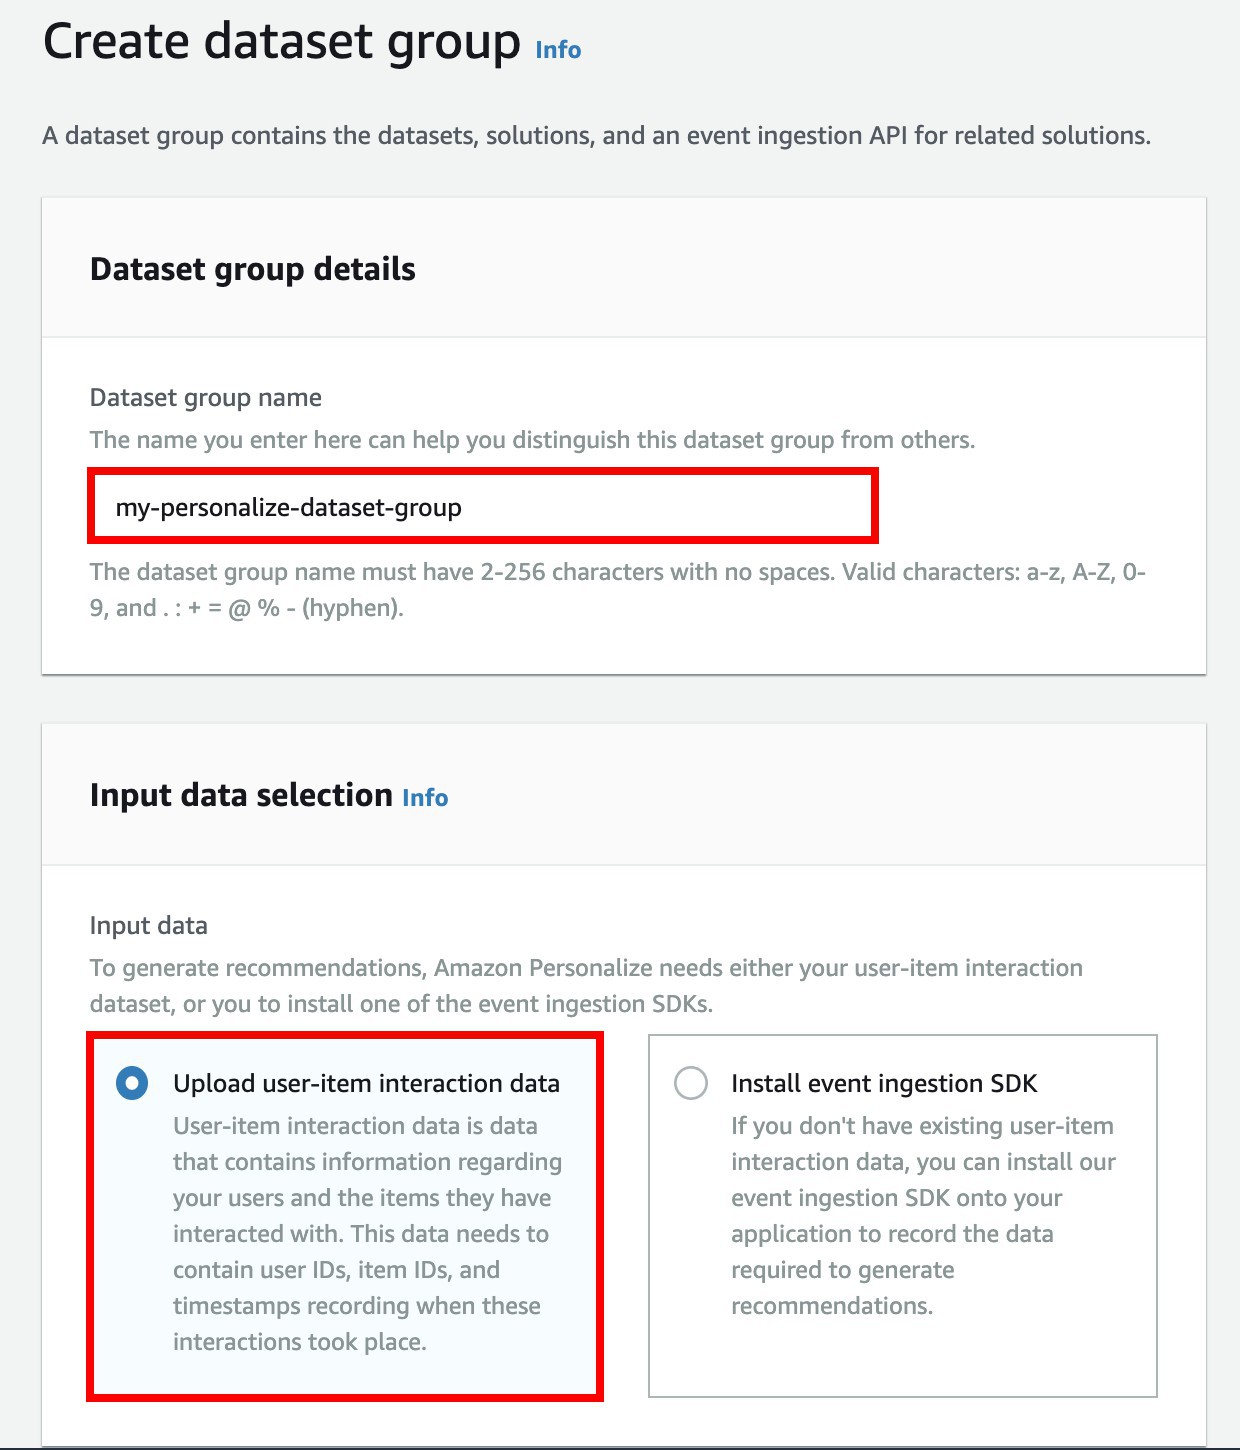
In Dataset group name type
my-personalize-dataset-group, and ☑ Upload user-item interaction data for Input data.
-
User-item interaction data: Data that includes information regarding users and items that have interactions, such as user rates the movie.
-
Install event ingestion SDK: If you don’t have existing user-item interaction data, you can install the event ingestion SDK supported by Amazon Personalize onto your application to record the data.
-
Select Next.
-
In Dataset name type
my-dataset. -
In Schema selection choose Create new schema, and type
my-schemafor New schema name, copy and paste the json code below into the Schema definition section.User-item interaction data json format must have these three fields:
- USER_ID
- ITEM_ID
- TIMESTAMP
You can add other fields after having these three fields.
{
    "type": "record",
    "name": "Interactions",
    "namespace": "com.amazonaws.personalize.schema",
    "fields": [
        {
            "name": "USER_ID",
            "type": "string"
        },
        {
            "name": "ITEM_ID",
            "type": "string"
        },
        {
            "name": "RATING",
            "type": "string"
        },
        {
            "name": "TIMESTAMP",
            "type": "long"
        }
    ],
    "version": "1.0"
}
-
Select Next.
-
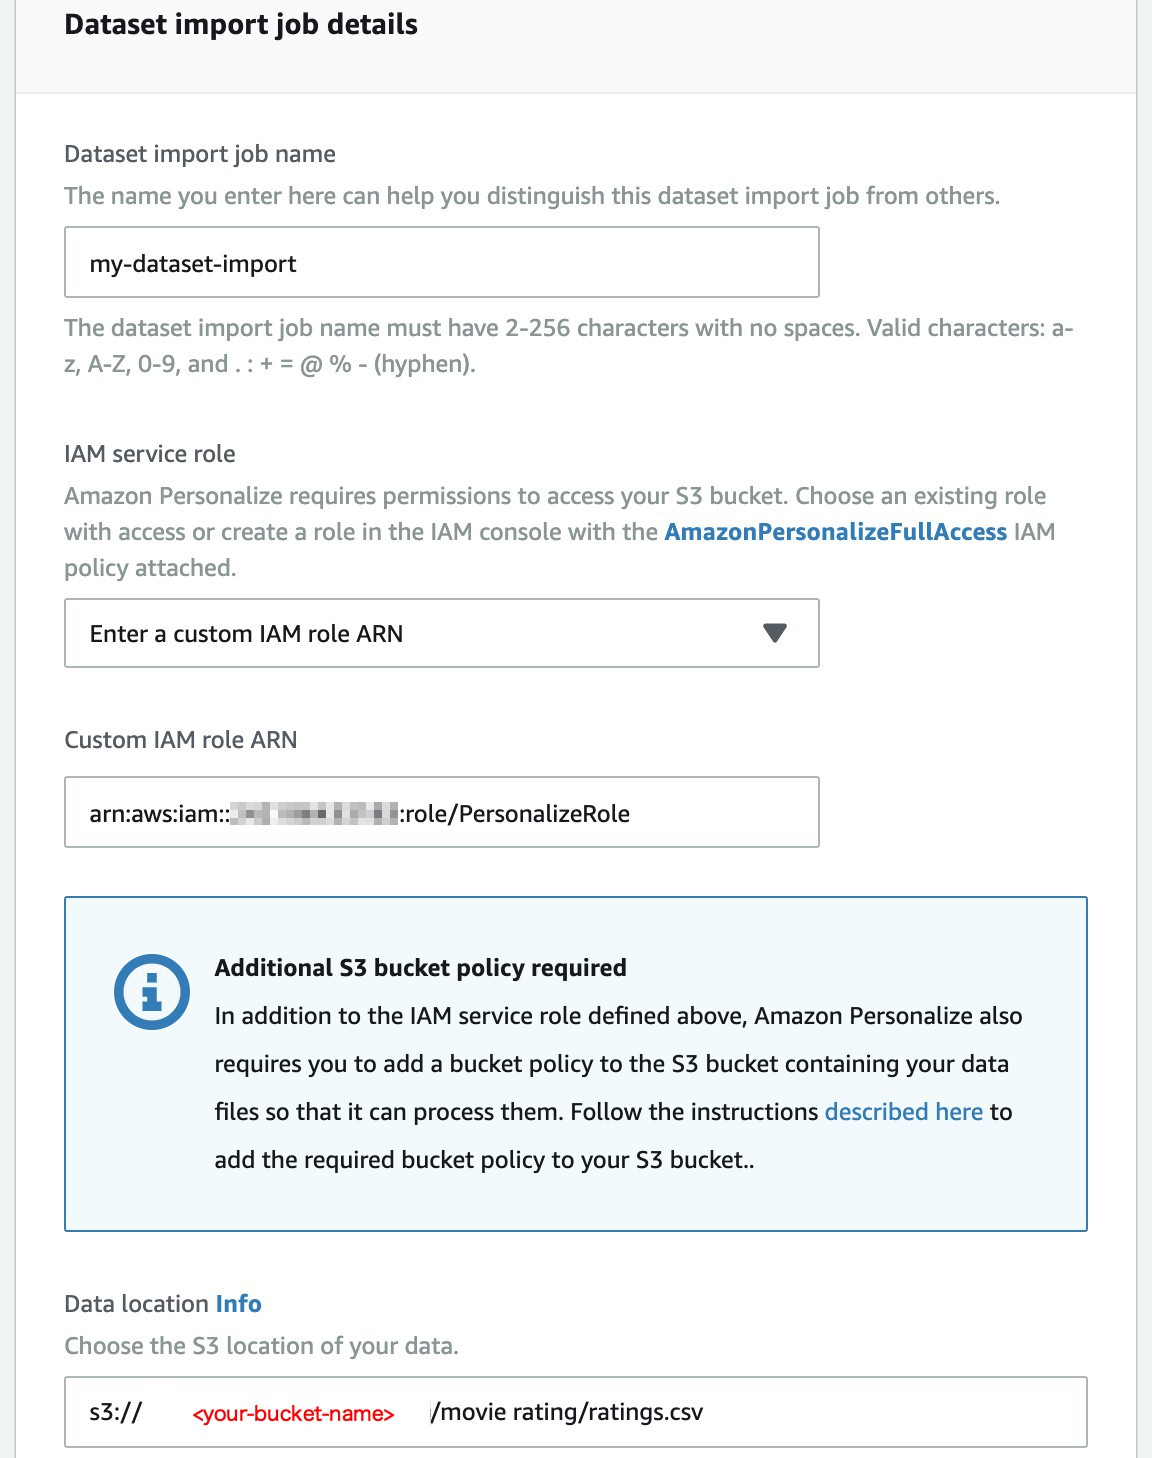
Type
my-dataset-importfor Dataset import job name and paste your Role ARN into Custom IAM role ARN, type your S3 path for <ratings.csv> ass3://<your-bucket-name>/movie rating/ratings.csv.
-
Select Finish.
-
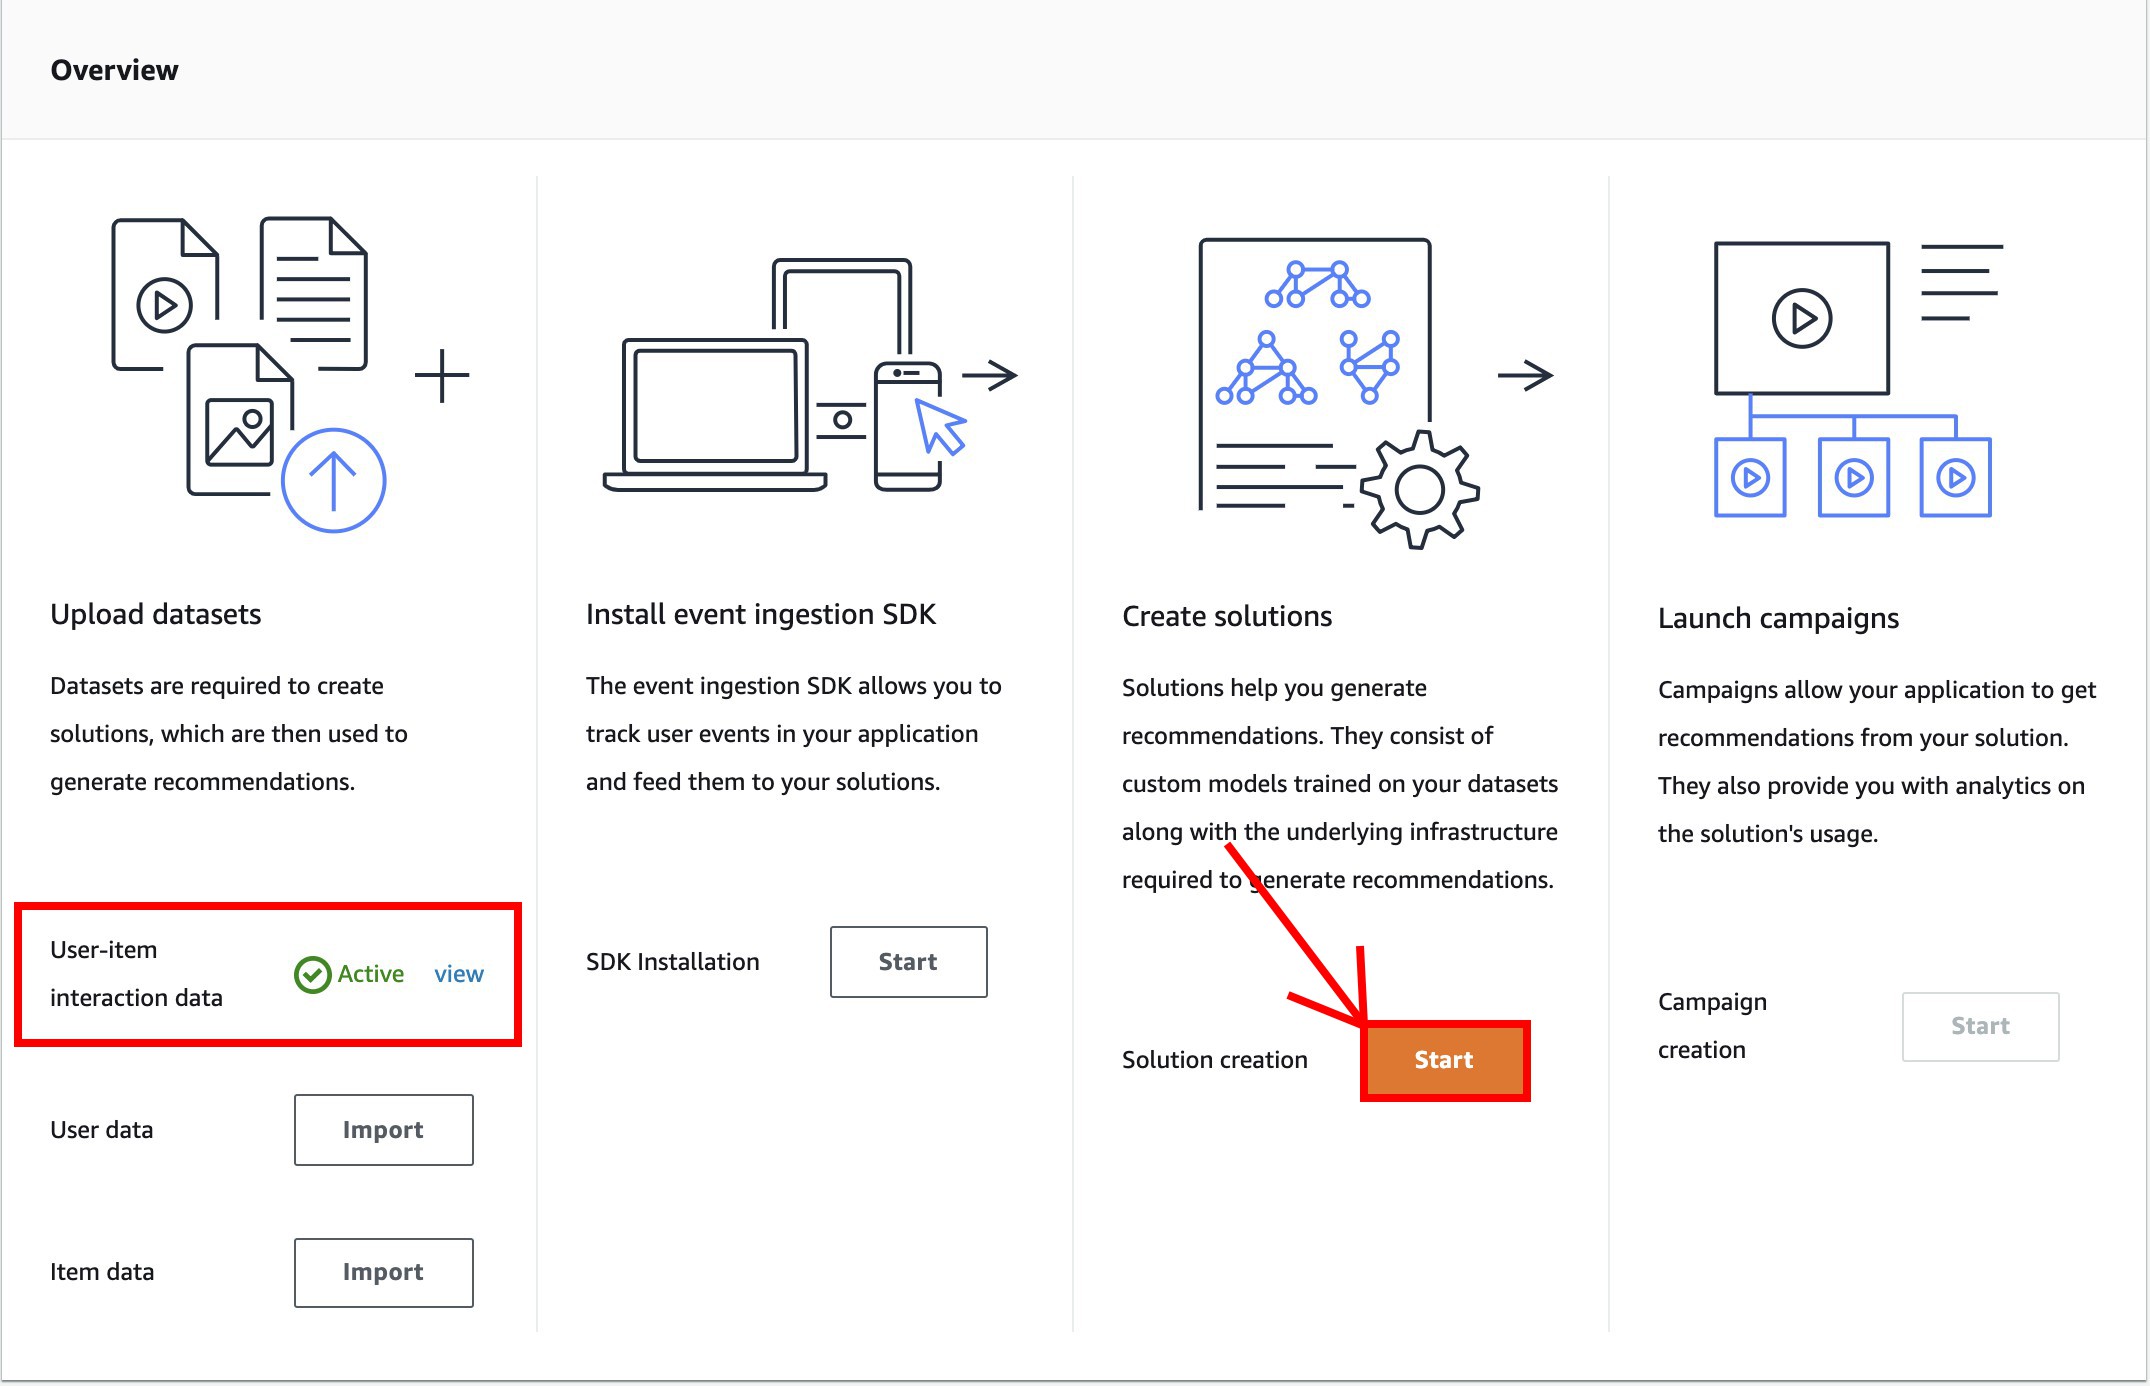
Wait for the User-item interaction data create, it will become Active after created, this might take 5-10 minutes.
Create solutions
In this part, we are going to create a solution, the advantage of using Amazon Personalize is that you don’t have to have a machine learning experience to train a solution, so in this part, we will choose a Automatic ML recipe provided by Amazon.
- Select Start at the Create solutions pane.
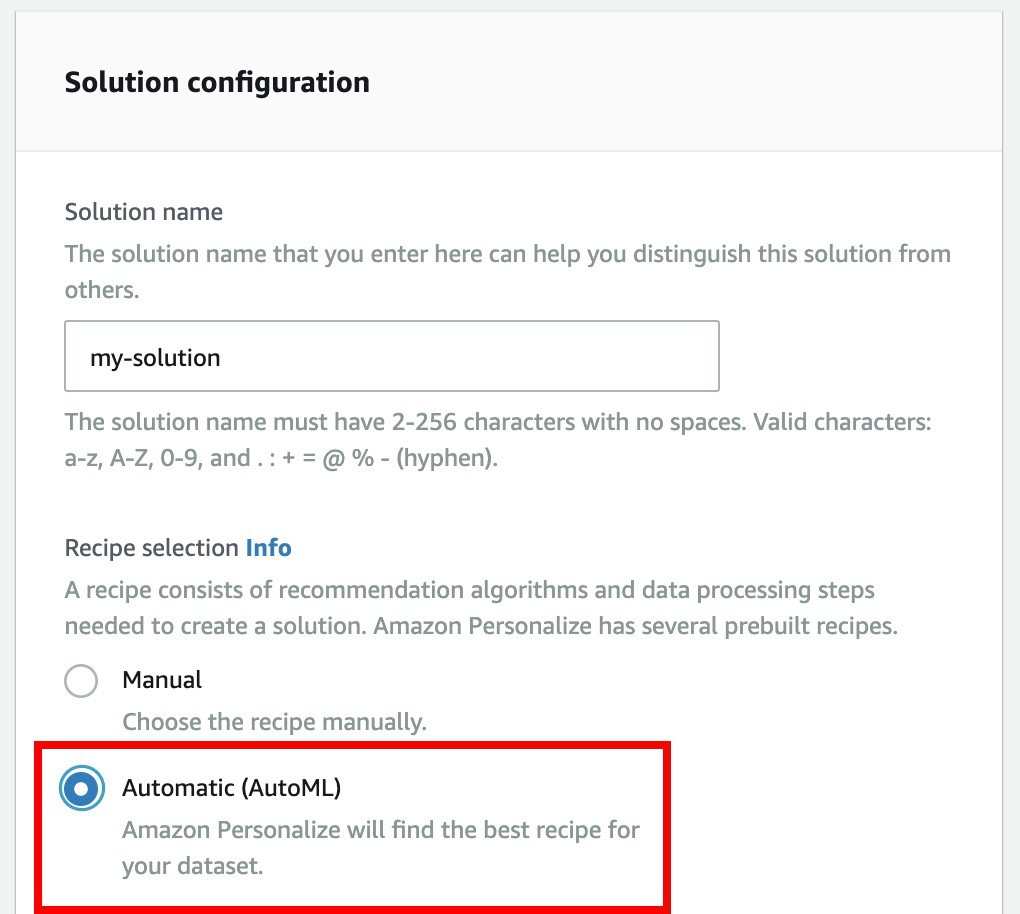
- In Solution name type
my-solution, and ☑ Automatic (AutoML)
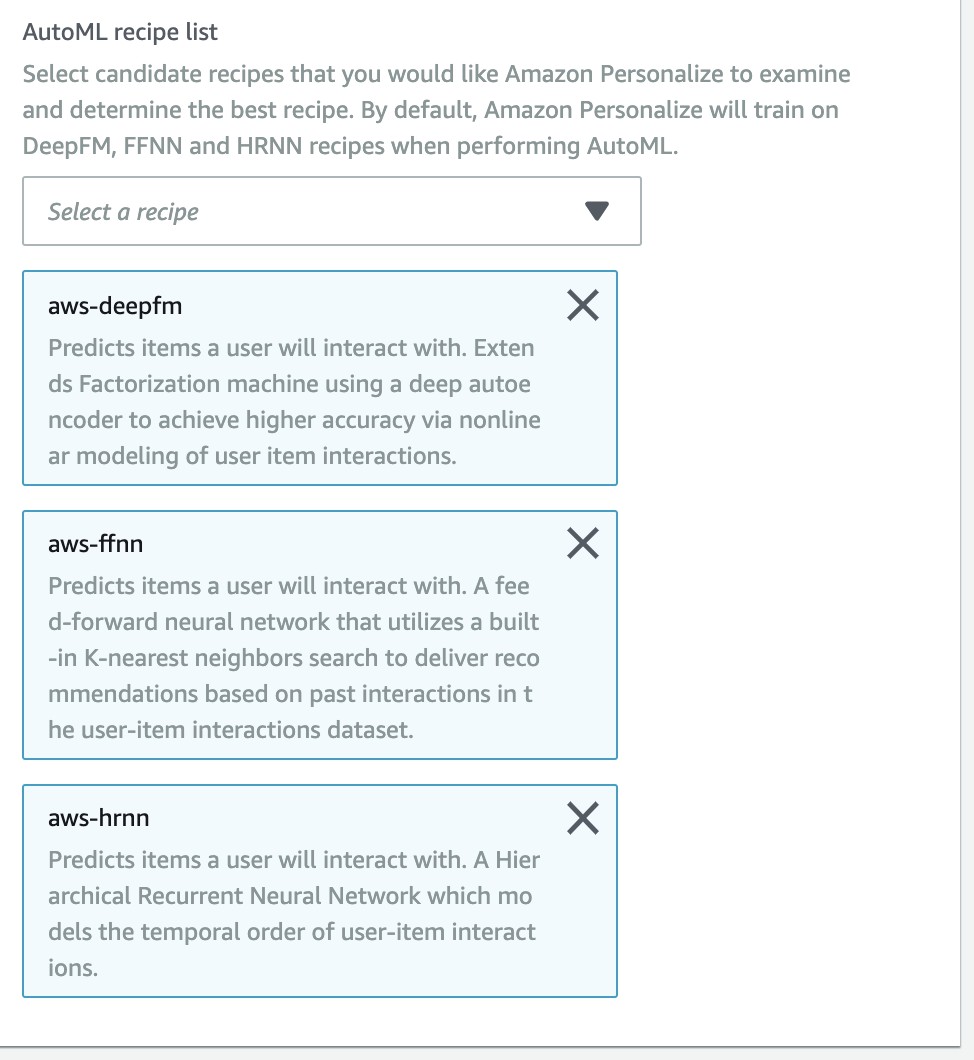
- This will default select three machine learning recipe, the three methods details:
- aws-deepfm
- Recommendations for quick training and inference with good general performance.
- aws-ffnn
- Recommendations for quick training and inference, and scalability for large data sets.
- aws-hrnn
- The recommended timing is that user behavior changes over time (progressive intent issues).
- aws-deepfm
-
Select Next check the details of this solution if there is no problem, select Finish.
-
Wait for the Solution creation, this might take 30-40 minutes.
You don’t have to wait for the creation, do the next step.
Create Campaign
In this part, we are going to the last part of Amazon Personalize, generating the recommend page with the solution created at last part.
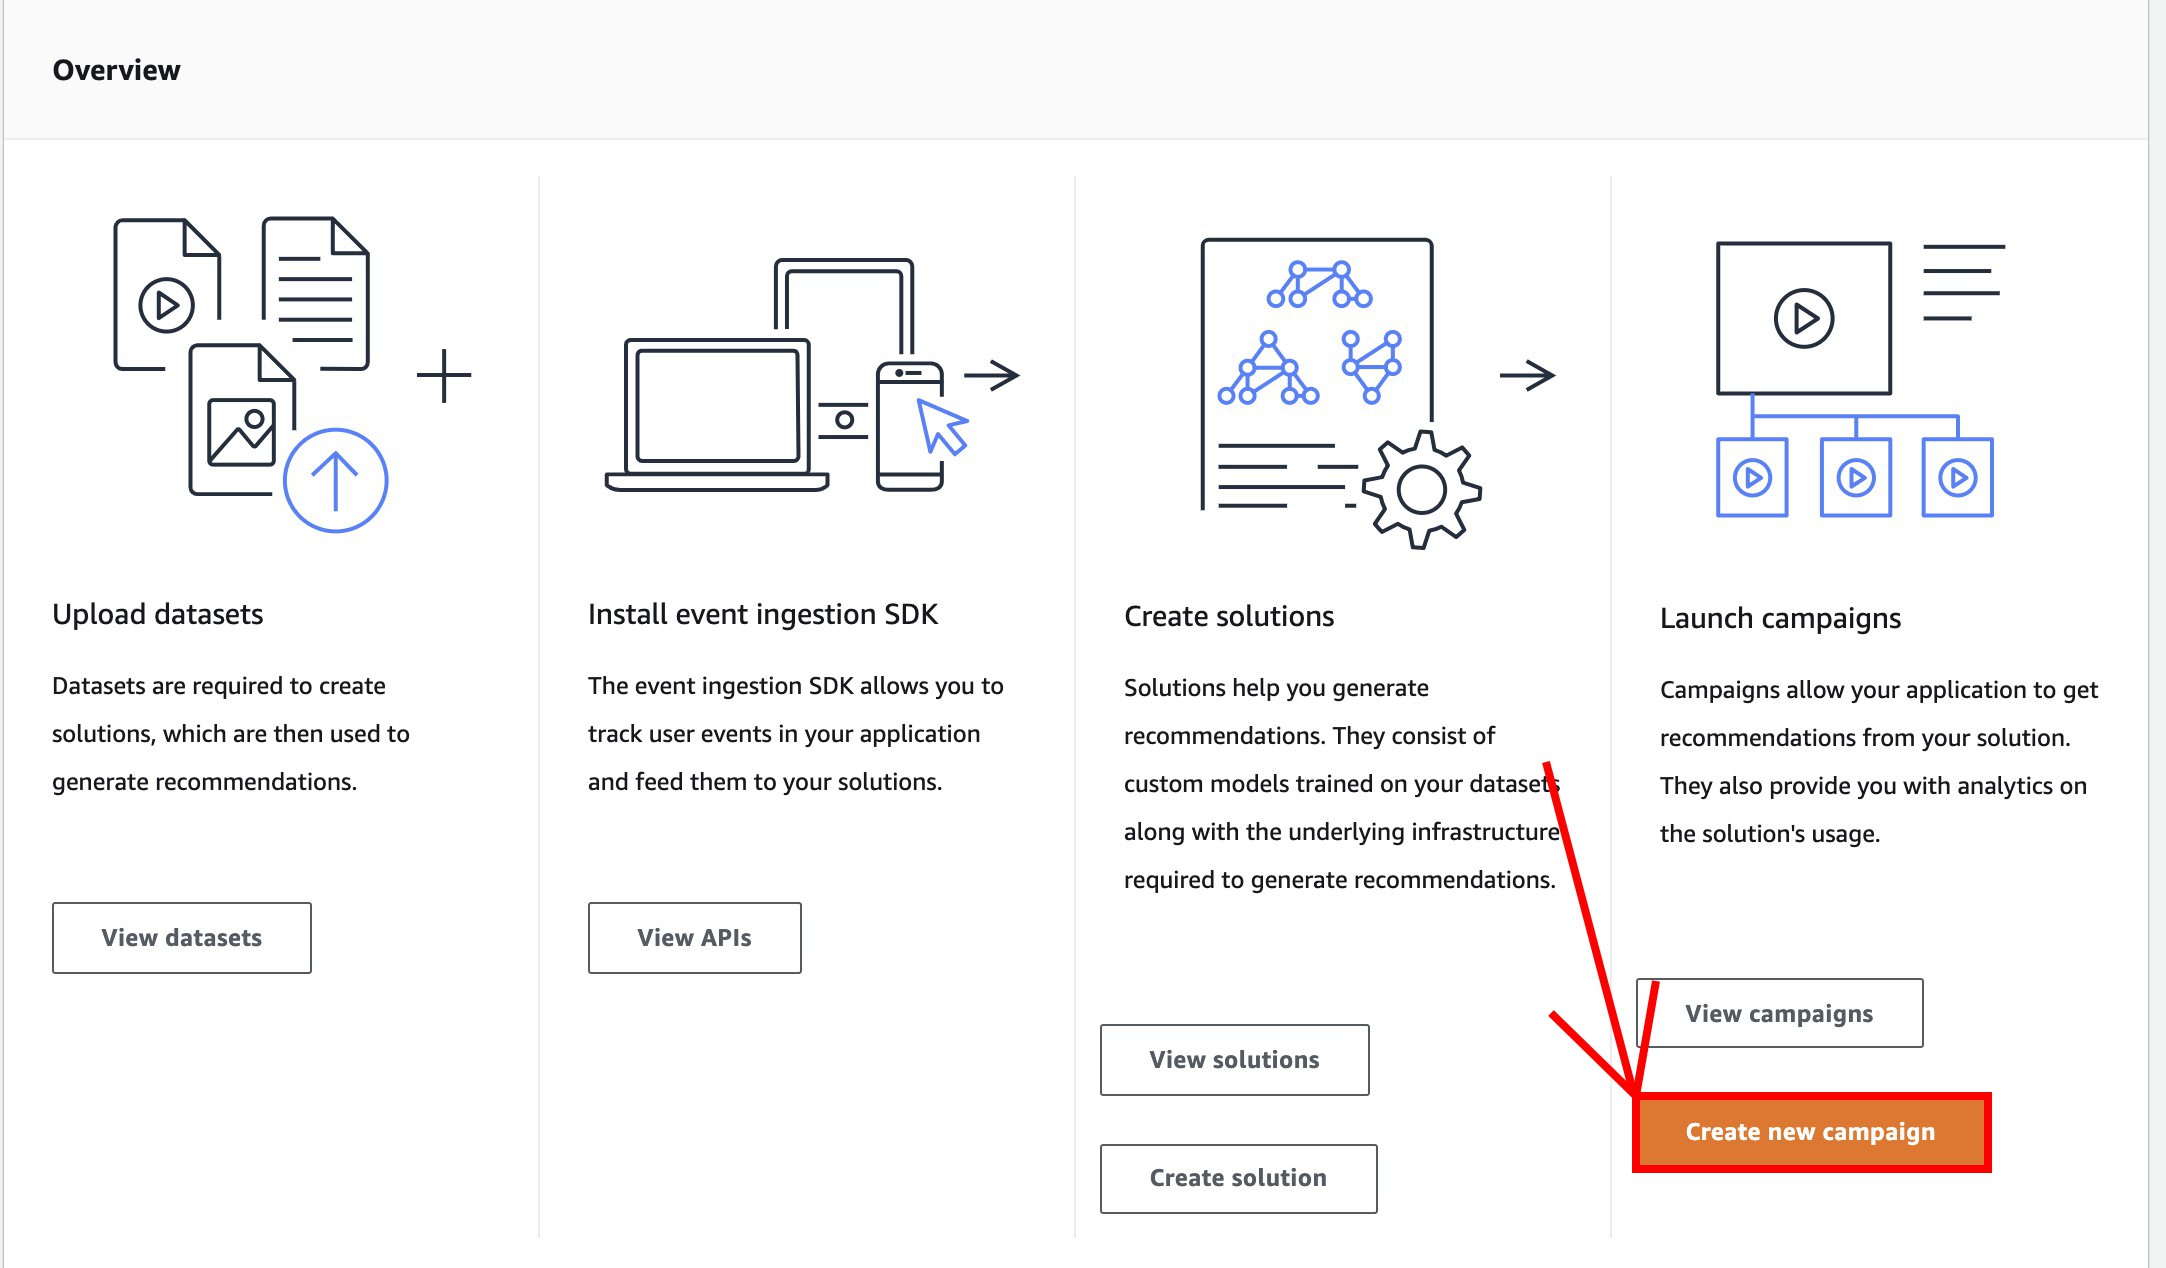
- Select Create new campaign at the Launch campaigns pane.
- Type
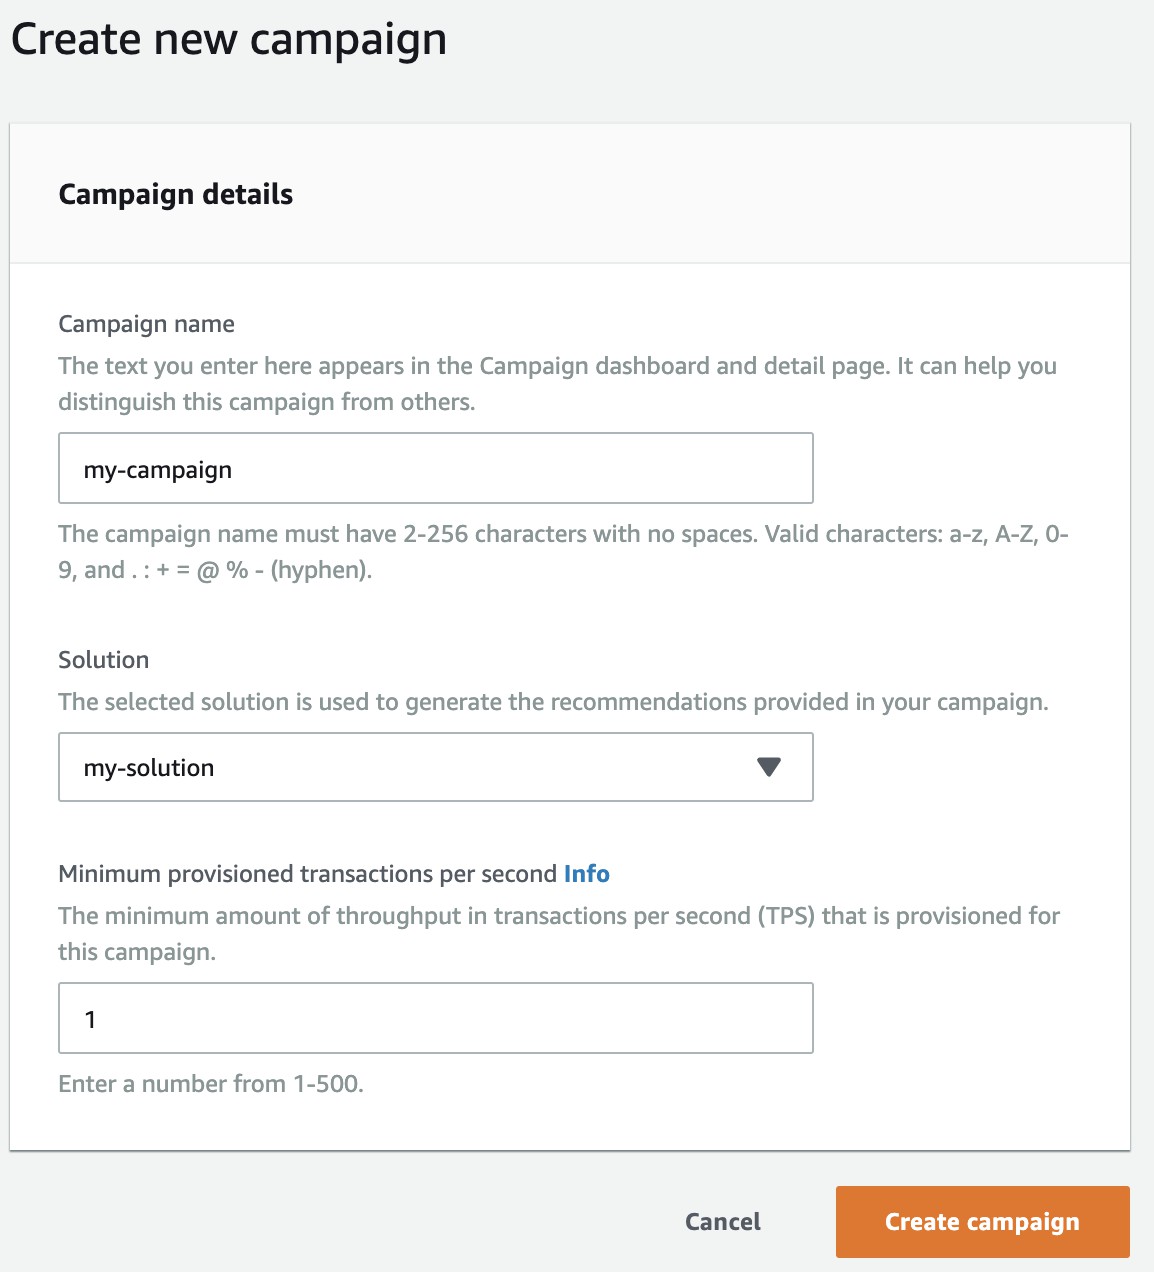
my-campaignfor Campaign name, select my-solution for Solution, and leave the Minimum provisioned transactions per second as default.
-
Wait for the Campaign to create, this might take 10-20 minutes.
-
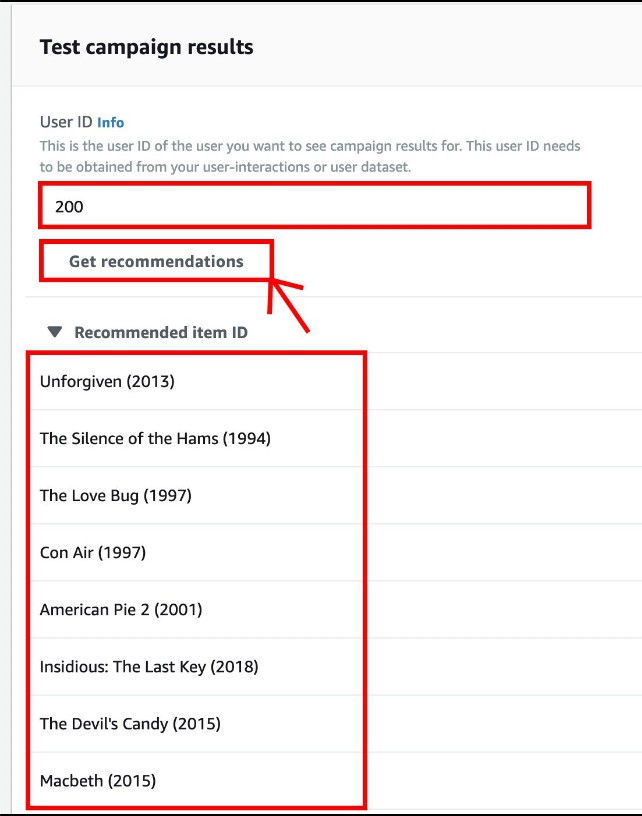
After creation, you will see this dashboard, you can input a USER_ID you like, and click Get recommendations, for example:
200, and below will output the recommend movie’s names.
Conclusion
Congratulations! You have learned how to upload a dataset group which contains user and item interactions the most important part is that there must be over 1,000 sets of data so that the recommendation system will be more accurate. Learn how to use a machine learning service without any machine learning experience by the method provided by Amazon Personalize. At last, generate a personalized recommendation system by using Amazon Personalize.
Tag:Amazon Personalize, Amazon S3, AWS, IAM Role, S3


