

Create a Virtual assistant app with Amazon Lex and AWS Amplify
Overview
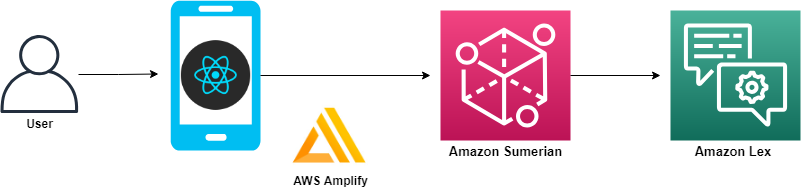
AWS Amplify recently added support for augmented reality (AR) and virtual reality (VR) content within your applications. The XR category has built-in support for Amazon Sumerian.
Amazon Lex is a service for building conversational interfaces into any application using voice and text. As a fully managed service, you don’t need to worry about managing infrastructure.
Amazon Sumerian lets you create and run virtual reality (VR), augmented reality (AR), and 3D applications quickly and easily without requiring any specialized programming or 3D graphics expertise.
AWS Amplify makes it easy to create, configure, and implement scalable mobile and web apps powered by AWS.
Scenario
We can design Amazon Lex chatbot according to different situations and cooperate with AWS Amplify to automatically deploy the application. We don’t worry about the backend program and hardware load problem at all, just focus on the design of the main code. The Amazon Sumerian scene can be quickly deployed in various installations, suitable for interactive receptionists of various large-scale exhibition events or various simulation teaching materials.
Preparation
- Use Windows for example
- Region in US East (N. Virginia)
- Recommend using VScode for this lab, because it can edit the project and use the command line at the same time.
Create an Amazon Lex Chatbot
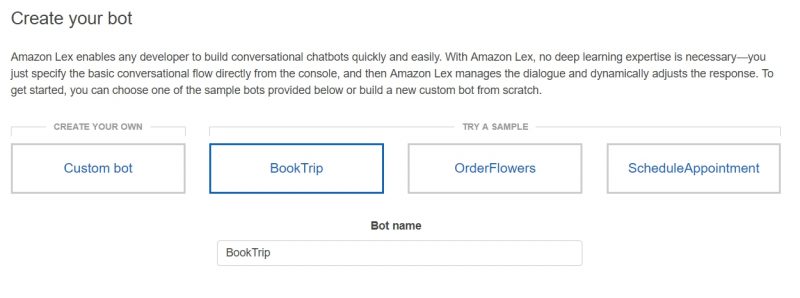
First, we used the Amazon Lex default “BookTrip” template to simplify the process to create the theme of this chatbot. The robot will detect the intent to judge the user’s intentions, and reply to the relevant dialogue or make corresponding actions. For example, the robot will continuously ask the user around the theme of “BookTrip” and finally make a reservation. Or the action of renting a car.
-
On the Service menu, click Amazon Lex, choose Create.
-
Choose BookTrip template, type Bot name :
yourbotname, and then Create.
-
Choose the bot created before, click Settings, choose Aliases.
-
Setting as following :
-
Alias name :
test -
Bot version :
latestIt will give a different alias name for the different versions for each time.
-
-
-
Click PLUS icon to add new alias.

-
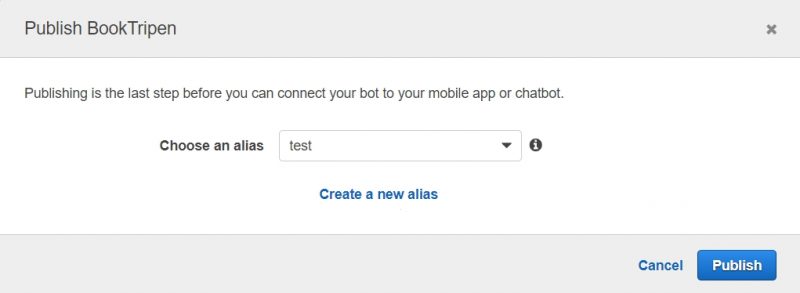
Slect Publish.
- Choose an alias :
test, and Publish.
- Choose an alias :
Waiting for publishing, and you can close the page.
Design AWS Amplify project
Open Visual Studio Code’s terminal, Using the command line to install AWS Amplify CLI.
-
Create react app by using create-react-app,
npx create-react-app sumerian-amplify-app.
The file will default create in C:\Users\USER\sumerian-amplify-app.
-
Change to react project with
cd sumerian-amplify-app. -
Install the aws-amplify and aws-amplify-react libaries with
npm install aws-amplify aws-amplify-react --save. -
Open sumerian-amplify-app project with Visual Studio Code
-
Update the App.js.
Replace
your_scene_regionin line 13.For eaxample : us-east-1
Replace
your_scene_namein line 15, 28. -
Insert the following content in Index.css.
body { height: 600px; }
Add an Authentication Service to the Amplify Project
We use AWS Amplify to build the identity verification capabilities of the application, which is just one of the features in the AWS Amplify tools, if you need to add more features to the application, please go to AWS Amplify.
-
Get into your sumerian-amplify-app folder in terminal.
-
Type
amplify add authin the terminal, select Yes to use the default configuration.
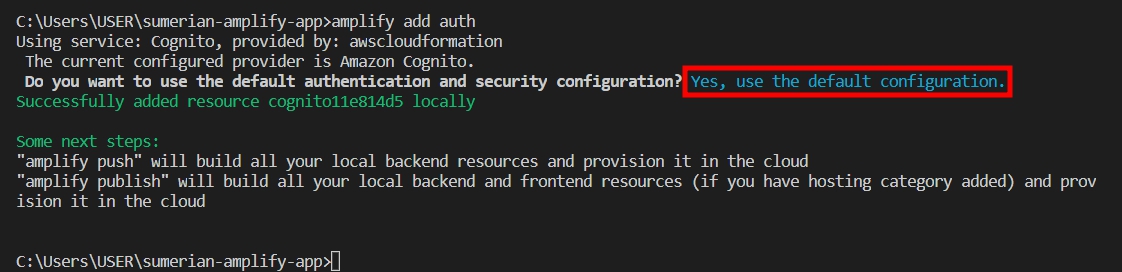
It will add an identity pool in AWS Cognito automatically.
- Type
amplify pushto update CloudFormation stack.
NOTES: It will take three to five minutes to update the stack.
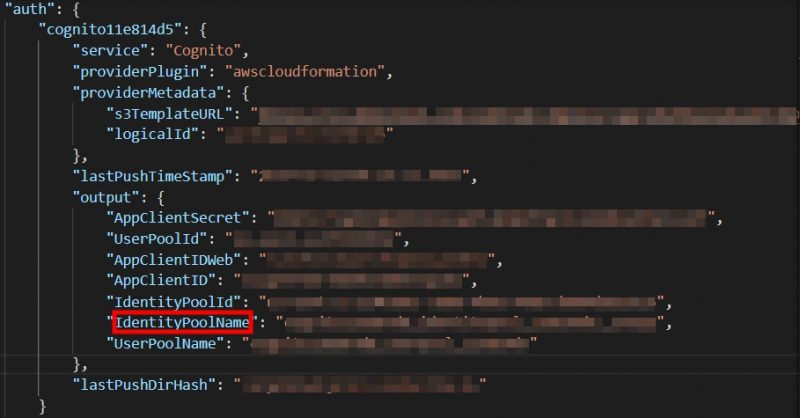
- Extend the amplify folder, open the amplify-meta.jason.
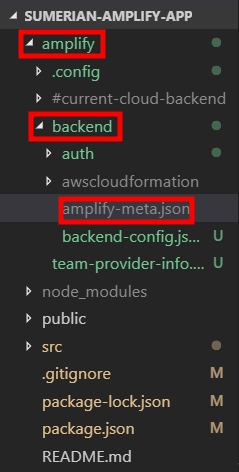
- Note the UnauthRoleName and AuthRoleName and IdentityPoolName, we will use it later.

-
Back to AWS console click Services, select IAM.
-
Choose Roles, search your UnAuthRoleName and click in.
-
Select Add inline policy.
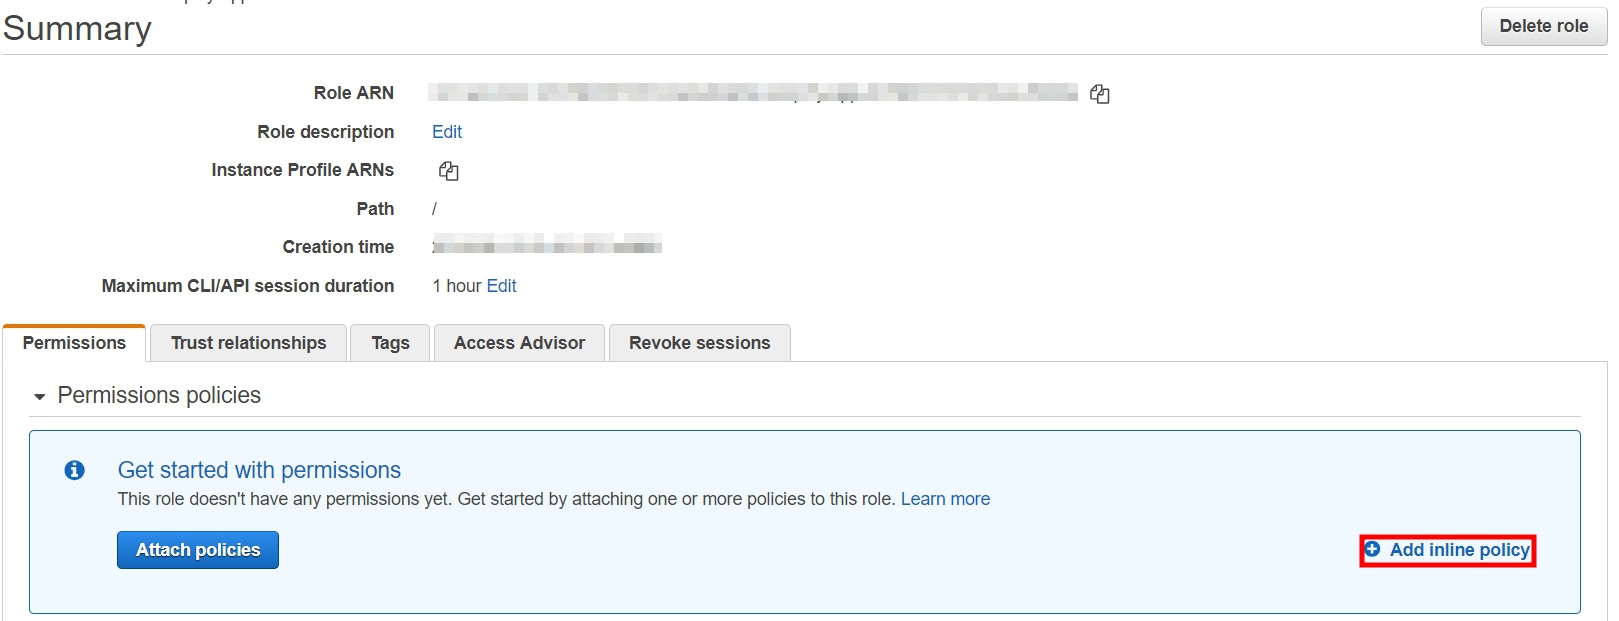
-
Select JSON, and paste the content.
-
Click Review policy, name your policy and then Create policy.
This policy will allow your Sumerian scene to use Amazon Lex and allow your app to load the Amazon Sumerian scene.
-
Attach the same Inline policy to AuthRolename with the same steps as UnauthRolename.
Add a role
-
Click Services, select Cognito.
-
Select Manage Identity Pools.
-
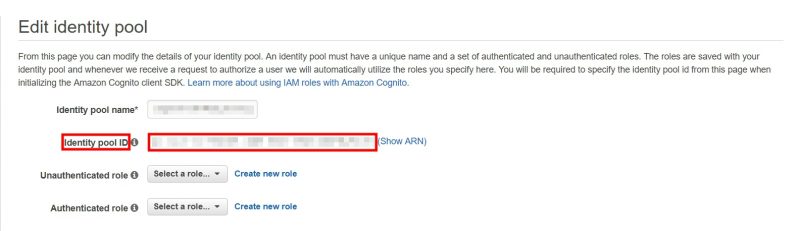
Search for your IdentityPoolName and click Edit identity pool on the upper right corner.
AWS Cognito console doesn’t have the search bar, please look for the identity pool name by yourself.
-
Extend the Unauthenticated identities, check the Enable access to unauthenticated identities option.
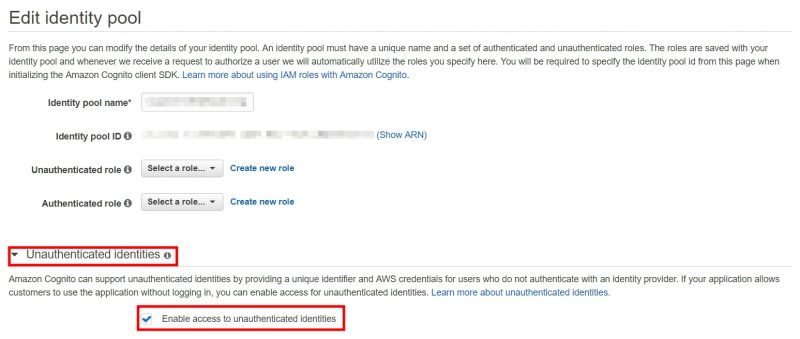
- Copy the Identity pool ID, we will use it later.
Create an Amazon Sumerian Scene
We will create a new scene and add the host to talk (Maya), and then connect to the previously established Amazon Lex chatbot by setting Dialogue Component to give the host (Maya) the function of a voice conversation. Finally, Then publish a private Amazon Sumerian scene for our application to use.
-
On the Service menu, click Amazon Sumerian, you will get into the Amazon Sumerian Dashboard.
-
Select Create new scene, and type your Scene name.
-
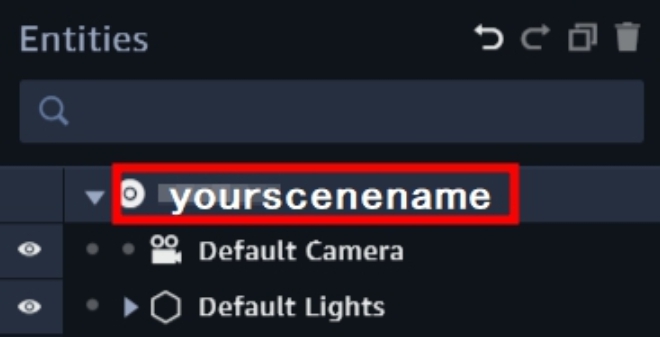
Click the Entities of yourscenename on the upper left corner, and then extend the AWS Configuration on the right side.
You will see the config list after click your “yourscenename”
-
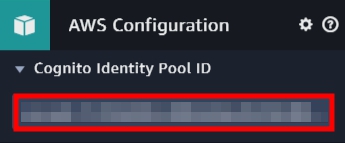
Extend the AWS Configuration, update the Cognito Identity Pool ID your copy before.
This step is to enable this scene to use the permissions just set in AWS Cognito
- Click Import Assets, choose Maya and select Add to add a host.
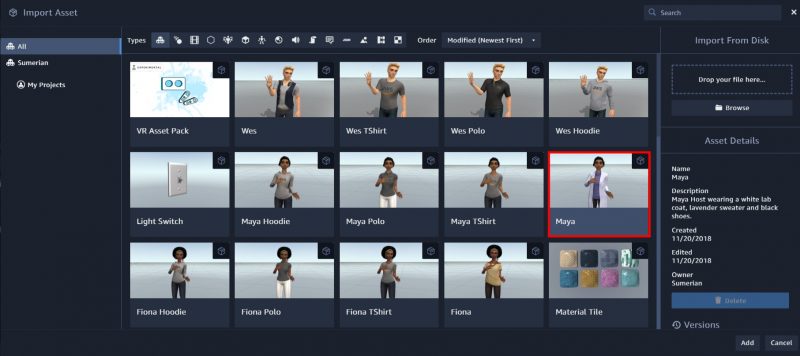
- Maya will show in the Assets on your left side.
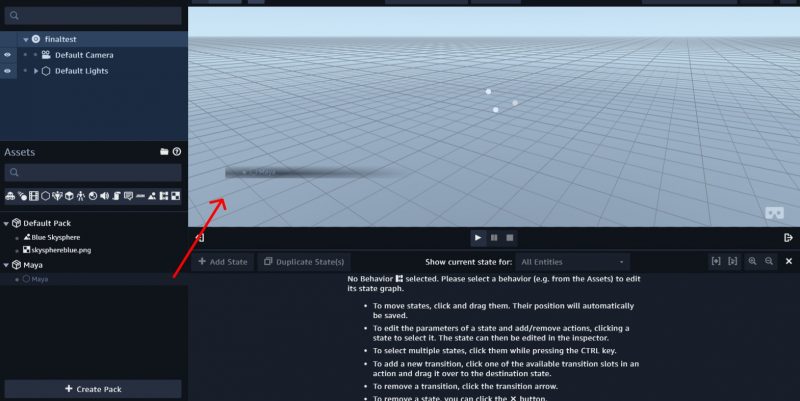
- Drop the Maya in your scene, you will see Maya.

Note: You may need to zoom in to see Maya.
- Select Maya entities, and click Add component, choose Dialogue.
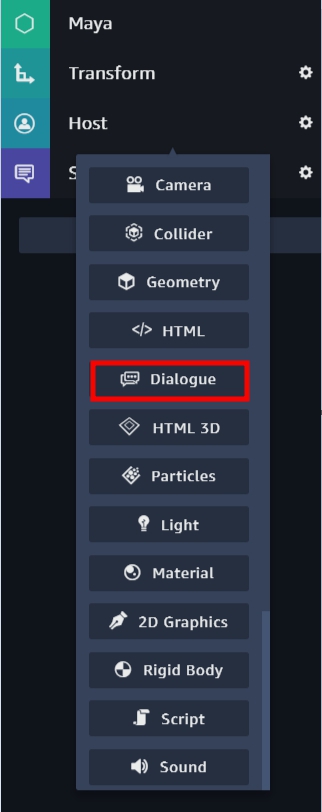
-
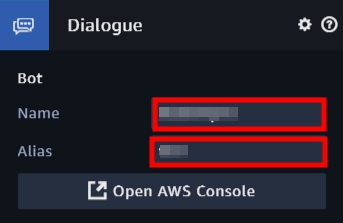
Insert the values for Name and Alias, these inputs reference the Amazon Lex chatbot what you created.
Bot name is created by yourself, Alias name is a test
This step gives Maya the ability of Amazon Lex chatbot
- Select Maya entities, and click Add component, choose State Machine.
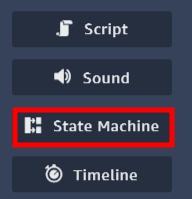
- Open the State Machine, click PLUS button to add new behavior.
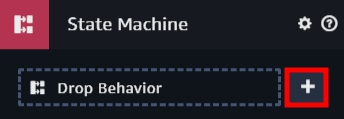
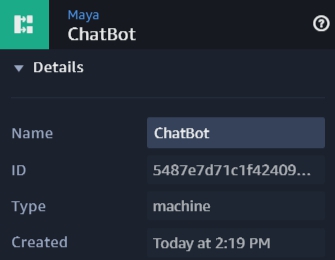
- Rename the name :
ChatBot.
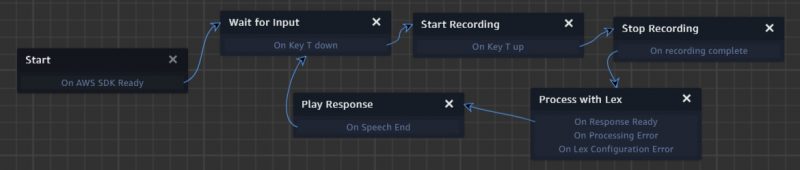
Next, we will add different states in this behavior component.
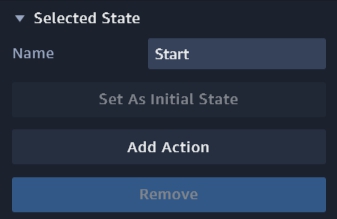
- Rename State 1 :
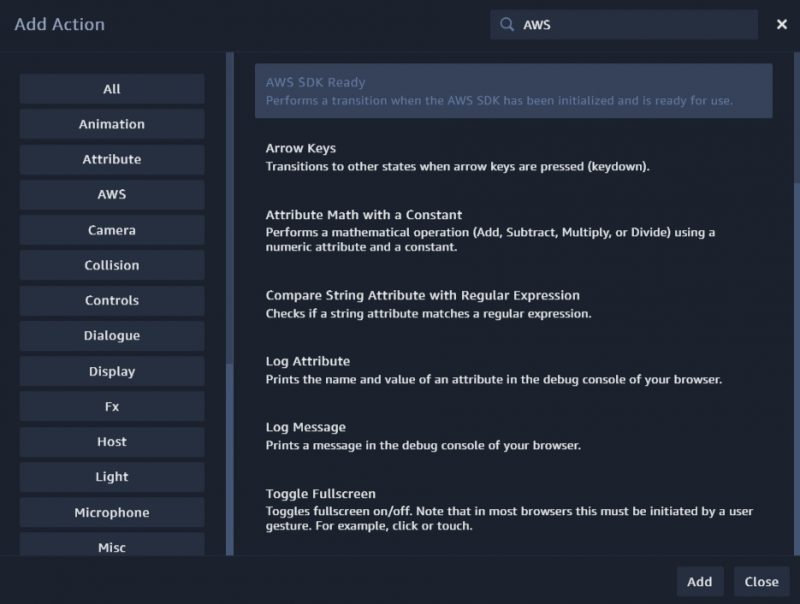
Start, and choose Add Action.
- Search for and add
AWS SDK Ready.
- Click Add State for five times to create five states.
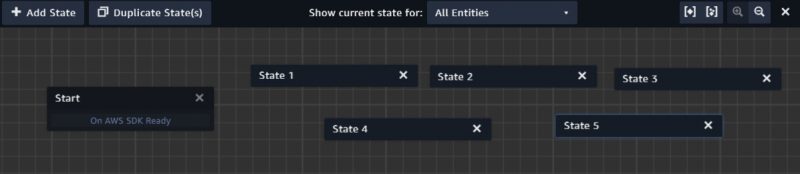
-
Choose the new state, and rename it.
State 1 :
Wait for InputState 2 :
Start RecordingState 3 :
Stop RecordingState 4 :
Process with LexState 5 :
Play Response

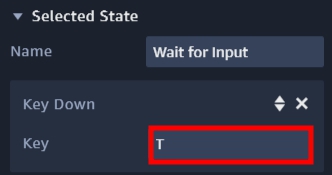
- Click state Wait for Input, add a Key Down action.
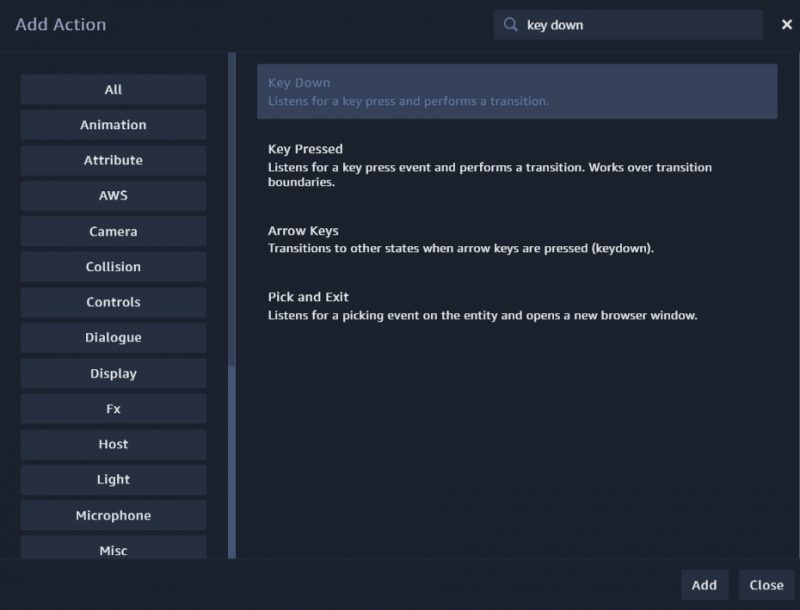
-
Change the key what you want.
I use T in this lab
-
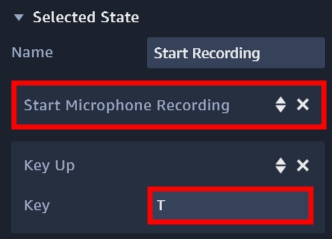
Click state Start Recording, add Start Microphone Recording and Key Up action.
It must the same with Key down
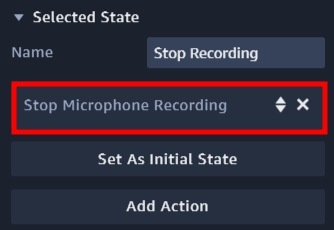
- Click state Stop Recording, add a Stop Microphone Recording action.
- Click state Process with Lex, add a Send Audio Input to Dialogue Bot action.
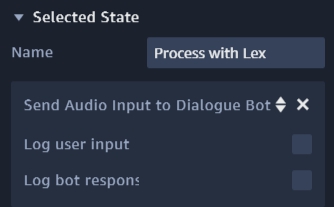
Do not select Log user input or Log bot response.
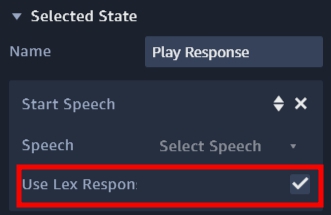
- Click state Play Response, add a Start Speech action and select Use Lex Response.
- Adding transitions by clicking the state and dragging the arrow to another state
On the Process With Lex state, drag the transition from the “On Response Ready output”.

The final graph will look like the following.
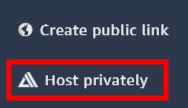
- Select Publish on the upper right corner, choose Host privately and Publish.
If you are already published, click unpublish.
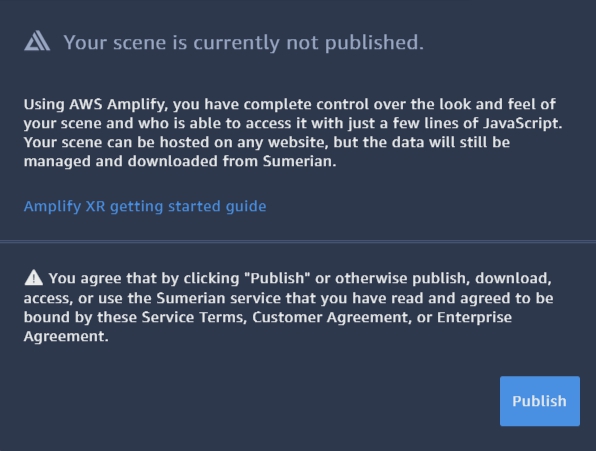
-
You will see a JSON file, Download JSON configuration.
-
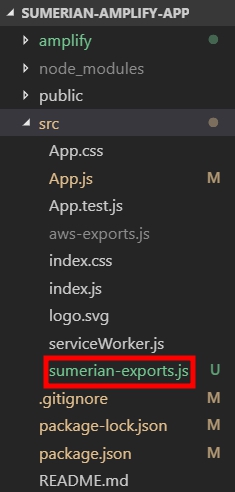
Drag the JSON file in src folder and rename it to
sumerian-exports.js.
- Update the content of sumerian-export.js as fowling.

Running on a VR or AR Device
-
Type
amplify add hostingto set up. -
Choose DEV to create a S3 hosting bucket.

- Insert your hosting bucket name, and choose the following option.
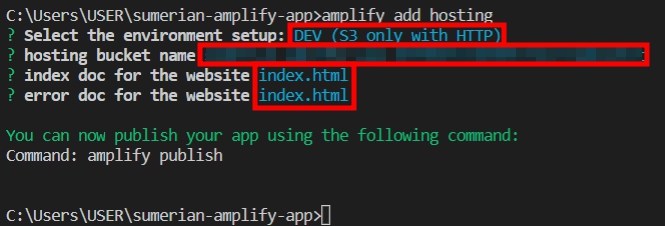
Once set up, AWS Amplify will automatically create an S3 Bucket
- Type
amplify publishto publish your Amplify project.

This publishes the app to a live URL, you can open the URL in any browser or VR headset.

-
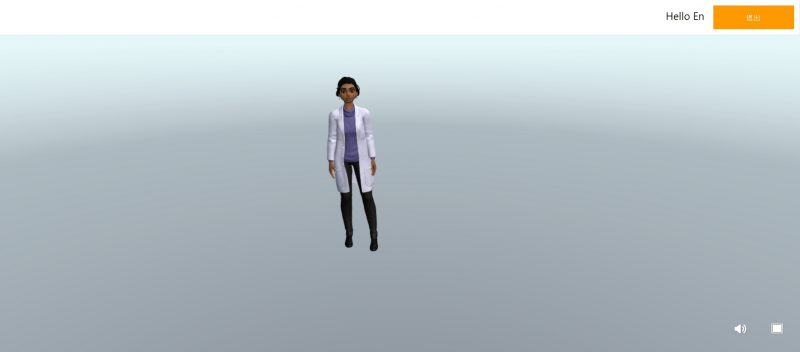
Create account and Login, you will see the Sumerian scene.
-
Press the key you set up before to talk with her.
You can say “Book a hotel” or “Book a car” to start the dialogue.


Conlusion
Now you have learned how to install and set up the AWS Amplify CLI and create applications with AWS Amplify. Also learn how to create an Amazon Sumerian scene, add the host to connect with Amazon Lex chatbot, and publish the Amazon Sumerian scenes privately, integrate them into your application or other devices, and create your own virtual assistant.
Reference
You may also like

AWS re:Invent 2021 – Werner Vogels Keynote

AWS re:Invent 2021 – Adam Selipsky Keynote
