AWS Read-Replica RDS Database
Overview
The website and SQL database have been used for a long time. In the choice of database, we usually choose MySQL or Oracle database and build it in the ground environment. Now, Amazon has developed RDS’s relational database for all AWS users to easily set up operations and extend the associated database in the cloud, from requesting the deployment of infrastructure capacity to installing the repository software. It also automates common administrative tasks such as performing backups and patching the software that supports the repository. Backups can be deployed in different Availability Zone. RDS development uses the same code as the general association database and can be used directly with existing code and tools.
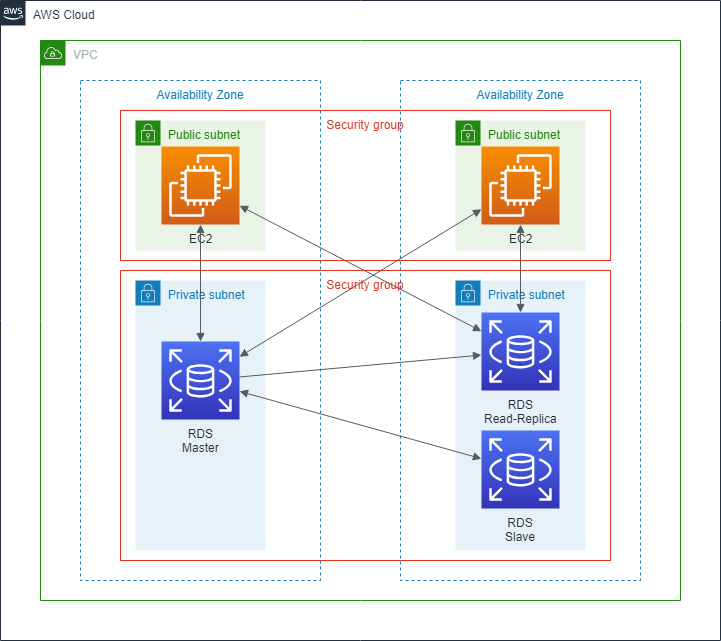
Amazon RDS makes it easy to set up, operate, and scale a relational database in the cloud. It provides cost-efficient and resizable capacity while automating time-consuming administration tasks such as hardware provisioning, database setup, patching and backups. It frees you to focus on your applications so you can give them the fast performance, high availability, security and compatibility they need.
Amazon RDS is available on several database instance types – optimized for memory, performance or I/O – and provides you with six familiar database engines to choose from, including Amazon Aurora, PostgreSQL, MySQL, MariaDB, Oracle Database, and SQL Server. You can use the AWS Database Migration Service to easily migrate or replicate your existing databases to Amazon RDS.
Scenario
In this lab, we will use CloudFormation to setup a VPC with two availability zone and four subnets. We’ll deploy our website in the EC2 instances in public subnet, and deploy RDS and read-replica data base in private subnet.
Step by step
Set up your environment with CloudFormation template.
Use the ClouFormation template to set up your environment.
-
On the Service menu, select CloudFormation.
-
Select Create Stack.
-
In Choose a template, choose Upload a template to Amazon S3.
-
Select RDS-Test.yaml and click Next.
-
Input
RDS-Testin Stack name, leave another setting as default, select Create .
Create Database subnet group
Here, we’re going to create subnet groups for database
-
On the Service menu, click RDS and click Subnet groups in the left.
-
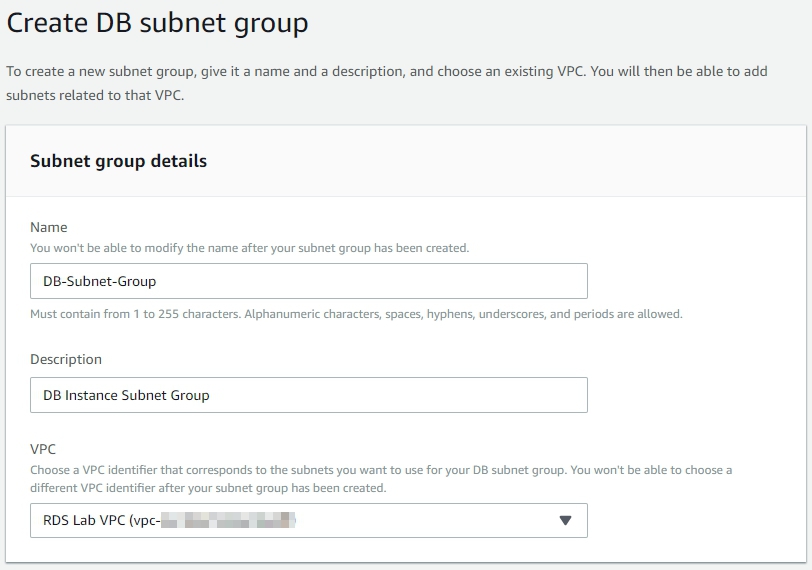
Select Create DB Subnet Group , create a DB subnet group use the followings:
- Name :
DB-Subnet-Group - Description :
DB Instance Subnet Group - VPC : select
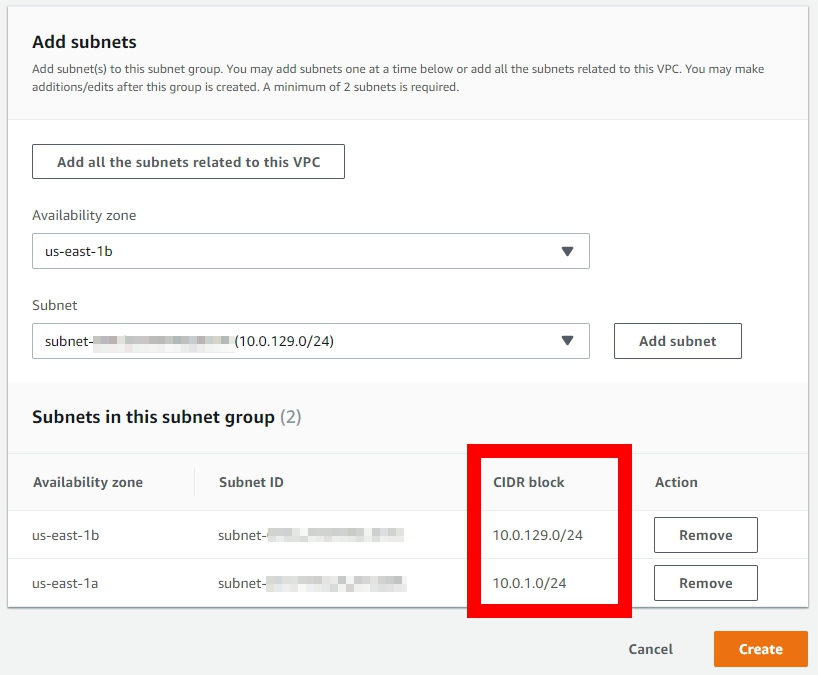
RDS Lab VPC - availiablity zone :
us-east-1a - Subnet : select the one with
10.0.1.0/24and click Add subnet.
- Name :
-
Now select another subnet and create:
- availiablity zone :
us-east-1b - Subnet : select the one with
10.0.129.0/24and click Add subnet.
- availiablity zone :
Create RDS Database Instance
This is the most important part of this lab, we’re going to create an RDS database for the web server.
-
In the navigation pane, click Databases and click Create Databases.
-
Select MySQL and select Production – MySQL in next page.
-
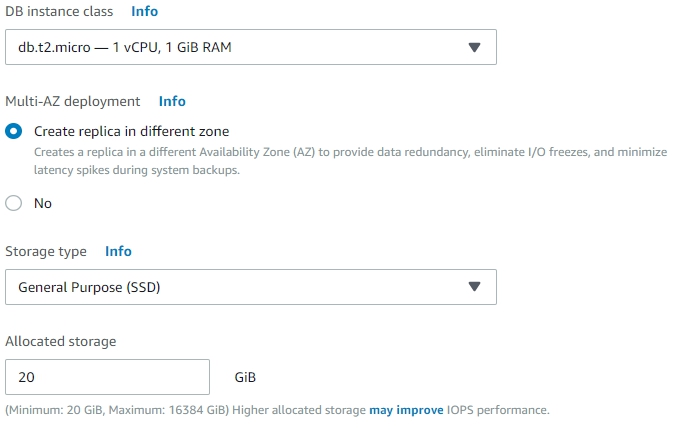
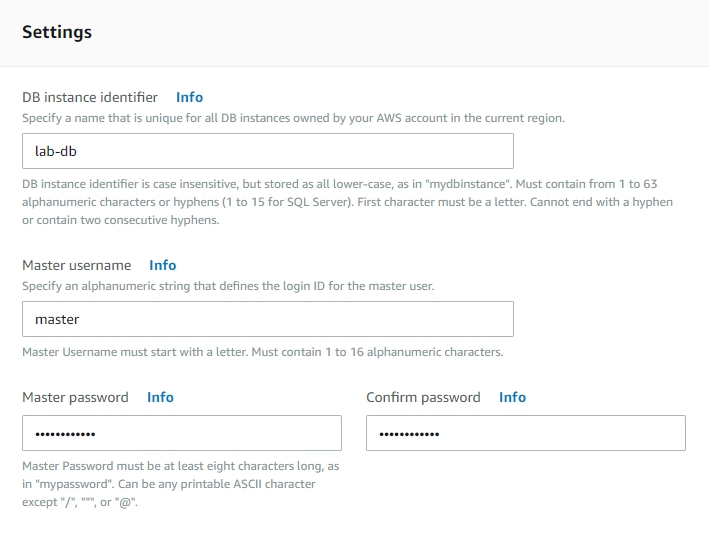
Complete the following settings:
- DB instance class :
t2.micro - Multi-AZ deployment :
Create replica in different zone - Storage type :
Genaral Perpose(SSD) - Allocated storage :
20GiB - DB instance identifier :
lab-db - Master username :
master - Master password :
lab-password - Confirm password :
lab-password
- DB instance class :
-
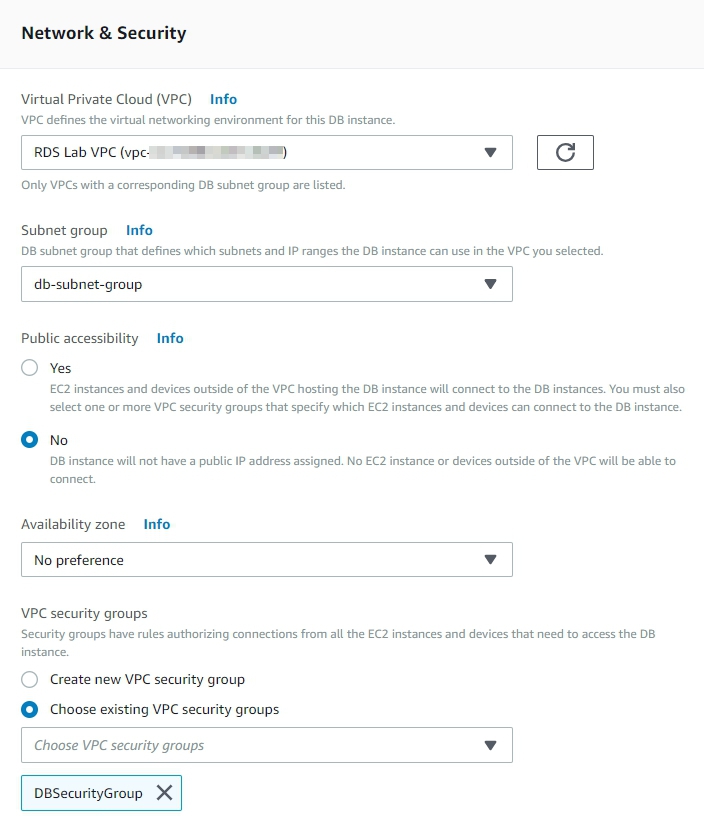
In the next page, input the following settings:
- VPC : select
RDS Lab VPC - Subnet group :
db-subnet-group - VPC security groups :
Choose existing VPC security groupsRemove the Default and selectDB-Security-Group - Database name :
lab - Deletion protection : discheck the box
- VPC : select
When we create a single lab, we can cancel the backups to make RDS create faster. But now we’re using read-replica, so let the backup selection as default.
It will take four or five minutes to create your database, refresh your webpage to check if it is done.
Create Read-replica database
In this part, we’ll create a read-replica database base on the RDS we created before. Read-replica can separate “read” and “write” works in the database. It can promote your website running speed. RDS support up to five read-replica, each replica has it own endpoint
-
Click RDS on the service menu, and click database to check your status.
-
Note your lab-db ‘s Region & AZ (It might be us-east-1a or 1b), wait until your Status change to Available .

-
Click Action, select Create read-replica.
-
Leave most settings as default, just edit a little different part:
- Availability zone: Choose the different AZ, if you are in 1a then choose 1b, vice versa.
- DB instance identifier :
lab-read-replica
-
Click Create read replica.
Wait until the status change to available. If you want to create more read-replica, select lab-db then repeat the steps in this part.
Create your web with EC2 instances
In this part, we’ll create two instances in a different availability zone. Each EC2 has a webpage, but they will connect to the same database.
-
In the Service menu, click EC2 and click Launch Instance.
-
Select Amazon Linux AMI 2018.03.0 (HVM).
-
Select t2.micro type of instance.
-
In Configure Instance Details input the followings:
- Network : select
RDS Lab VPC - Subnet : select
RDS Public subnet 1 - Auto-assign Public IP :
Enable
- Network : select
-
In Advanced Details , input the followings into User data:
#!/bin/bash # Install Apache Web Server and PHP yum install -y httpd24 php56 php56-mysqlnd # Create inc folder mkdir -p /var/www/inc # Download SamplePage.php wget https://raw.githubusercontent.com/ecloudvalley/AWS-Read-Replica-RDS-Database/master/SamplePage.php mv SamplePage.php /var/www/html/ # Turn on web server chkconfig httpd on service httpd start -
Skip to Add Tags, click Add tag and input:
- Key :
Name - Value :
WebServer1
- Key :
-
In Configure Security Group, select Select an existing security group and choose WebSecurityGroup.
-
Review and launch your instance, select Select an existing key pair. Choose your existing key pair or select Create a new key pair to create a new key pair.
-
Launch the second instance, follow steps 1 ~ 8 again, but this time we’ll change some settings:
In Configure Instance Details
- Change Subnet to
RDS Public subnet 2
In Add tags
- Change value to
WebServer2
- Change Subnet to
Connect to your webserver
After creating both webservers, you can see Php and MySQL have been installed already. We will connect into webserver and setup database settings. If you have a question with connection, please check Connect to Your Linux Instance for more information.
-
Connect to WebServer1, use the following command to get into inc folder and create database config:
$ cd /var/www/inc $ sudo nano dbinfo.inc
-
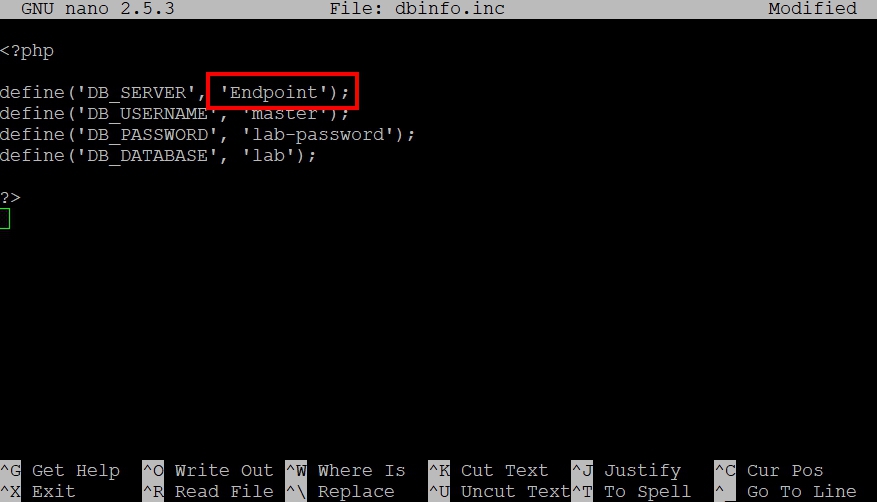
Paste the code below:< ?php define(‘DB_SERVER’, ‘Endpoint’); define(‘DB_USERNAME’, ‘master’); define(‘DB_PASSWORD’, ‘lab-password’); define(‘DB_DATABASE’, ‘lab’); ?>
dbinfo.inc is a config of your RDS database, we’ll write down the User name, password, database name and endpoint we create in the front steps。 You can find your endpoint in RDS database page, if you create your database following the steps, then you won’t have to change other settings except for Endpoint.
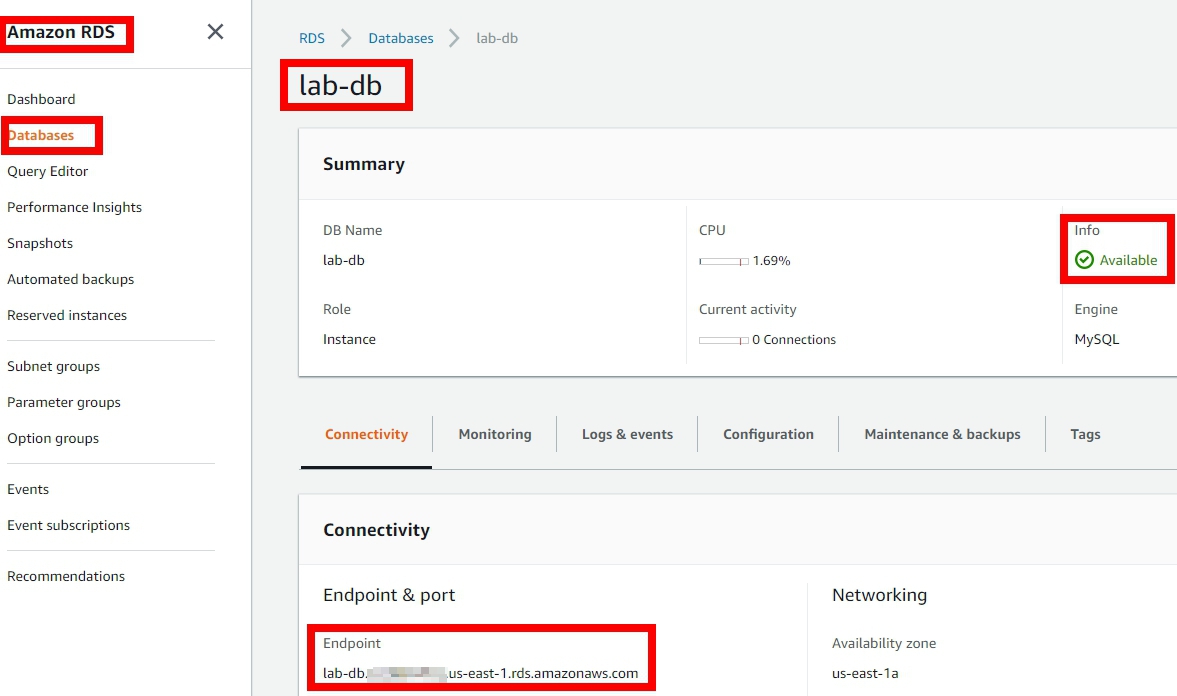
- Modify the Endpoint in the red mark, change it to lab-db‘s endpoint:
 1. Press Ctrl + X when you are finish, then press Y to leave with the origin file name.
After finish set up the first database, it’s time to set up the second one, make it connect to the read-replica database.
-
Connect to WebServer2, repeat step 1 and 2 again.
-
This time, change Endpoint to lab-db-replica‘s endpoint. Since RDS supports the construction of multiple read replicas, when creating several read replicas, the individual endpoint addresses should be filled in here.
-
Press Ctrl + X when you are finished, then press Y to leave with the origin file name.
When we created the webserver, SamplePage.php has been downloaded into your instance. This is the php page we’ll visit later. If you wondering about what’s inside, visit the file on Github.
Test your website
Now we’re in the last part, it’s time to test our website and database.
-
Copy your WebServer1‘s Public DNS(IPv4) and paste it to the browser, add
/SamplePage.phpin the back. -
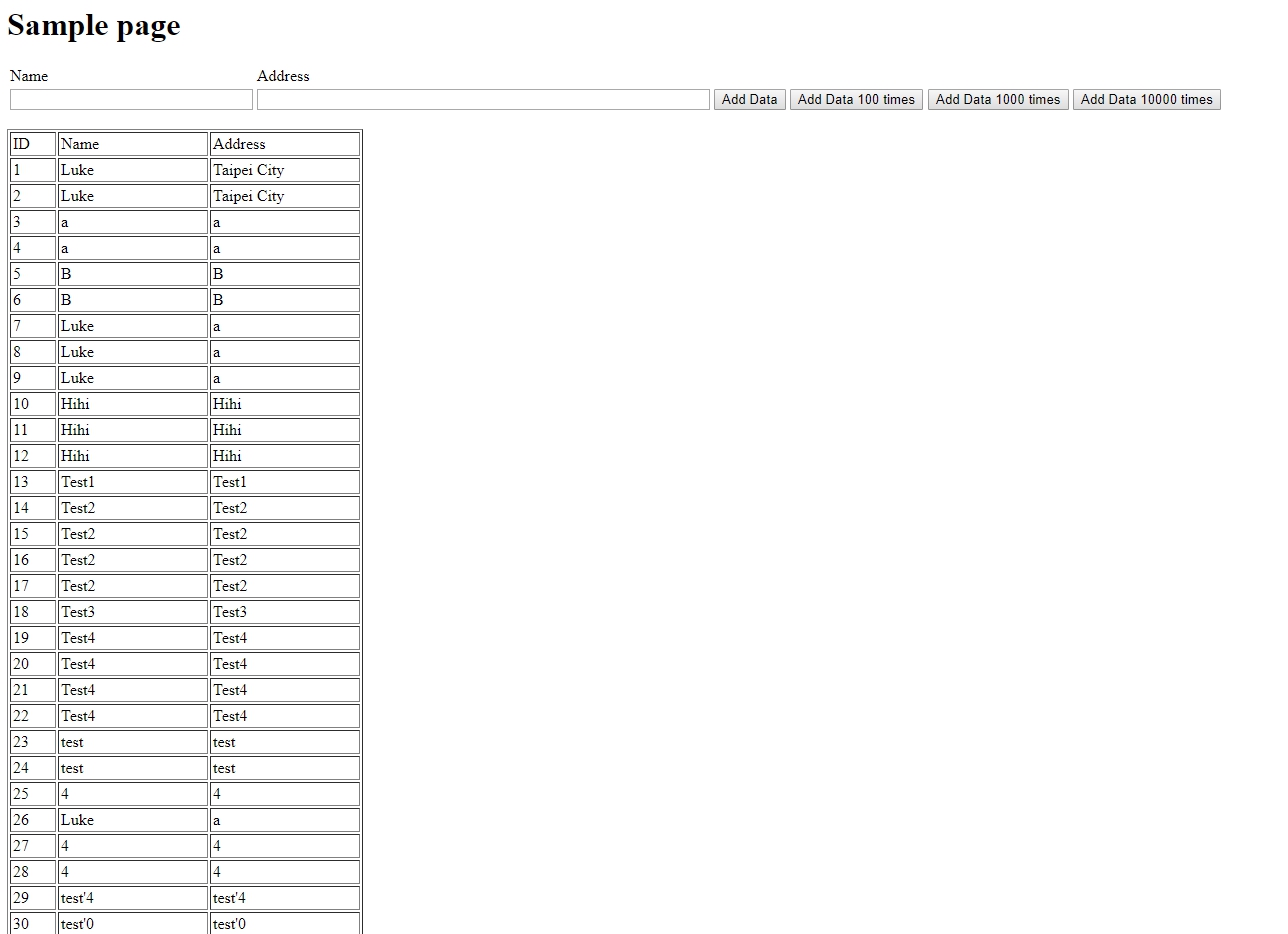
you can see there are blank fields for Name and Address, input a group of value and add it to the database.

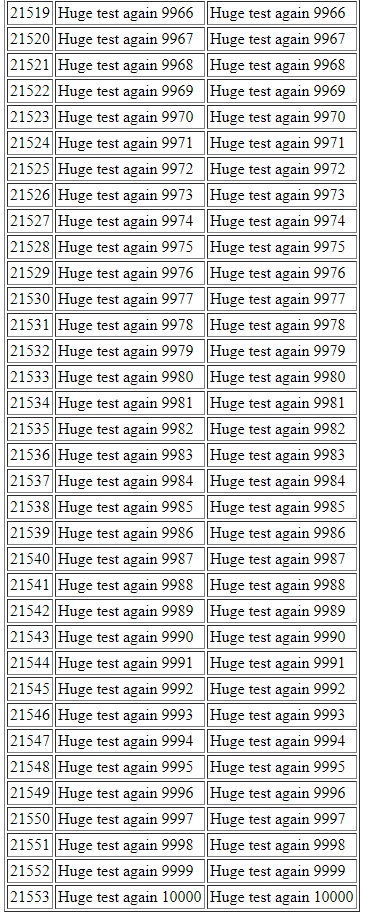
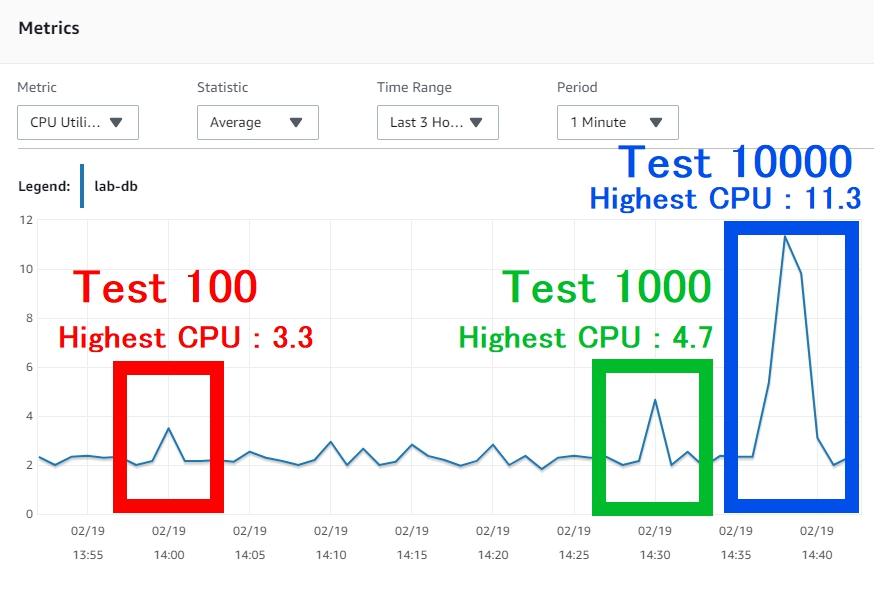
- You can input several times, or use the buttons behind to add one hundred, one thousand or ten thousand data into the database. It’ll take about three minutes to write ten thousand data.
- Back to RDS page and check CPU usage.
Move on to test the second webserver
-
Copy your WebServer2‘s Public DNS(IPv4) and paste it to the browser, add
/SamplePage.phpin the back. -
You can see the value input in the front steps, then input another group of values.
-
Discover an error message on top of the website, because the second webserver doesn’t support write data function.
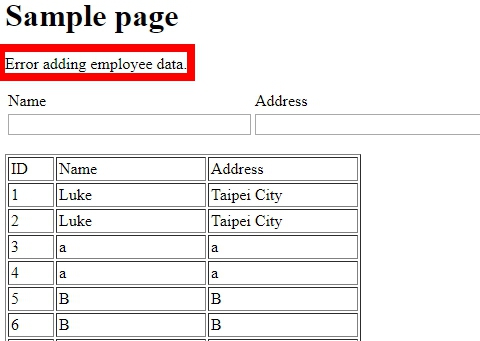
You will see the same page as WebServer1, but read-replica database only can let you read your data, you can’t edit any value on it.
Conclusion
After finish this lab, you will learn how to prepare your VPC with CloudFormation. Also, you can deploy an RDS database with read-replica and Webserver in the different available zone. The most are, you can connect your webserver to your databases, and test the differences between normal database and read-replica database.
Tag:AWS, AWS RDS, Database, RDS, Read replica


